Xy z – Edge Lighting TruLine .5A, 24VDC - Plaster-In LED System User Manual
Page 8
8
DRYWALL
1.05"
5: Determine the desired length of lit installation area and
mark on wall. The total installation length cut will need to
be 1 3/4" taller than the desired lit installation area to
account for the fixture end caps. (For example, a desired
48" lit area will require a drywall cut of 49 3/4" inches)
Mark this length on the wall using the junction box
mounting plate and a level as a guide.
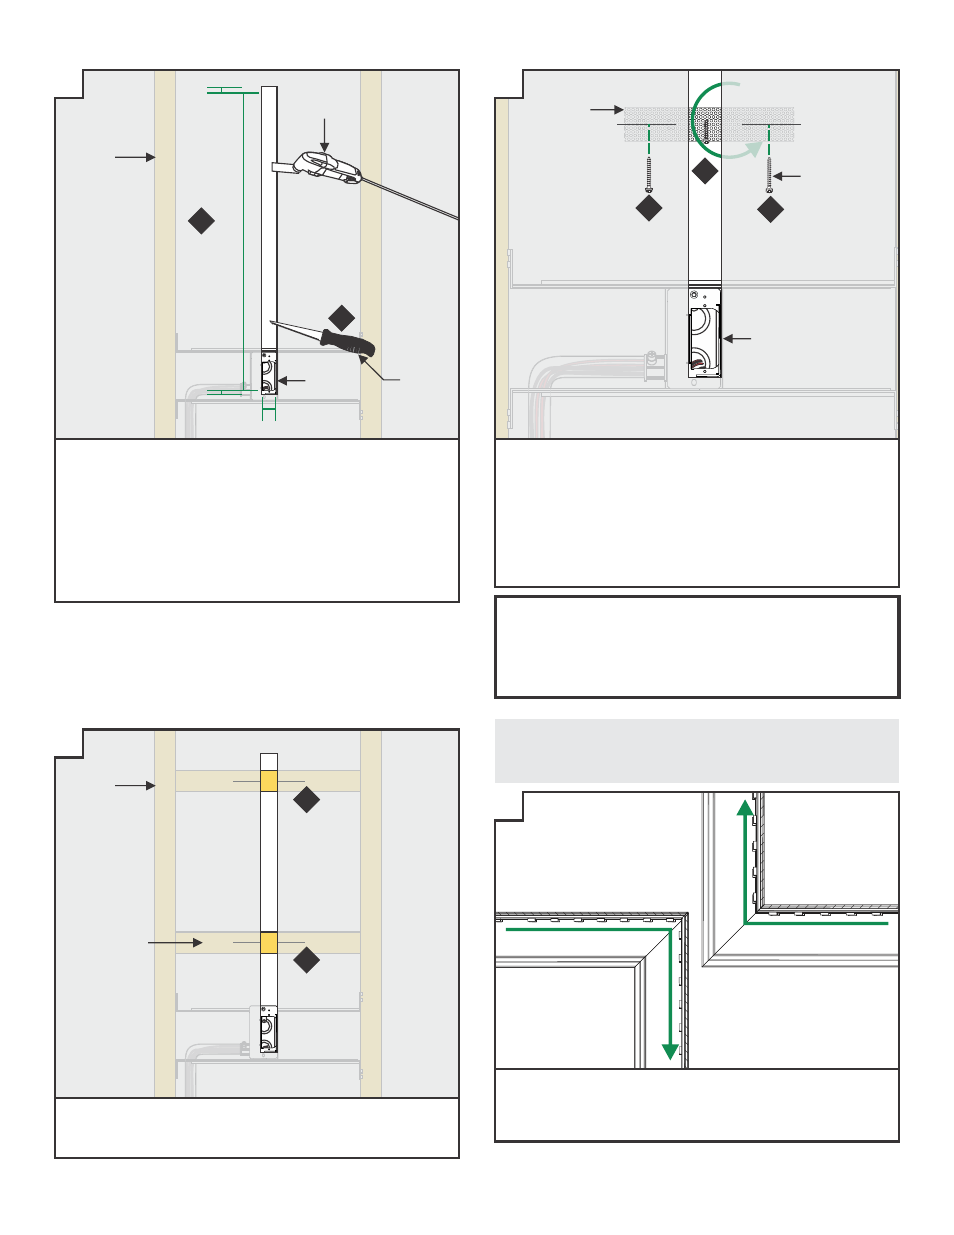
6: Cut out the marked area using a "Dremel Multi-Max" or a
6" Fixed Jab Saw.
8: Install mounting straps behind the drywall (suggested
spacing is every 32") by threading a drywall screw into
the perforated material.
9: Place the mounting strap behind the cut drywall and rotate
into place using the drywall screw as a handle.
10: Secure the mounting strap to the drywall using two
drywall screws. Mark the location on the drywall.
DREMEL
MULTI-MAX
6" FIXED
JAB SAW
STUD
JUNCTION
BOX
ALTERNATE VERTICAL INSTALLATION OPTION:
11: Install 2x4 support braces (suggested spacing is every
32") before installing and finishing drywall.
STUD
SUPPORT
BRACE
Complete cutting, mounting,
plastering,painting, and LED strip
installation by following Steps 8
through 31 on Pages 3 through 7.
Section Four: Room-Wrapping
Configuration
INSTALLATION NOTES
Room-wrapping installations use LED strip bent 90° for inside
or outside corner configurations. Channel sections will be
miter cut on-site.
INSIDE CORNER
OUTSIDE CORNER
ASSEMBLED
CUTAWAY VIEW
X
Y
Z
Z1
5
6
9
10
10
11
11
MOUNTING
STRAP
JUNCTION
BOX
DRYWALL
SCREW
1.0"
DESIRED LIT LENGTH
0.75"