Update coulters, Prepare implement, Replace coulter bars – Great Plains 2007HD Update Installation User Manual
Page 69: Remove existing bar
05/25/2011
166-370M
Great Plains Manufacturing, Inc.
65
Update Coulters
Prepare Implement
366. Hitch the air drill to a tractor, or connect the lift and
fold circuits to a hydraulic source. Raise the imple-
ment. Check for hydraulic leaks.
367. See Operator manual for details on center locking
and lock channels.
368. Install lock channels.
369. Engage the center lift lock.
370. Lower implement onto locks.
371. Set hydraulic circuits to Float. Shut down tractor or
hydraulic source.
Replace Coulter Bars
Repeat the following steps for each row. To minimize the
risk of re-assembly errors, perform a complete update to
a single row before moving to another row. If multiple
workers are available, multiple drill sections may be
worked on simultaneously.
Remove Existing Bar
Refer to Figure 104
372. Make note of current coulter height. Check the loca-
tion of the bar
tops with respect to the tool bar,
or the distance from the bottom of the tool bar to the
bottom edge of the coulter disk. Some rows may run
at different heights (for tire compensation).
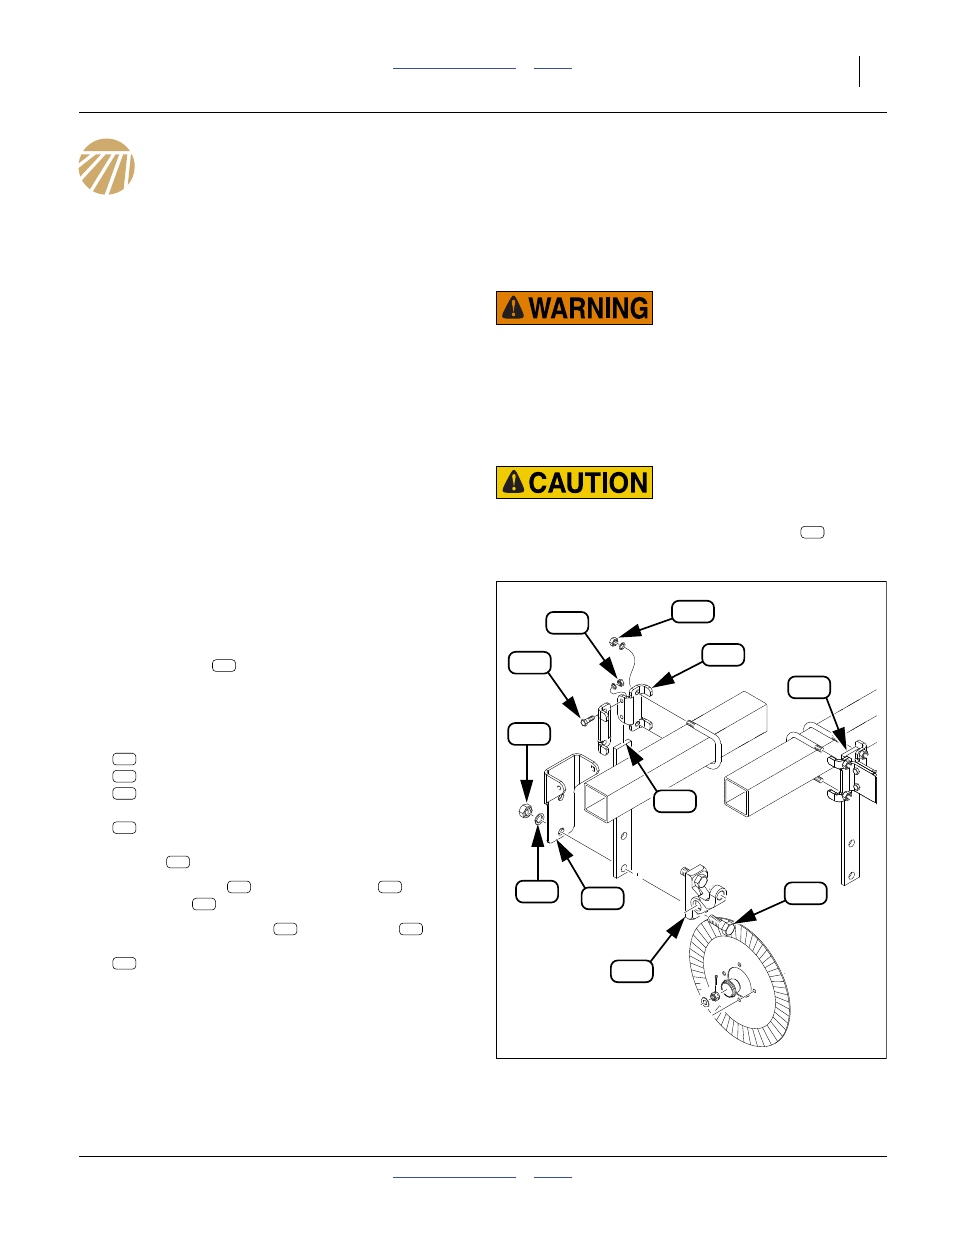
373. Remove and save two sets:
804-037C WASHER LOCK SPRING 7/8 PLT
and the mount:
then dismount the coulter assembly at the
casting
.
374. Loosen the nuts
at the cross-bolts
between
the clamps
375. Loosen the U-bolt nuts
Remove the existing coulter bar:
204-280D 18" COULTER SPRING BAR-PAINTED
This bar is not re-used.
Figure 104
Coulter Dismounting
29353
177
167
High Pressure Fluid Hazard:
Wear gloves and goggles when checking hydraulic connec-
tions. Use cardboard to check for leaks. Check for leaks care-
fully. If an accident occurs, seek immediate medical assistance
from a physician familiar with this type of injury.
Sharp Object Hazard:
Wear gloves when handling the coulter assembly
. The disc
may be sharp and contaminated with soil. The assembly is
heavy.
177
167