Install meter seal flange, Replace meter shaft mount plates, Replace right end plates – Great Plains 2007HD Update Installation User Manual
Page 22
18
NTA607HD or NTA2007HD
Great Plains Manufacturing, Inc.
166-370M
05/25/2011
Install Meter Seal Flange
Refer to Figure 28 (new holes not shown)
85. For each meter, select two new:
266-306D METER SEAL FLANGE
86. Clamp the flange seals
on the meter top panel,
around the opening. Make sure the ends
of the
seals touch each other.
87. Tack weld the seal to the top panel at the corners,
halfway point on front and back, and at end joints
.
88. Clean off any splatter or burned paint.
89. Allow the welds to cool.
90. Touch up bare/discolored areas with green enamel.
91. Allow paint to dry. Apply a bead of silicone sealant
to the inside corner of the top panel / seal flange
joint. Smooth the bead into a fillet shape.
Replace Meter Shaft Mount Plates
Replace Right End Plates
Refer to Figure 29
92. For each meter, select one new:
168-472D METER SHAFT MOUNT PLATE
Apply a bead of silicone sealant to one face of the
plate, in a circle around each outer bolt hole, and in
a circle on the outer bolt hole center-lines.
93. Select six sets new:
802-001C HHCS 1/4-20X3/4 SS
804-033C WASHER LOCK 1/4 SS
Apply silicone sealant under bolt heads and under
washer faces. Secure the plate
to the right end
of the meter. Smooth excess sealant to fillet shape.
94. Select the saved flute shaft
. Temporarily insert
the flute shaft from meter left.
Refer to Figure 30
95. Select one set saved:
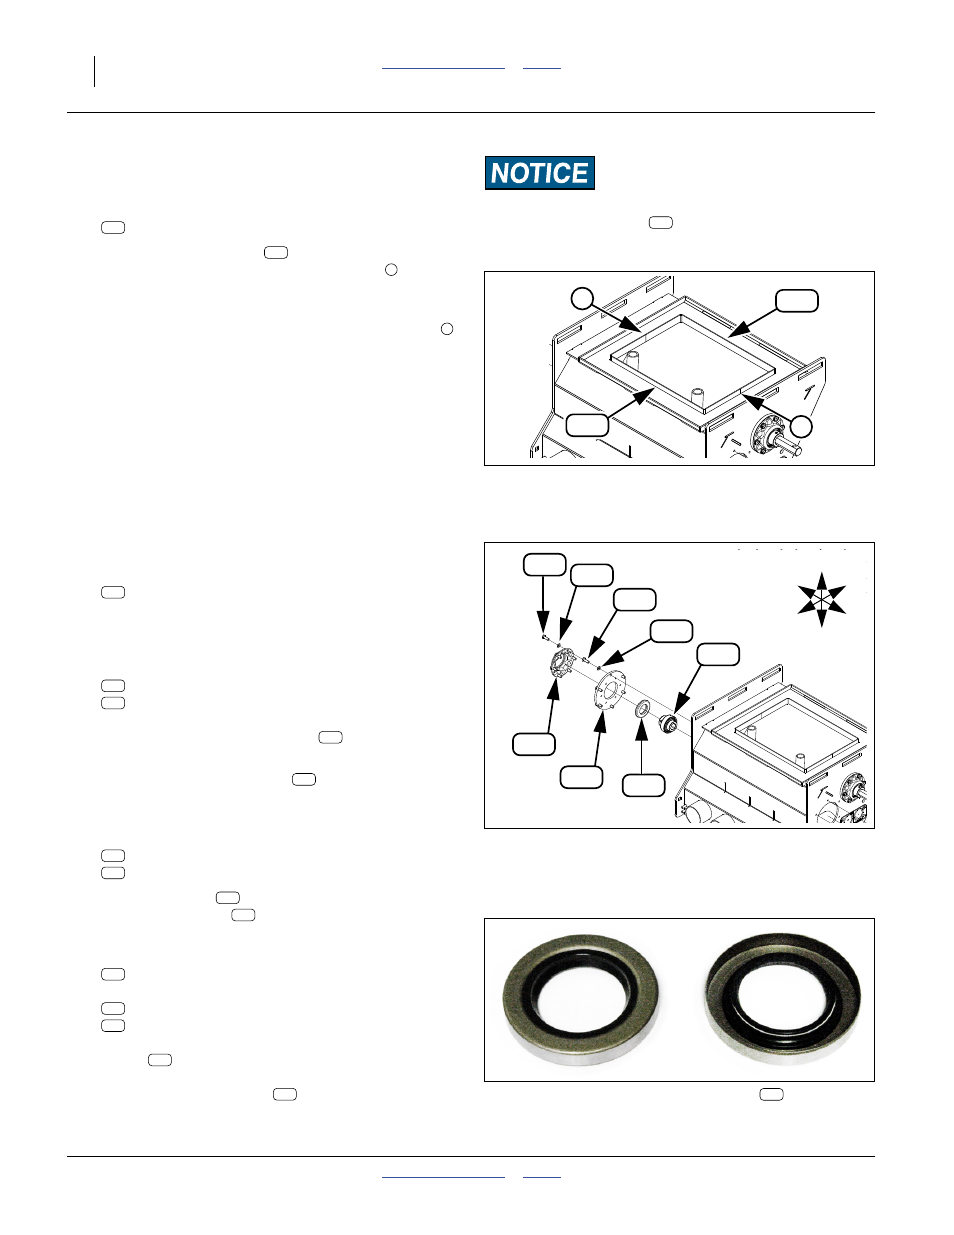
188-009V BRG .755 HEX BORE W/S-S
816-199C SEAL 1.33IDX2.23ODX.31T
Add the bearing
, with set screw collar to the
right. Add the seal
with the solid face to the out-
side and the open face toward the meter.
96. Select one saved:
890-466C HSG RIBB FLG 6BOLT PLT
and six sets new:
802-001C HHCS 1/4-20X3/4 SS
804-033C WASHER LOCK 1/4 SS
Apply silicone sealant to the outer rim of the
flange
. Place the flange over the bearing. Apply
silicone sealant under bolt heads and under washer
faces. Secure the flange
to the right end of the
meter. Smooth any excess sealant into a fillet
shape.
Figure 28
Meter Seal Flange
Q0103
924
924
3
3
Equipment Damage Risk:
Check that the flute shaft (
in Figure 25 on page 16) is
removed prior to welding. Slag and splatter can rapidly and
severely damage meter flutes and fillers.
125
924
924
3
3
Figure 29
Right Shaft Mount Plate
Q0103
918
942
231
959
218
134
942
959
U
D
F
B
L
R
918
942
959
918
125
134
218
Figure 30: 816-199C Seal
Orientation: Outside / Inside
32122
218
134
218
231
942
959
231
231