Dismount parallel arms, Remove pull link, Update rear link anti-rotation – Great Plains 2007HD Update Installation User Manual
Page 41: Dismount parallel arms remove pull link
Great Plains Manufacturing, Inc.
Update Implement Frame
37
05/25/2011
166-370M
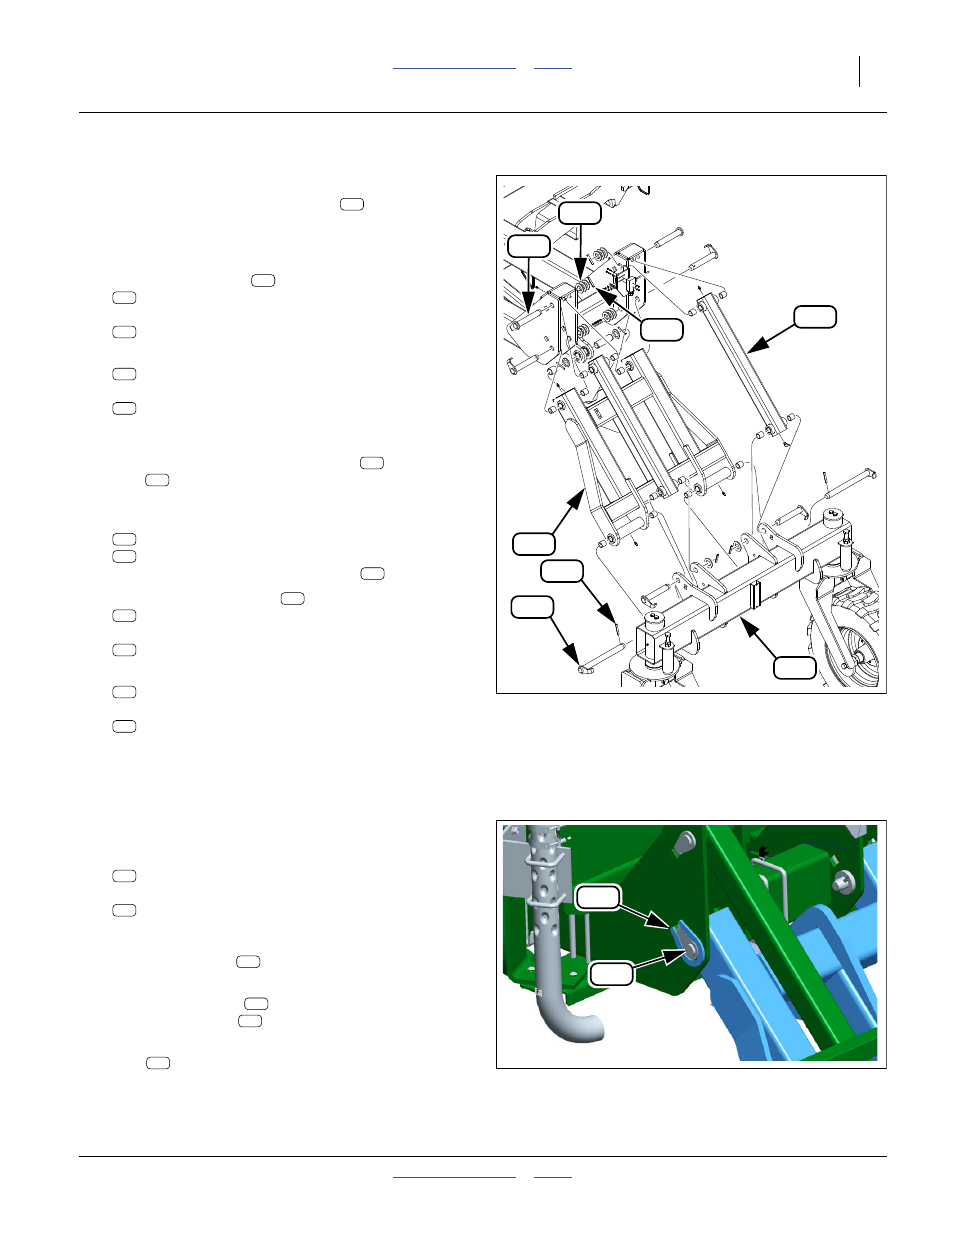
Dismount Parallel Arms
Refer to Figure 61
209. Support the lift-assist cross-tube
upper parallel arms are removed, it can tip away
from the wheels. The combined assembly weighs
nearly 450 kg (1000 pounds).
210. At the parallel arms
, remove and save four:
805-255C PIN ROLL 3/8 X 2 1/2 PLT
and eight:
804-039C WASHER FLAT 1 1/4 SAE PLT
211. Remove and save four:
160-201H WING PIVOT PIN WELDMENT
and two:
160-314H REAR PARALLEL LIFT LINK WELDMT
Remove Pull Link
212. Support the rear end of the pull link
pins
removed, the link is free to swing down and
forward. The link weighs 150 kg (330 pounds).
213. Remove and save two sets:
805-255C PIN ROLL 3/8 X 2 1/2 PLT
160-324H PIN WLDMNT 1.25 X 12.34 NR
then remove and save the lift-assist
214. Attach a hoist to the link
. Remove and save two:
805-255C PIN ROLL 3/8 X 2 1/2 PLT
and six:
804-039C WASHER FLAT 1 1/4 SAE PLT
215. Remove and save two:
160-201H WING PIVOT PIN WELDMENT
then remove the pull link:
160-316H NTA607HD REAR PULL LINK WELDMT
The pull link is not re-used.
Update Rear Link Anti-Rotation
Refer to Figure 62 (which depicts the pull link connected -
this is not done until step 311 on page 52)
216. Select two new:
160-795D PIN RETAINER TAB
and two saved:
160-201H WING PIVOT PIN WELDMENT
Position these at the lower outside pivot holes of the
LH and RH main frame rear. Mark around the outer
edges of the tabs
. Remove the paint from the
main frame weldment in preparation for welding.
217. Tack weld the tabs
to the main frame. Remove
and save the pins
.
218. Finish weld around the outside (only) of the
tabs
, fillet of 7 mm (
1
⁄
4
in.) fillet.
219. Clean off all weld splatter and slag. Allow the welds
to cool. Paint green.
Figure 61
Dismount Lift-Assist
Q0115
193
200
104
111
200
200
193
104
111
200
111
200
193
104
Figure 62
Rear Lift Link
Q0123
104
904
904
104
904
904
104
904