Update rear extension tops – Great Plains 2007HD Update Installation User Manual
Page 44
40
NTA607HD or NTA2007HD
Great Plains Manufacturing, Inc.
166-370M
05/25/2011
Update Rear Extension Tops
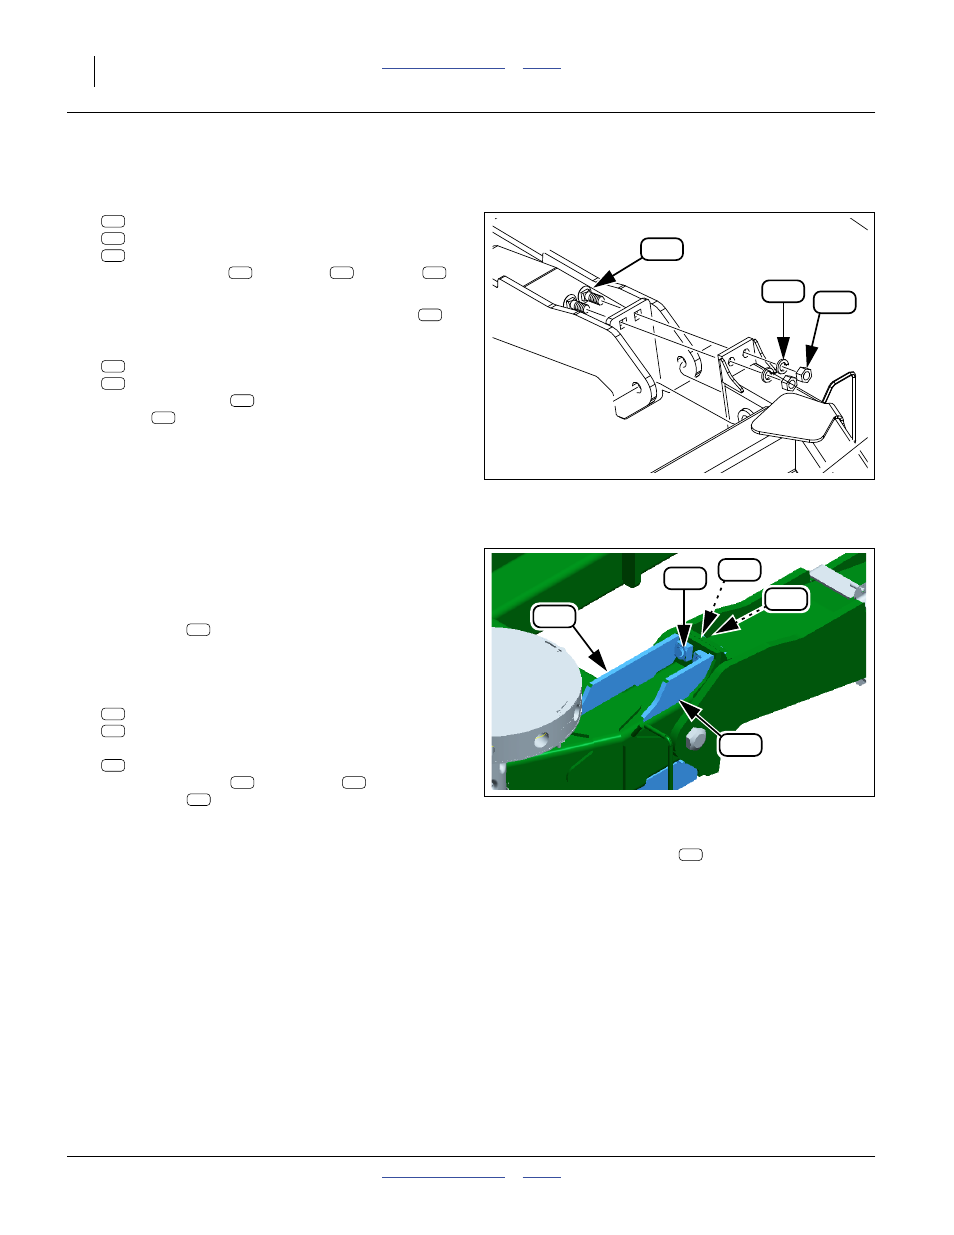
Refer to Figure 66
237. Remove two sets:
804-023C WASHER LOCK SPRING 3/4 PLT
802-910C RHSNB 3/4-10 X 2 GR5 PLT
Save the washers
and nuts
are not re-used.
Refer to Figure 67 (which depicts the new square nuts
installed - this is not done until step 243)
238. Select one each new:
160-808D FRAME EXT 100 DEG GUSSET
160-809D FR EXT 100 DEG GUSSET REWORK
The longer gusset
to the front. The shorter
gusset
is to the wing inside.
239. Position the gussets. Slide them as far toward the
pivot extensions as allowed by the existing weld fil-
lets. Keep them in full contact with existing gussets.
Mark the wing for paint removal at all accessible
corners and joints of each gusset. Remove paint in
preparation for welding.
240. Tack weld the gussets in position.
241. Finish weld all around each gusset, using an
8 mm (
5
⁄
16
in) fillet. Keep the weld fillet small at the
joint plates, so that it won’t interfere with the new
square nuts
.
242. Clean off all weld splatter and slag. Paint the welded
area green.
243. Select two sets new:
802-064C HHCS 3/4-10X2 GR5
803-047C NUT SQ 3/4-10 PLT
and two saved:
804-023C WASHER LOCK SPRING 3/4 PLT
Add a lock washer
to each bolt
. Position the
square nuts
on the wing side of the joint plates.
Insert the bolts through the joint plates, from the
wing extension side, and thread into bolts. Tighten
bolts to Grade 5 torque specification.
244. Repeat step 237 through step 243 for the right wing
front.
This completes welded updates.
245. Re-connect any hoses or cables removed for weld
protection.
Figure 66
Existing Top Rear Hardware
Q0116
951
912
913
913
912
Note: The new square nuts
are NOT welded (or
even tack-welded) onto the wing frame.
Figure 67
LH Wing Top Rear Gussets
Q0124
951
913
912
951
943
951
943
951
943
951