E-flite Super Cub 25e ARF User Manual
Page 9
9
E-flite Super Cub 25e ARF Assembly Manual
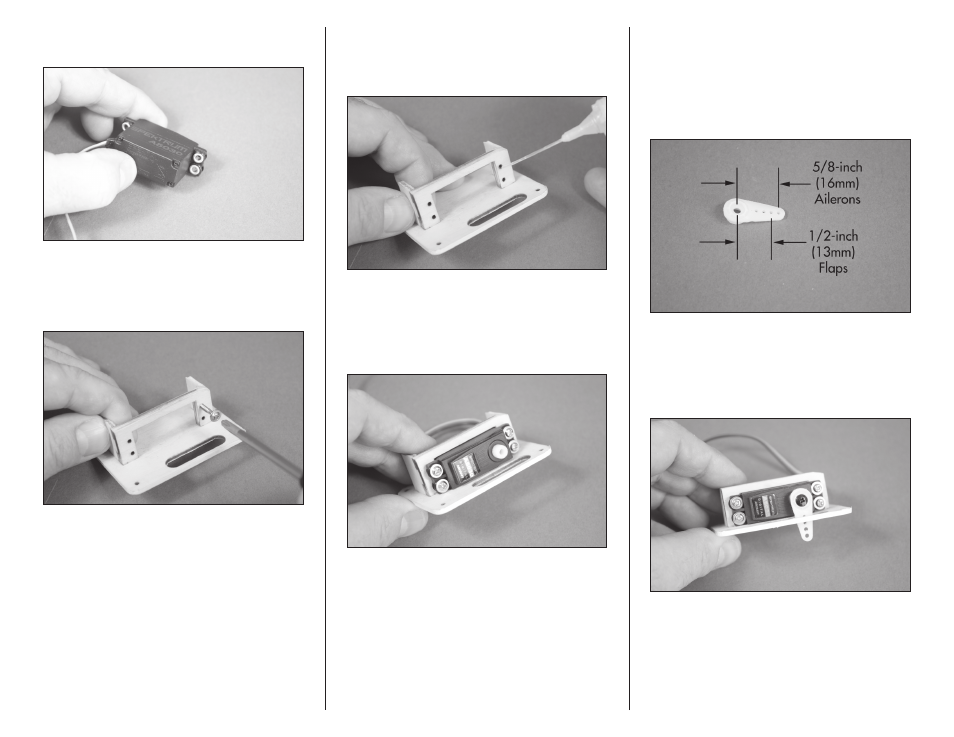
2. Prepare the servo by installing the servo
grommets and brass eyelets.
3. Use a #1 Phillips screwdriver to thread a
servo mounting screw into each of the holes to cut
threads in the surrounding wood. Remove the screw
before moving to the next step.
4. Apply 2–3 drops of thin CA in each of the
holes to harden the surrounding wood. This will
harden the threads so the screws do not easily strip
the surrounding wood.
5. Secure the aileron servo to the servo mount
using the hardware included with the servo. Use a
#1 Phillips screwdriver to tighten the screws. Note
that the output for the servo is centered in the slot
where the servo arm will protrude through the cover.
6. Use a pin vise and 5/64-inch (2mm) drill
bit to enlarge the hole in the servo horn. Enlarge
the hole that is 5/8-inch (16mm) from the center of
the horn for the ailerons (1/2-inch (13mm) for the
flaps). Use side cutters to remove any unused arms
so they don’t interfere with the operation of the
servo.
7. Use the radio system to center the aileron
servo. Use the screw from the servo to install the
servo horn on the servo as shown. Use a #1 Phillips
screwdriver to tighten the screw that secures the
servo horn to the servo output.
8. Repeat steps 2 through 7 for the flap servo.