E-flite Super Cub 25e ARF User Manual
Page 6
6
E-flite Super Cub 25e ARF Assembly Manual
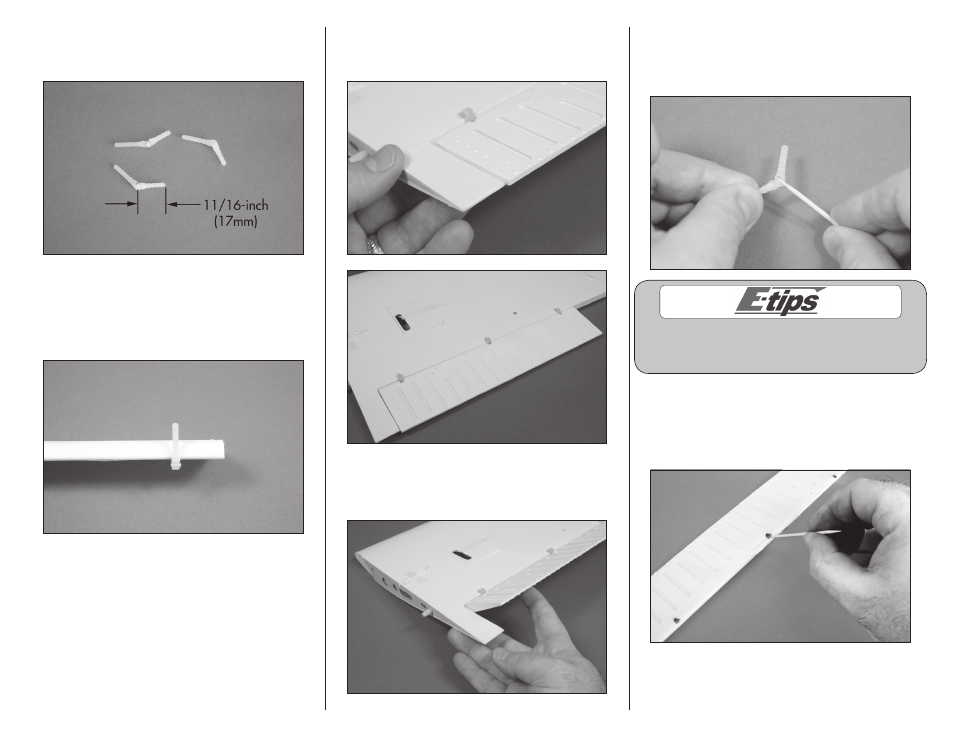
2. Locate three hinges for the flaps. Use side cutters
to trim one end of each hinge to 11/16-inch
(17mm). The trimmed end will be placed in the flap.
3. Insert the trimmed end of the hinges into the flap.
Check that the hinge moves perpendicular to the
hinge line. Also check to ensure that the hinge is not
protruding through the top of the flap skin. If you
see a bump, trim a little more off of the hinge.
4. Fit the hinge and flap to the wing. Position the
flap so it aligns with the wing and that the hinge
line is equal along the entire length of the flap.
5. Check that the flap can move freely through its
range of motion. This will ensure that the hinges are
installed correctly.
6. Remove each hinge and apply a small amount
of petroleum jelly to the hinge point in order to help
prevent the glue from penetrating the hinge which
could prevent it from operating correctly.
Dipping the hinge knuckles in heated petroleum
jelly (in a liquid state) is easier than trying to
apply it with a toothpick in the gel state.
7. Remove the flap and hinges. Mix a small amount
of 30-minute epoxy. Use a toothpick to apply the
epoxy inside the holes in the wing and flap, then
install the hinges. Check to make sure the flap is
positioned as described in steps 4 and 5.