E-flite Super Cub 25e ARF User Manual
Page 12
12
E-flite Super Cub 25e ARF Assembly Manual
Drawing not to scale
Aileron and Flap
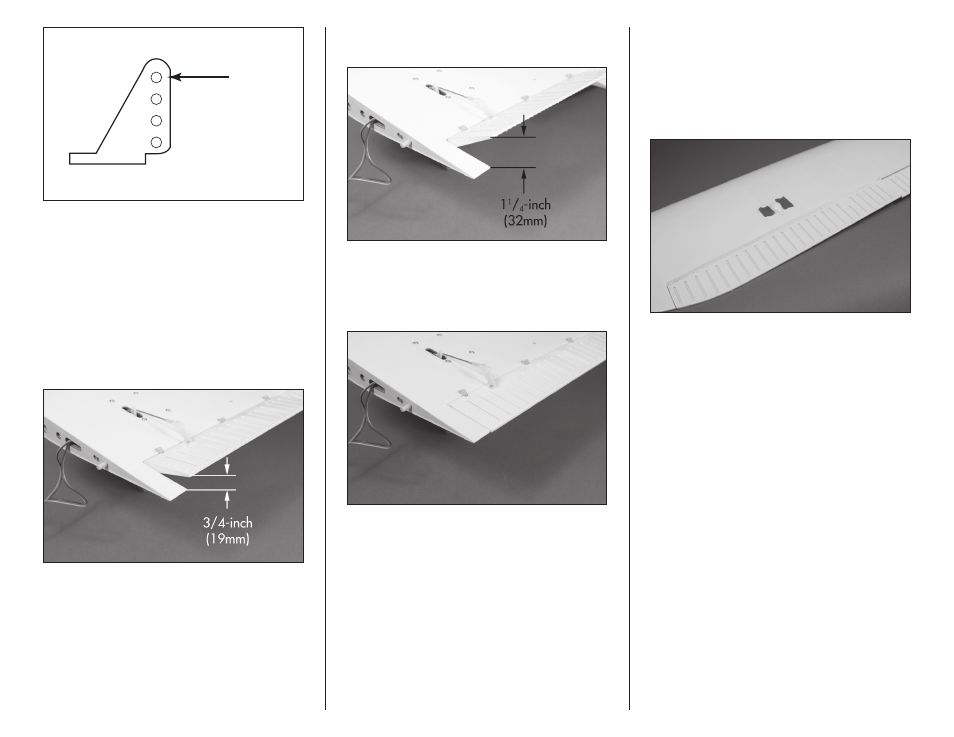
Attach clevis
to the
outer hole
22. Repeat steps 1 through 19 to install the
remaining aileron servo.
If you are using a 2-position flap switch, still set
the center position as a starting point for the
flap linkage installation.
23. Connect the flap linkage to the servo and the
flap control horn. With the flap servo centered,
adjust the linkage to achieve the mid-flap position
as shown.
24. Next, set the full-flap position Use the travel
adjustment to set the down flap position as shown.
25. Set the flap switch to the up flap position. Use
the travel adjustment to move the servo so the
trailing edge of the flap is aligned with the trailing
edge of the wing.
26. Repeat steps 23 through 25 for the flap servo.
27. Use canopy glue to attach the scale aileron
linkage cover to the top of the wing. Position
the cover so it is centered along the width of the
aileron. The cover will rest 3/4-inch (19mm)
forward of the hinge line as shown. Use low-tack
tape to hold the cover in position until the glue
fully cures. Install both covers at this time.