E-flite Super Cub 25e ARF User Manual
Page 37
37
E-flite Super Cub 25e ARF Assembly Manual
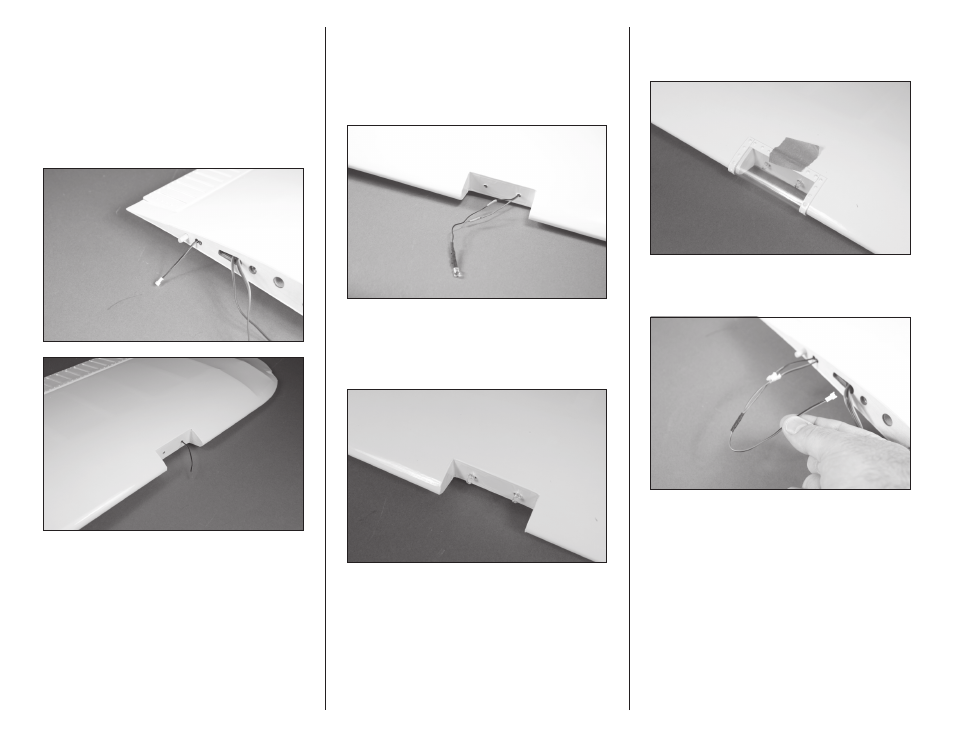
2. Use side cutters to remove the plug from the
clear light. Remove the end of the 36-inch (915mm)
lighting extension. Cut the length of the lead so
when the light is installed, the lead protrudes
approximately 1
1
/
2
-inches (38mm) from the wing
root. Make sure the end that remains is the end that
plugs into the lighting controller. Slide the extension
through the tube into the wing root and out at the
leading edge.
3. Carefully solder the extension to the light.
Use care not to melt the wiring by leaving the
soldering iron in position too long. Make sure to
stagger the solder joints so the wires will fit into the
tube in the wing. Use heat shrink to cover the solder
joints to prevent shorting the wires.
4. Repeat steps 1 through 3 to prepare the second
landing light. Press the lights into position in the wing.
It may be necessary to use a very small amount of
silicone adhesive to keep the lights in position.
5. Use canopy glue to glue the landing light cover
to the wing. Use low-tack tape to hold the cover in
position until the glue fully cures.
6. Connect the Y-harness for the landing lights
outside the wing as shown.