1 attaching the propellers, 1 introduction, 2 assembly – DJI Phantom 2 Vision User Manual User Manual
Page 6: 3 removing the propellers, 4 notes, Ntroduction, Ssembly, Emoving the, Ropellers, Otes
©2014 DJI. All Rights Reserved.
6 |
1 Attaching the Propellers
Please use the original 9-inch propellers which are classified by the color of each central nut. Damaged propellers
can be replaced by purchasing new ones if necessary.
1.1 Introduction
Propellers
Grey Nut (9450)
Black Nut (9450 R)
Diagram
Assembly Location
Attach to the motor thread that does
not have a black dot.
Attach to the motor thread that has a
black dot.
Fastening/Un-fastening
Instructions
Lock: Tighten the propeller in this direction.
Unlock: Remove the propeller in this direction.
1.2 Assembly
1.
2.
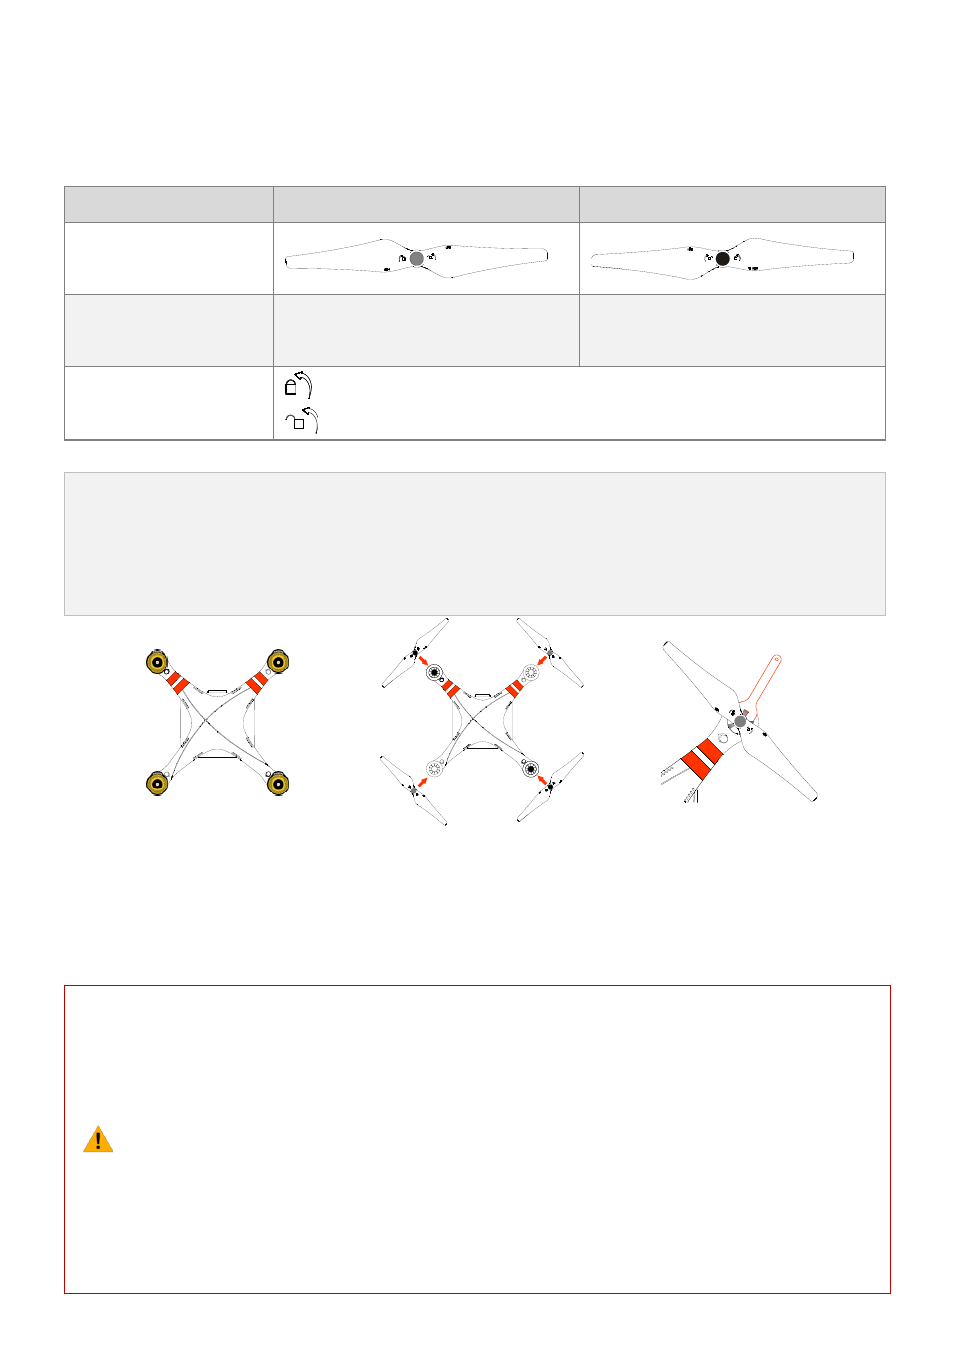
(Fig.1) Remove the four warning cards from the motors after you read them.
(Fig.2) Prepare the two grey nut propellers and two black nut propellers. Make sure to match the black nut
propellers with the correctly marked black dot motors. Tighten the propellers according to the fastening
instructions.
Fig.1 Fig.2 Fig.3
1.3 Removing the Propellers
(Fig.3) Keep the motor deadlocked in place with the assistant wrench (or one hand) and remove the propeller
according to the un-fastening instructions.
1.4 Notes
(1)
(2)
(3)
(4)
(5)
(6)
(7)
Propellers are self tightening during flight. DO NOT use any thread locker on the threads.
Make sure to match the propeller nut colors with the corresponding motors.
It is advised to wear protective gloves during propeller assembly and removal.
Check that the propellers and motors are installed correctly and firmly before every flight.
Check that all propellers are in good condition before flight. DO NOT use any ageing, chipped,
or broken propellers.
To avoid injury, STAND CLEAR of and DO NOT touch the propellers or motors when they are
spinning.
ONLY use original DJI propellers for a better and safer flight experience.