Operation attaching the header – MacDon 9352c SP User Manual
Page 42
Form # 147459
Issue 11/06 Web Rev_01
40
OPERATION
Attaching the Header
1. Choose an area that is as level as possible and
set header stand (A) in the down position.
942 Header, set 2 inch (50 mm) blocks under
each end of cutterbar.
960 & 970 Series Headers, be sure header and
tractor have been properly prepared for
windrower use.
See "Preparing Tractor and Headers" in
Assembly section for details.
CAUTION: Be sure area is clear of
bystanders, then start engine.
2. Fully retract header lift cylinders. For units with
Header Express Down option, use switch on
side console to bypass the feature.
NOTE: For 30’ & 36’ Harvest Headers with
Transport Option; when attaching to header in
transport mode, position 6 inch high (150 mm)
blocks for drive tires to provide adequate linkage
height. Blocks should be at least the width of the
drive tires and long enough that drive tires are fully
supported when attaching header.
3. Slowly drive tractor forward so that lift linkage
enters header legs. Continue to drive slowly
forward until linkage contacts support plate in
the lower header leg, and header nudges
forward. Place variable speed lever into neutral
position and lock steering wheel. Stop engine
and remove key.
4. Adjust length of center link and connect to
header at (C). For 962 and 972 headers, use
the lower, more rearward hole in mount on
header tube as shown.
NOTE: Ensure that thread length is equal at
both ends of center link. See "Header Angle for
adjustment details.
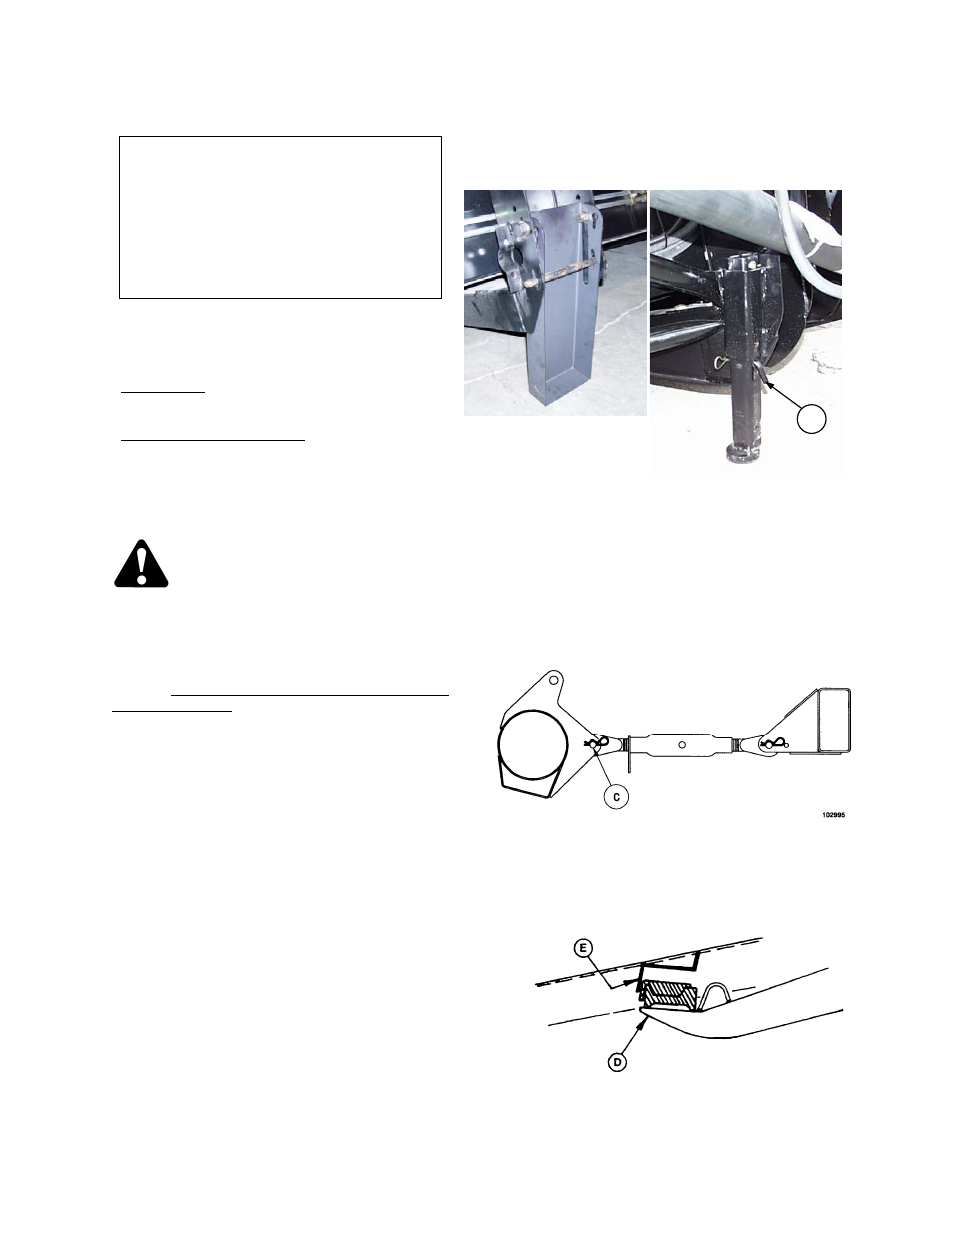
5. Check that bottom of linkage (D) is properly
engaged in header leg, contacting support plate
(E).
NOTE: For Harvest Headers with gauge
wheels, instructions under "Attaching" and
"Detaching the Header" which refer to the
"header stand" do not apply. Use the "stand"
position of the gauge wheels to support rear of
header. All gauge wheel positions are identified
on a decal located at each gauge wheel. Be
sure to reposition gauge wheel to field position
before operating.
INSTALL CENTER LINK
CHECK FOR PROPER ENGAGEMENT
A
HEADER STAND - DOWN POSITION
963 HEADER STAND