Installing the base station, Installing the esls – Opticon ESL User Manual
Page 12
Opticon ESL
DEMO KIT
User Manual
12
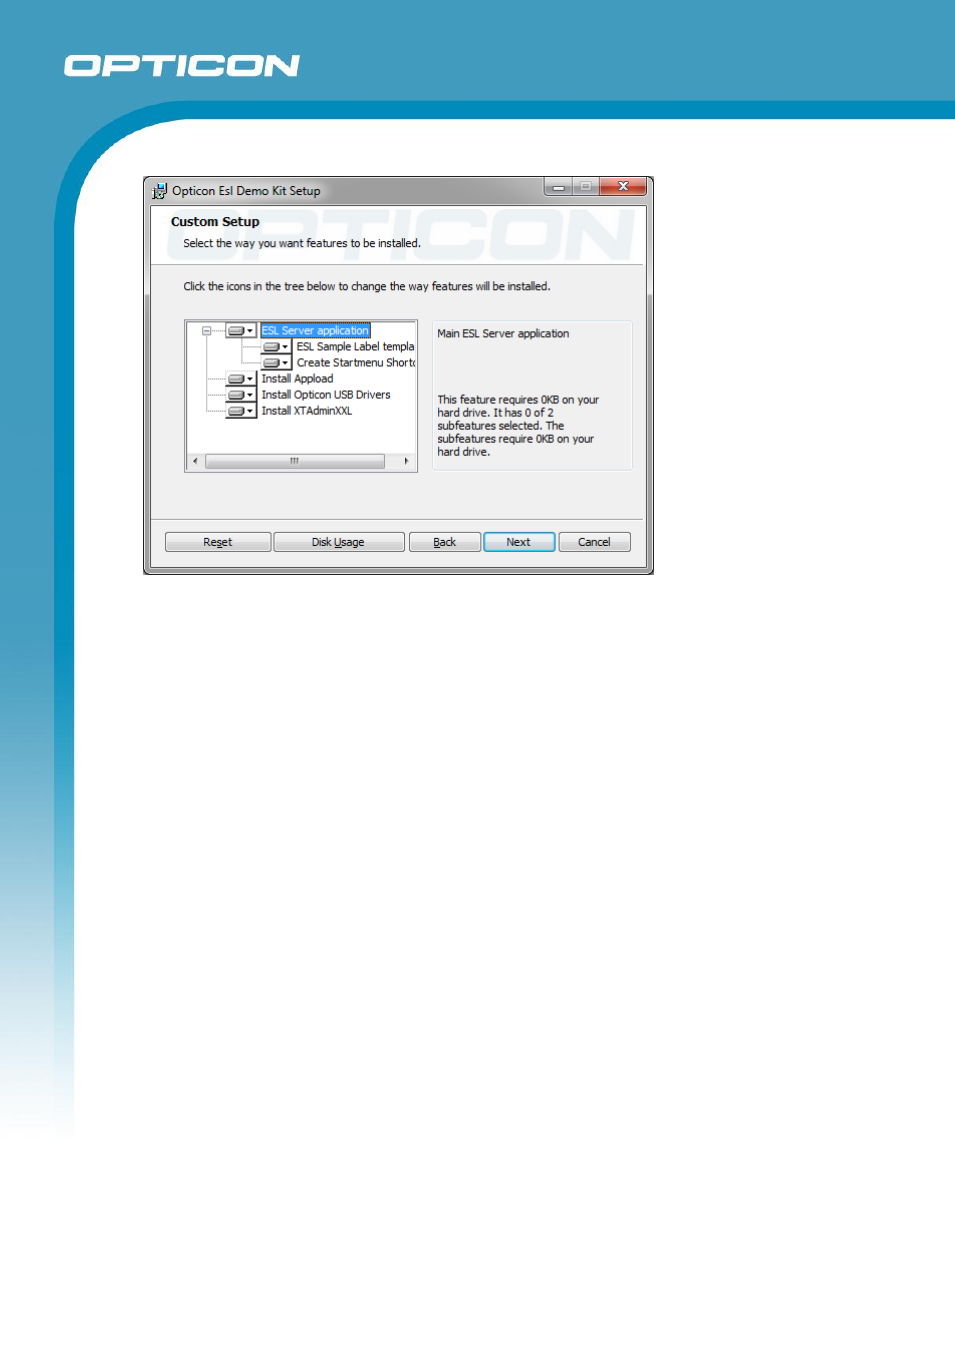
Note that only the installer of XTAdminXXL will be copied to the „Tools‟-folder of your
installation. To actually install the program this installer needs to be run manually.
3.1.2.
Installing the base station
The base station can be easily installed by powering it up, connecting it to the Ethernet
and placing it within 10 meter (the actual maximum range is bigger) of your ESLs. The PC
will need to be connected to the same LAN, so it can communicate with the base station
*. See chapter 5.6.3 for more information on configuring the Ethernet settings of your
base station. Other information on how to configure the base stations (i.e. selecting the
best RF channel) can be found in chapter 5.6.
* Note: The base station can also be controlled over the Internet or via a public network,
but it won’t be a secure solution, since SSL isn’t supported yet in this SDK.
3.1.3.
Installing the ESLs
On arrival the ESLs usually already have their two CR2450 batteries inserted. If not, the
batteries can be easily inserted by removed the back shell. When the batteries are
inserted the ESL‟s will be periodically seeking for an Opticon base station, so as soon as
an Opticon base station is within range, they will associate with it and start sending data
requests and status information to it. When a base station is turned off or an ESL is
moved out of range, an ESL will time out after a couple of minutes and starts seeking for
another base station in range. See chapter 5.4 for more information about configuring
ESLs.