Chapter 2 installation, 1 sqm-242 card installation, Chapter 2 – INFICON SQM-242 Thin Film Deposition Controller Card Operating Manual User Manual
Page 23: Rd, see, Chapter 2, installation
2 - 1
IP
N 07
4-
54
9-
P1
A
SQM-242 Operating Manual
Chapter 2
Installation
2.1 SQM-242 Card Installation
Jumper each SQM-242 card before installation as shown in
.
Figure 2-1 Jumper Configurations
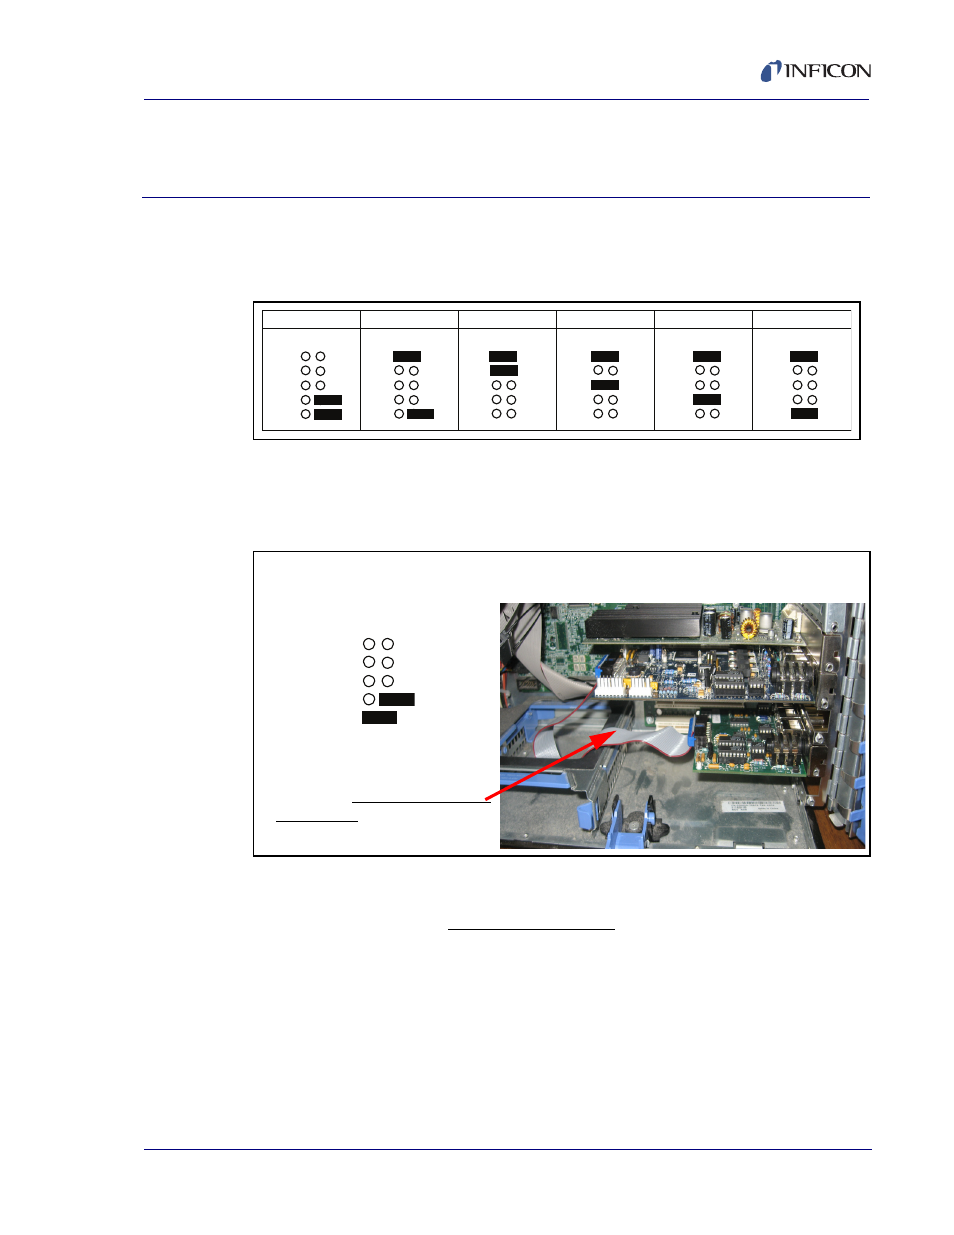
If you are installing a SAM-242 analog piggyback card, it must be connected to
Card 1. Set the Card 1 jumper as shown in
when the optional SAM-242
card is used.
Figure 2-2 SAM-242 Card Installation
Once each card is jumpered:
1
Turn off the computer, unplug the power cord, and remove the computer cover.
2
Locate an empty PCI slot and remove the screw holding the blank bracket for
the slot. Remove the blank bracket.
3
With the card’s gold contacts down, place it above the PCI slot with the BNC
connectors on the card extending through the back of the computer. Press
down on the card to seat it into the connector. Repeat with each card.
4
Replace the screw at the top of the card bracket to secure the card. Replace
the cover on the computer and plug in the power cord.
Card 1
Card 2
Card 3
Card 4
Card 5
Card 6
JP5
JP5
JP5
JP5
JP5
JP5
JP5
Card 1 Jumper
with SAM-242 Card installed
Card 1 with SAM-242
Ribbon Cable installed
The SAM-242 card can go on
either side of SQM-242 Card 1,
as long as
the ribbon cable is
not twisted
(red stripe on one
side of both cards).