Troubleshooting, Operator reference chart – ERICO ELAT100 LENTON Automatic Threader User Manual
Page 23
www.erico.com
23
1. If the threader will not power up in hand mode,
check the following:
a. Check that the machine is plugged in and the
main disconnect is on.
b. Check to see if the E stop is activated.
c. See if the kill switch is activated.
d. The correct electrical power must be used.
See “Electrical” section.
2. If the cutting head does not spin in auto mode,
check the following:
a. Safety hood must be all the way forward.
b. Check motor control relay and corresponding fuse.
3. If the cutting oil is not flowing to the cutting
head, check the following:
a. Check control relay and the corresponding fuses.
b. Chips jamming the impellor.
c. Oil level – see “Adding Oil” section.
d. Possible build up of chips behind the
touch probe assembly.
4. If the chasers are wearing prematurely,
check the following:
a. Improper oil flow.
b. Harder than normal rebar.
c. Improperly prepared bar ends.
Troubleshooting
5. If the bar ends have stripped threads,
check the following:
a. Are the chaser holders in the correct position –
see “Change Chasers”.
b. Are the woodruff keys tight in the slot –
see “Change Chasers”.
c. Chaser wear.
d. Incorrect controlled feed speed –
check Introloc 61f.
6. If the chaser holders will not shift in the
cutting head, check the following:
a. Chips, dirt or other contaminants in the
cutting head.
b. Bent control rod.
c. Damaged control key.
d. Damaged control block.
e. Chaser holder(s) protruding beyond face of
cutting square.
7. If the bar ends suddenly become too long,
check the following:
a. Check that the tip of the touch probe
is not broken.
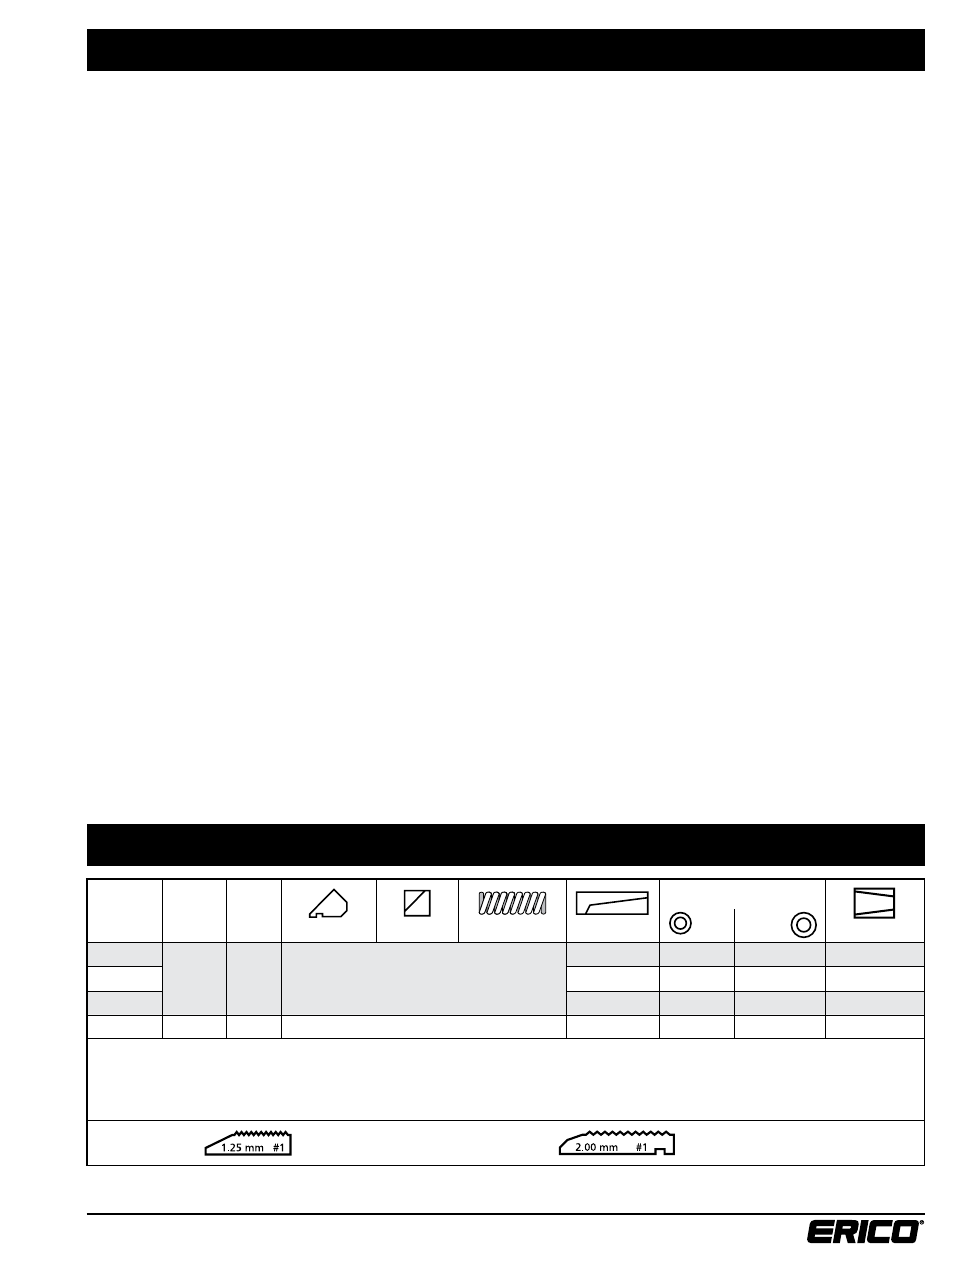
Operator Reference Chart
Bar Size
Chaser
Pitch
Touch
Probe
Chaser Holder
Cam Block
Release Spring
Key
Guide Rings
Bar End Gauge
Small
Medium
#3 (10M)
1.25MM
7/64
101D + “E” + Blue
( 75 / S / 1 / 1 / B )
10 (10A)
10X (10B)
10XX (10C)
ELBEG10A
#4
12 (12A)
12XX (12D)
12XXXX (12E)
ELBEG12A
#5 (15M)
16 (16A)
16X (16B)
16XX (16C)
ELBEG16A
#6 (20M)
2.00MM
3/16
111D + “E” + Blue
20 (20A)
20 (20A)
20X (20B)
ELBEG20A
Setup Instructions
1. Install proper tooling for desired bar size. See table above.
2. Rotate the bar selector switch to the desired bar size.
3. Close safety hood, and rotate Hand/Auto switch to Auto.
4. Depress Jog/Reset button to setup for selected bar size.
5. Insert rebar into machine to start threading.
Note! Contact ERICO if further instructions are required.
ELLBL39 A