Video balancer, Diagnostic procedures – COATS Series XR 1800 Balancer User Manual
Page 35
Important: Always read and follow the on-screen operating instructions.
• 29
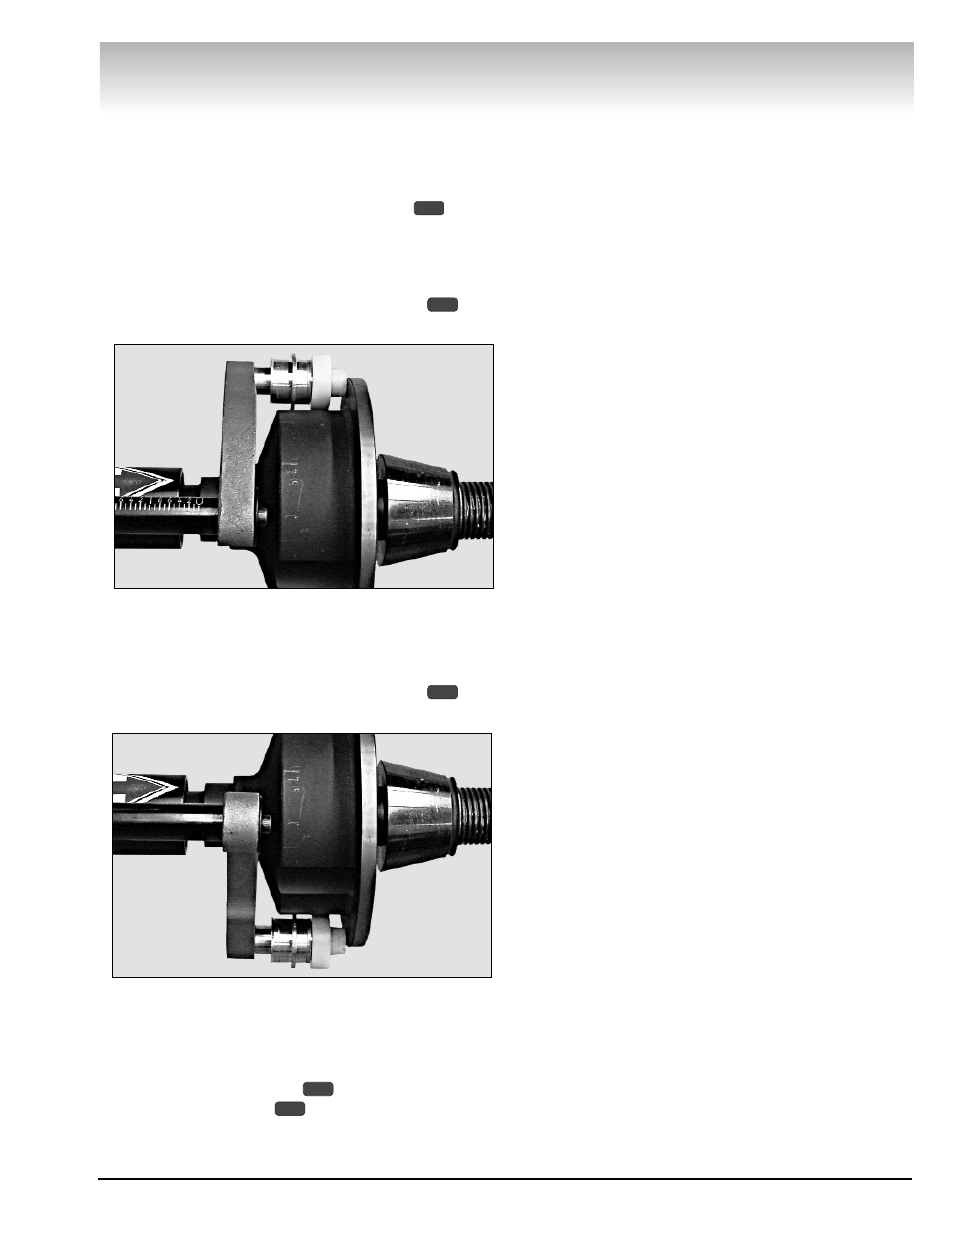
Diameter Arm Calibration (Metal)
Note: Be sure the correct Distance/Diameter Arm
Type is set (See Service Adjustments page 27).
Follow these instructions on-screen when calibrating
the DIAMETER ARM CALIBRATION option
(metal
arm type):
1. Position the arm roller at upper position on the
faceplate hub with the tip on back of flange.
2. Hold at position and press NEXT option
.
Note: The position will display on the screen.
Figure 53 - Hold Roller Tip At Upper Position And Press
NEXT
3. Rotate and position the arm roller at lower posi-
tion on the faceplate hub with the tip on back of flange.
4. Hold at position and press NEXT option
.
Note: The position will display on the screen.
Figure 54 - Hold Roller Tip At Lower Position And Press
NEXT
5. Return offset arm to home position.
6. Calibration Accepted.
7. Press NEXT option
to return to Service
Adjustments or option
to EXIT.
Diagnostic Procedures
After Balance Vibration Problems
If vibration is still present after balancing the wheels
and driving the vehicle on smooth pavement, remove
the wheels and recheck the balance. If a wheel is out
of balance the cause maybe:
• Wheel was not mounted/centered correctly on the
balancer.
• A weight has come off the wheel (possibly the
wrong clip style). Remove the other weights from
the wheel and rebalance.
• Foreign material inside the tire. Remove the tire
from the wheel, remove the foreign material, and
remount. Remove wheel weights and rebalance
the wheel.
• Stones or other foreign objects caught in the tire
tread or rim. Remove the objects. Check and rebal-
ance if needed.
If the balancer still indicates the wheels are balanced
to within 0.05 ounces on both inner and outer displays,
the problem is not in the balance of the wheels. Check
the following possible sources of vibration:
• Tire pressure. Bring all tires up to the recom-
mended PSI.
• Radial or lateral runout in the tire or wheel. Replace
the damaged part.
• Unbalance in wheel covers or trim rings. Remove
the wheel covers or trim rings and test drive. If the
vibration is gone, remove the shaft and use an
appropriate adapter to mount the wheel to the bal-
ancer. Balance the wheel with the wheel cover or
trim ring attached to the wheel.
• Incorrectly mounted wheel. Remount correctly.
• Damaged wheel bolt holes. Replace wheel.
• Worn universal joints. Replace as required.
• Drive shaft unbalance or damaged. Balance, repair,
or replace.
• Unbalance in brake rotor(s) or drum(s).
• Suspension out of alignment. Align the vehicle and
replace any damaged or worn parts.
1
7
1
1
3
Video Balancer