Video balancer – COATS Series XR 1800 Balancer User Manual
Page 33
Important: Always read and follow the on-screen operating instructions.
• 27
Video Balancer
Service Adjustments
Press the
key and select SERVICE ADJUST-
MENTS option
for the following menu selections.
Important: These service adjustments are password
protected. Contact your factory trained COATS®
Service Technician before attempting any upgrade or
repair that may affect the machine dimension meas-
urement system.
Figure 47 - Service Adjustments Screen
Distance Arm Calibration - Calibrates the
distance part of the offset arm.
Width Sonar Calibration - Calibrates the
width using a sensor.
Diameter Arm Calibration - Calibrates the
diameter part of the offset arm.
Distance/Diameter Arm Type - Toggle to
METAL or PLASTIC. Set to match the style/type of
arm installed on the balancer.
Temperature - Ambient temperature setting
for sonar.
Recommended setting is 70˚ F.
Distance Arm Calibration
Note: Calibrate the offset arm first, since it is very
important that the wheel dimensions are correct.
Follow these instructions on-screen when calibrating
the DISTANCE ARM CALIBRATION option
:
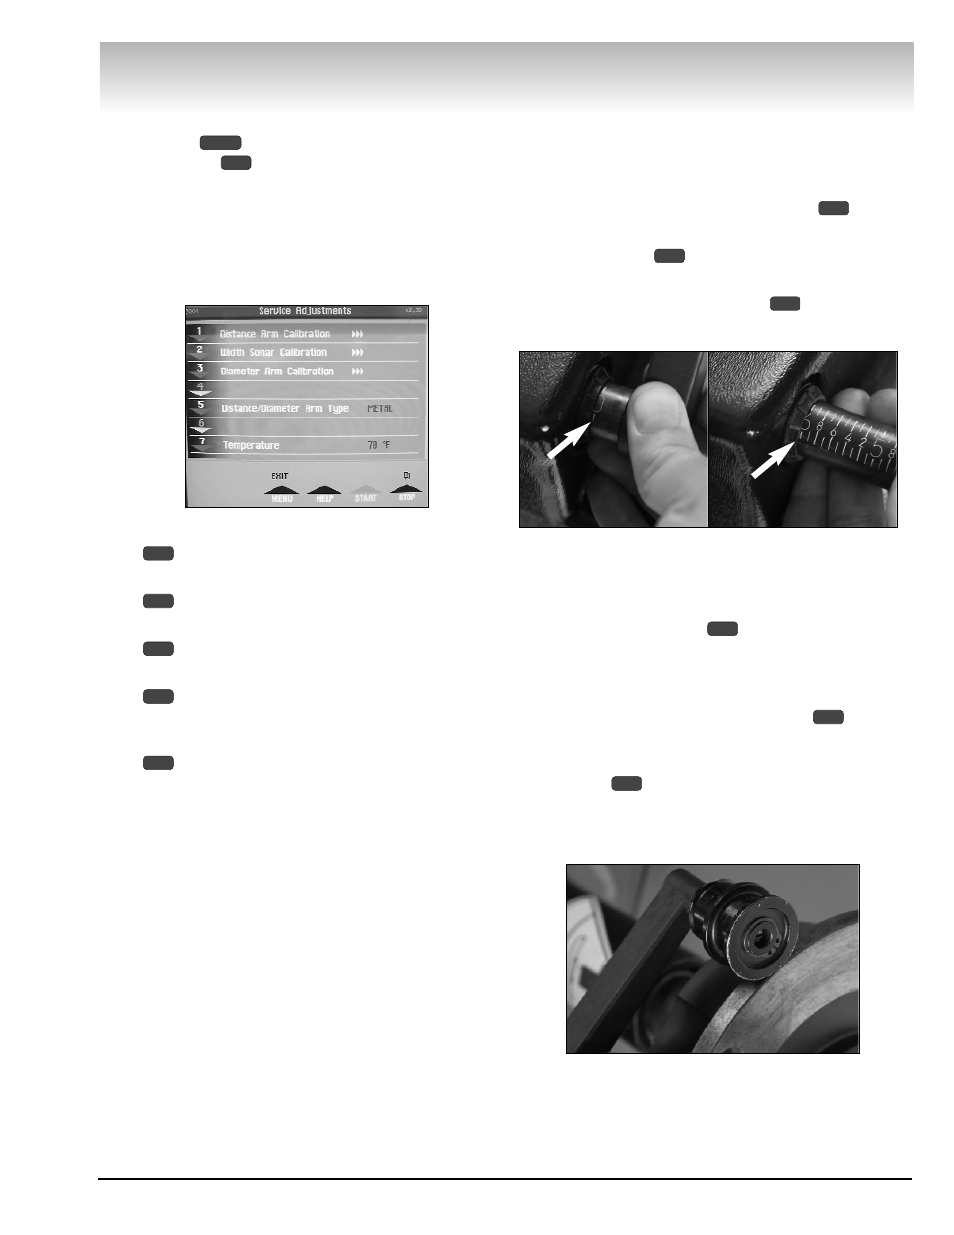
1. Move offset arm to position 0 on gauge, hold and
press NEXT option
.
2. Move offset arm to position 6 (not 0.6-inch) on
gauge, hold and press NEXT option
.
Note: Position the gauge as shown in figure 48.
Figure 48 - Distance Arm Calibration
3. Return offset arm to home position.
4. Calibration Accepted.
5. Press NEXT option
to return to Service
Adjustments.
Width Sonar Calibration (If equipped)
Follow these instructions on-screen when calibrating
the WIDTH SONAR CALIBRATION option
:
1. Move the arm gauge to front of faceplate (outer
edge of large diameter). Hold at position and press
NEXT option
.
Note: It is highly important to position the gauge cor-
rectly as shown in figure 49A (plastic arm) or figure
49B (metal arm).
Figure 49A - Plastic Offset Arm Gauge to Faceplate
1
2
1
4
MENU
1
1
1
1
2
3
5
7
Gauge
Set to 6
Gauge
Set to 0
Shown with Recommended Settings