AirLive WN-300ARM-VPN User Manual
Page 22
To Configure additional VCs
1. Start
the
Setup Wizard again.
2. On the first screen, select VC2, and click "Next"
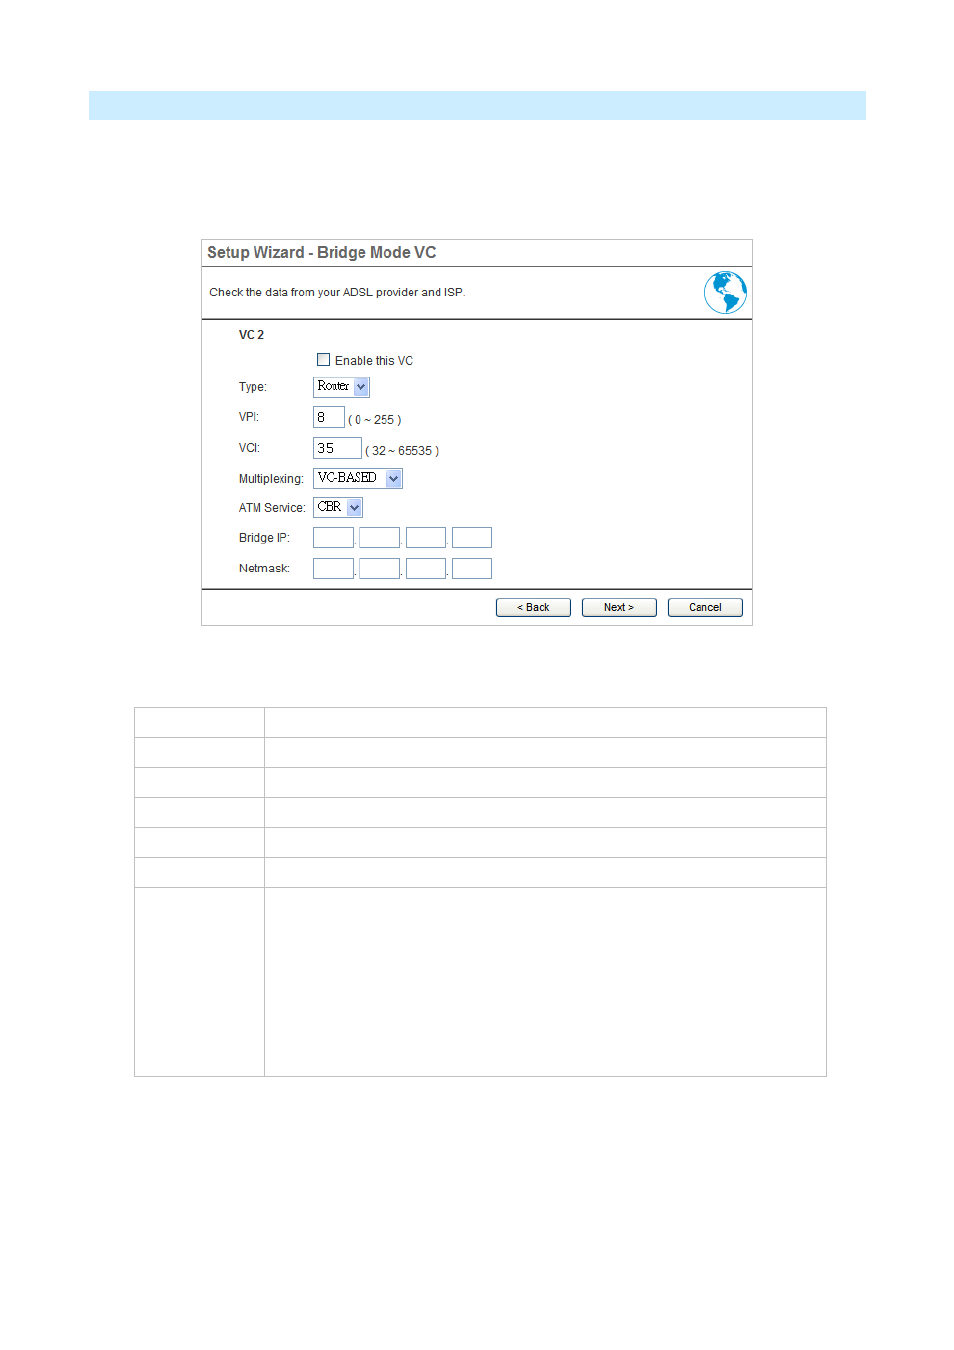
3. Configure the VC setup screen as described below, then click "Next".
Figure: Setup Wizard - VC2
-1-
Setup Wizard VC Screen
VC
The VC number is displayed
Enable
To use this VC, you must enable it by checking this checkbox.
VPI
Enter the VPI value provided by your ISP.
VCI
Enter the VPI value provided by your ISP.
Multiplexing
Select the multiplexing value provided by your ISP.
ATM Service
Select the multiplexing value provided by your ISP.
LAN IP
Address
Enter the IP address of the device on your LAN which will receive the data on
this VC.
For Video-on-Demand, this would be the IP address of your SetTop Box.
For VoIP, this would be the IP address of your VoIP TA.
Note that this IP address does not have to be in the same IP address
range as other devices on your local LAN.
4. When finished, click "Next" and complete the Wizard.
5. After completing the Wizard, you can check the Status screen to see the VC has been corrected
established.
AirLive WN-300ARM-VPN User’s Manual
20