1 tilt/auxiliary hose removal, 2 tilt/auxiliary hose installation, Tilt/auxiliary hose removal -14 – JLG 4017RS Service Manual User Manual
Page 54: Tilt/auxiliary hose installation -14
Boom
3-14
3614RS, 4017RS
3.5
TILT AND AUXILIARY CIRCUIT HOSE
REMOVAL/INSTALLATION - 3614RS
Hoses that need replaced and are still in one piece can be
removed and replaced without removing sections of the
boom.
3.5.1
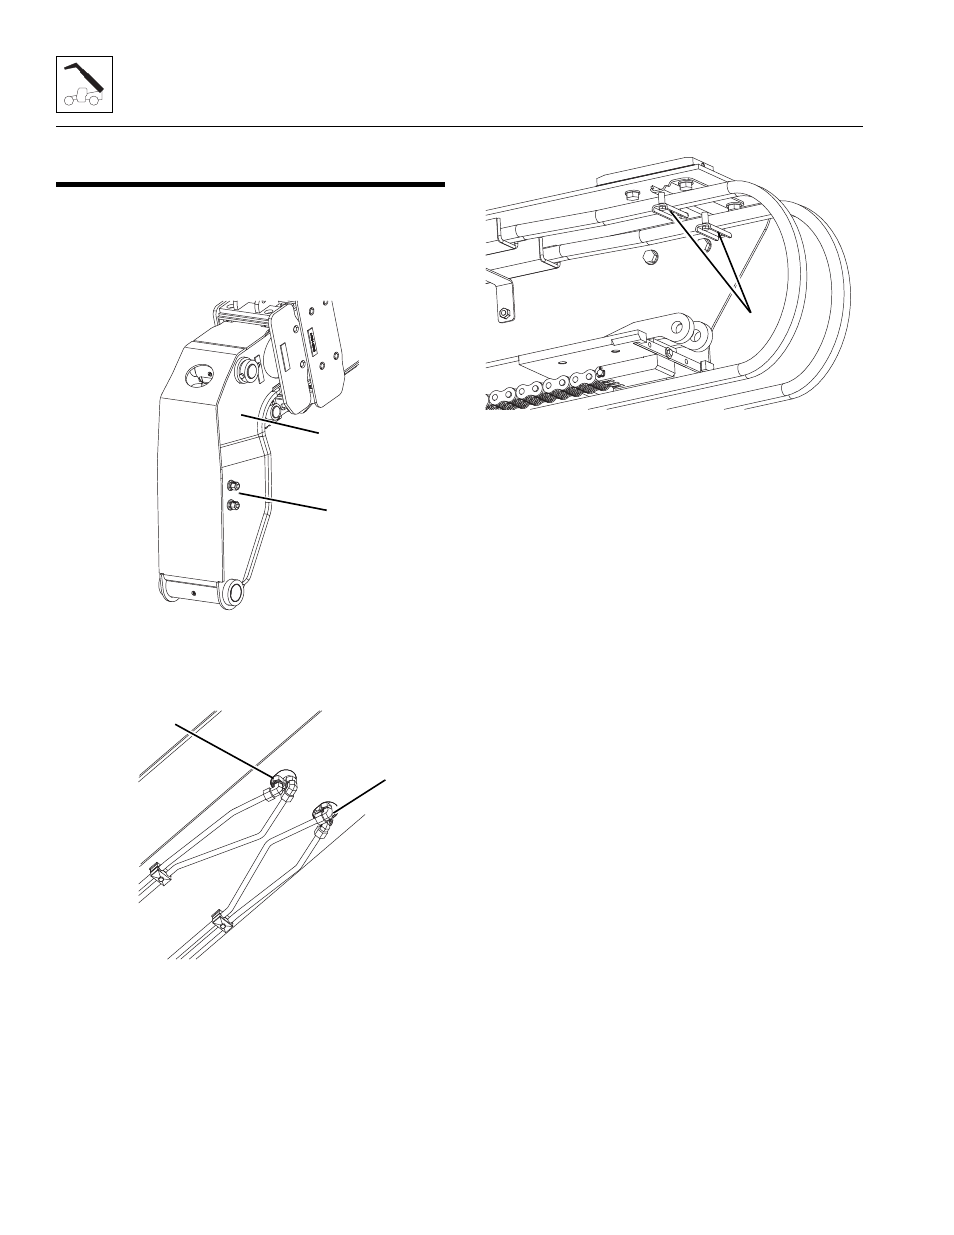
Tilt/Auxiliary Hose Removal
1. Label, disconnect and cap both hoses from the tilt
cylinder (1) and (if equipped) auxiliary fittings (2) at the
front of the boom. Cap all fittings and openings to keep
dirt and debris from entering the hydraulic system.
2. Label, disconnect and cap both tilt hoses (3) attached to
the tubes on the bottom of the boom. If equipped,
label, disconnect and cap both auxiliary hoses (3)
attached to the tubes on the bottom of the boom.Cap
all fittings and openings to keep dirt and debris from
entering the hydraulic system.
3. Fasten a rope/wire to the hose end below the first boom
section.
4. Loosen and remove the clamps (5) securing the tilt
hoses and (if equipped) auxiliary hoses at the rear of the
third boom section.
5. From the rear of the boom, pull the tilt hoses from
between the first and second boom sections.
6. From the rear of the boom, pull the tilt hoses from
inside the third boom section.
7. Unfasten the rope/wire from each end of the hose
assembly.
3.5.2
Tilt/Auxiliary Hose Installation
1. Fasten the rope/wire left in the boom from the hose
removal to each end of the new hose at the rear of
boom.
2. Slowly pull the rope/wire from the boom head until the
hose end is visible at the boom head.
3. Slowly pull the rope/wire from below the first boom
section until the hose end is visible at the tube
connections.
4. Unfasten the rope/wire from each end of the hose.
5. Uncap and connect the hoses to the previously labeled
tubes under the first boom section. Refer to Section
2.3.3, “Hydraulic Hose Torque Chart,” for proper hose
torque.
6. Uncap and connect the hoses to the previously labeled
fittings at the tilt cylinder or the auxiliary fittings. Refer
to Section 2.3.3, “Hydraulic Hose Torque Chart,” for
proper hose torque.
7. Install and tighten the clamps holding the tilt hoses at
the rear of the third boom section.
8. Properly connect the battery.
M 7230
Z
1
2
MZ7220
3
4
MZ7200
5