2 transmission removal/installation, 3 engine disassembly, inspection and service, 4 engine/transmission installation – JLG 4017RS Service Manual User Manual
Page 128: Section 7.9.4, “engine/transmission, Installation,”f, Transmission removal/installation, Engine disassembly, inspection and service, Engine/transmission installation
Engine
7-14
3614RS, 4017RS
16. Remove exhaust pipe from exhaust manifold. Refer to
Section 7.7, “Engine Exhaust System.”
Note: Emission Sensitive Exhaust. Assembly must be replaced
exactly as removed.
17. Remove air cleaner assembly. Refer to Section 7.8, “Air
18. Remove drive shaft assemblies.Refer to Section 5.9.3,
19. Secure engine with a lifting strap or chain from
appropriate lifting points. Use a suitable hoist or
overhead crane
.
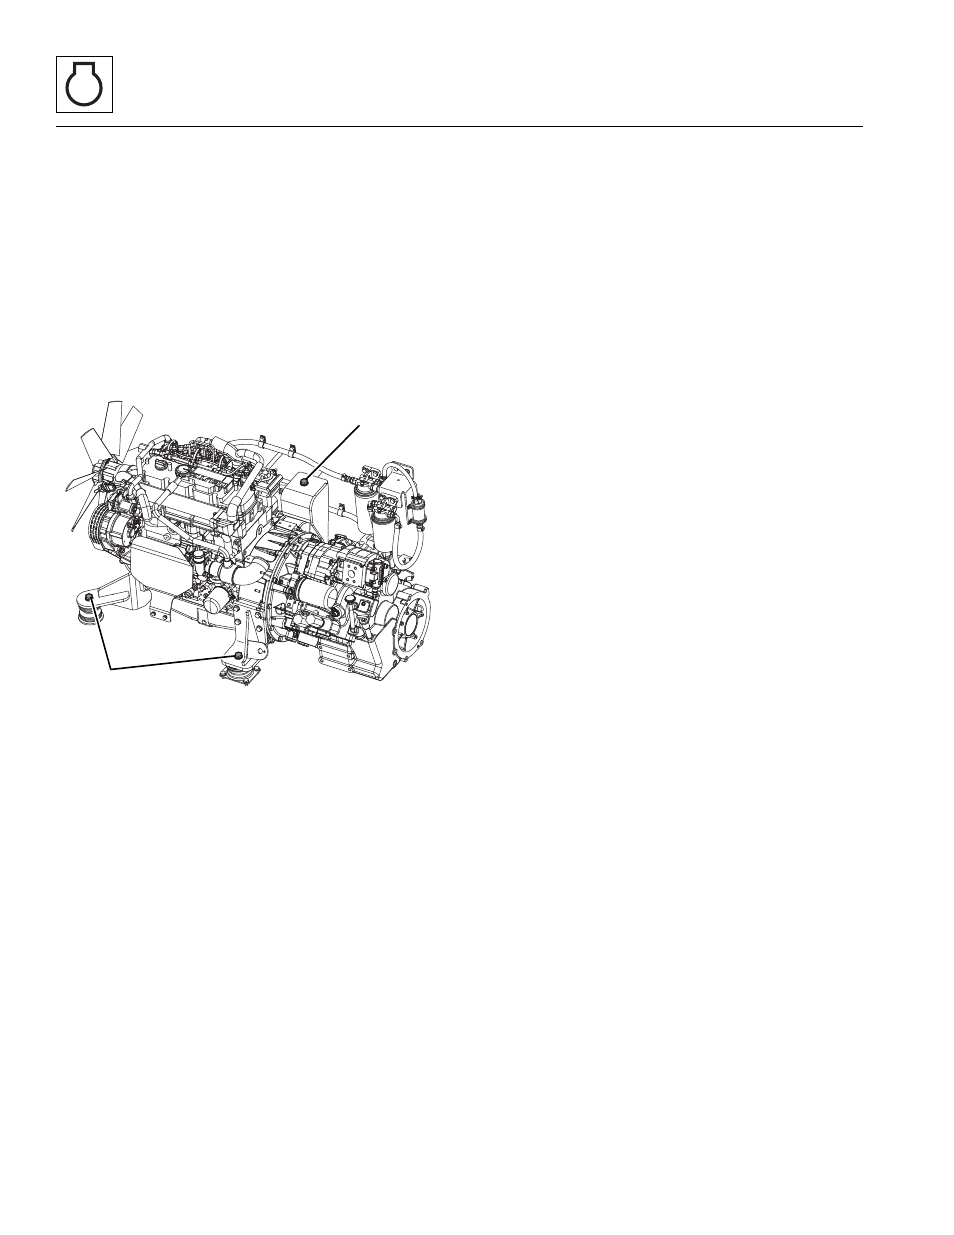
20. Loosen and remove four engine/transmission mounting
bolts (5).
21. Slightly lift and pull engine/transmission out of
machine. Have an assistant ensure that
engine/transmission clears all frame components
during removal.
22. Place engine/transmission on a flat, level surface.
7.9.2
Transmission Removal/Installation
1. Refer to Section 6.4, “Transmission Replacement,” for
detailed transmission removal and
installation instructions.
7.9.3
Engine Disassembly, Inspection
and Service
Engine disassembly, internal inspection, service, repair and
assembly procedures are covered in the Engine Service
Manual. Several special engine service tools are required to
properly service the engine. Contact the local Caterpillar dealer
for further information.
Note: If engine is being replaced, there may be external
components that will be required to be transferred from original
engine to replacement engine depending upon who you purchase
new engine from and configuration of your replacement engine.
Refer to appropriate Engine user manual for detailed procedures
that cover transfer of original engine components to replacement
engine.
7.9.4
Engine/Transmission Installation
1. Attach a lifting chain to the front and rear engine
lift brackets, and lift engine/transmission clear of
the ground.
Note: Apply Loctite
®
243
TM
to the engine mount bracket bolts
before installation.
2. Lift engine/transmission and slowly push and lower into
engine compartment. Have an assistant ensure that
engine/transmission clears frame, hose and harness
components during engine/transmission installation.
Position engine/transmission brackets over frame
mounts.
3. Align motor mount holes and install front mounting
bolts and washers.
4. Align motor mount holes and install rear mounting
bolts and washers.
5. Lower engine onto mounts.
6. Install flat washer, lock washer and nut on front two
mounting bolts.
7. Remove lifting chains
8. Torque engine /transmission mounting bolts (5)
to 241 Nm (178 lb-ft).
9. Install air cleaner. Refer to Section 7.8.2, “Air Cleaner
10. Install exhaust pipe. Refer to Section 7.7.2, “Exhaust
11. Install radiator assembly. Refer to Section 7.4.3,
“Radiator Assembly Replacement.”
12. Install drive shaft assemblies. Refer to Section 5.9.5,
13. Connect and secure all the previously labeled hydraulic
hoses, fuel lines and electrical wire connections on
engine and transmission.
M 7550
Z
5
5