JLG 4017RS Service Manual User Manual
Page 120
Engine
7-6
3614RS, 4017RS
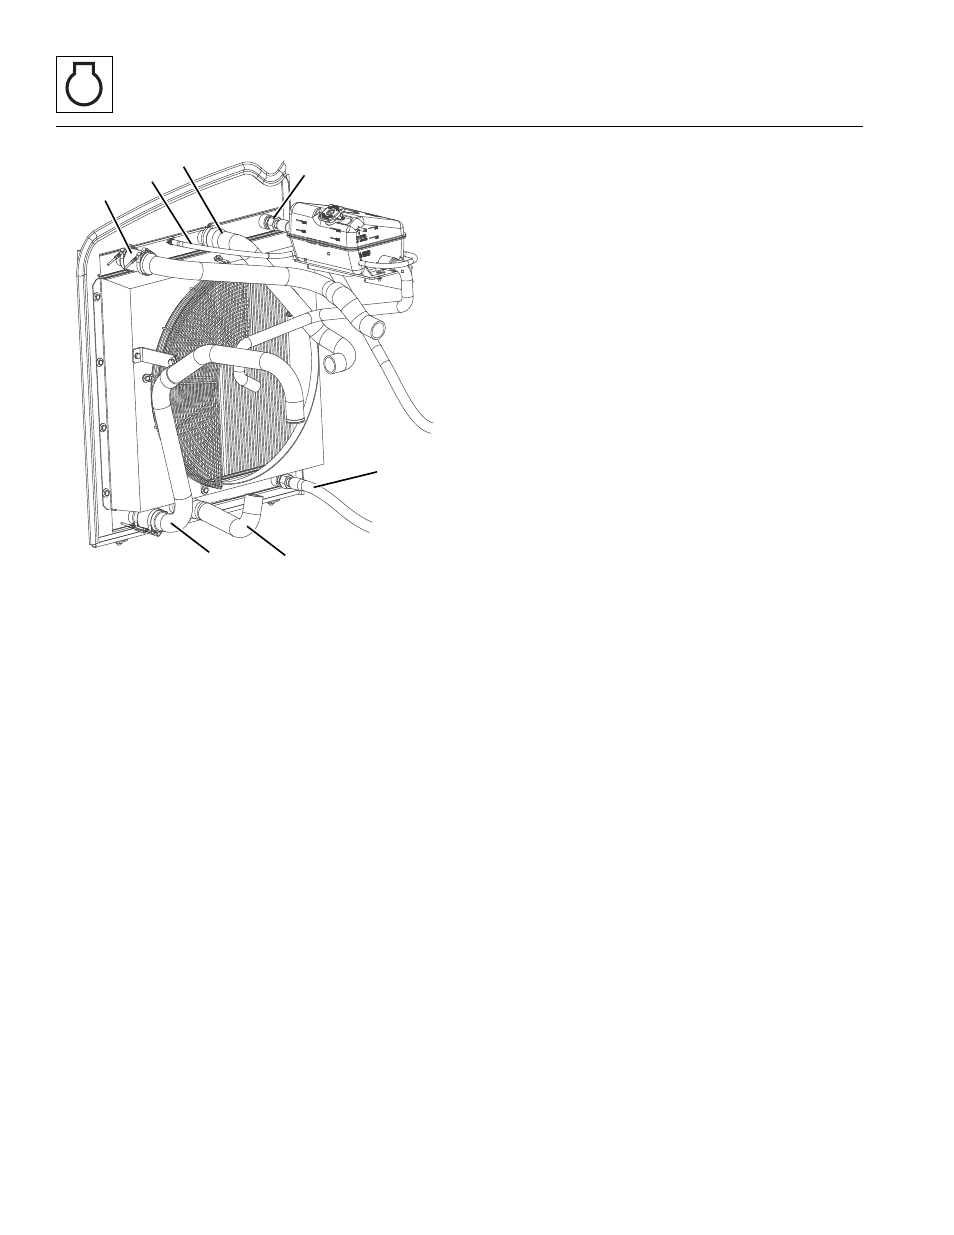
13. Label and disconnect both transmission cooler hoses
(6). Cap all fittings and openings to prevent dirt and
debris from entering hydraulic system.
14. Loosen and remove radiator assembly mounting bolts,
washers and (if equipped) shims. Note the number of
shims being used and there location.
15. Label, disconnect and cap hoses attached to coolant
recovery tank (7). Remove coolant recovery tank and
mounting plate
16. Loosen and remove air intercooler tubes (8) from
radiator assembly.
17. Loosen and remove the radiator hoses (9) from radiator
assembly.
18. Carefully lift the radiator assembly out of the
engine compartment.
Note: Fan Guard can be removed after radiator assembly is
removed and placed in a secure location.
b. Radiator Assembly Installation
1. Place radiator assembly in engine compartment at the
original orientation. Secure with the previously used
hardware.
2. Uncap and connect previously labeled hoses to radiator,
transmission cooler and oil cooler.
3. Fill hydraulic oil reservoir. Refer to Section 8.7.2,
“Hydraulic Oil Reservoir Filling.”
4. Fill transmission. Refer to Section 2.5, “Fluids, Lubricants
5. Open surge tank cap and fill the radiator completely
with coolant. Replace and tighten surge tank cap. Refer
to Section 2.5, “Fluids, Lubricants and Capacities.” for
proper capacities.
6. Properly connect battery.
7. Run engine to operating temperature. Visually check for
leaks with engine running. Check all fluid levels for
correct levels.
8. Install the end cover, hood and belly pans on the engine
compartment.
9. Close and secure engine cover.
10. Remove Do Not Operate Tag from ignition key switch
and the steering wheel.
M 7450
Z
6
6
8
7
9
8
9