3 roof window wiper motor, Roof window wiper motor – JLG 4017RS Service Manual User Manual
Page 169
9-17
3614RS, 4017RS
Electrical System
9.7.3
Roof Window Wiper Motor
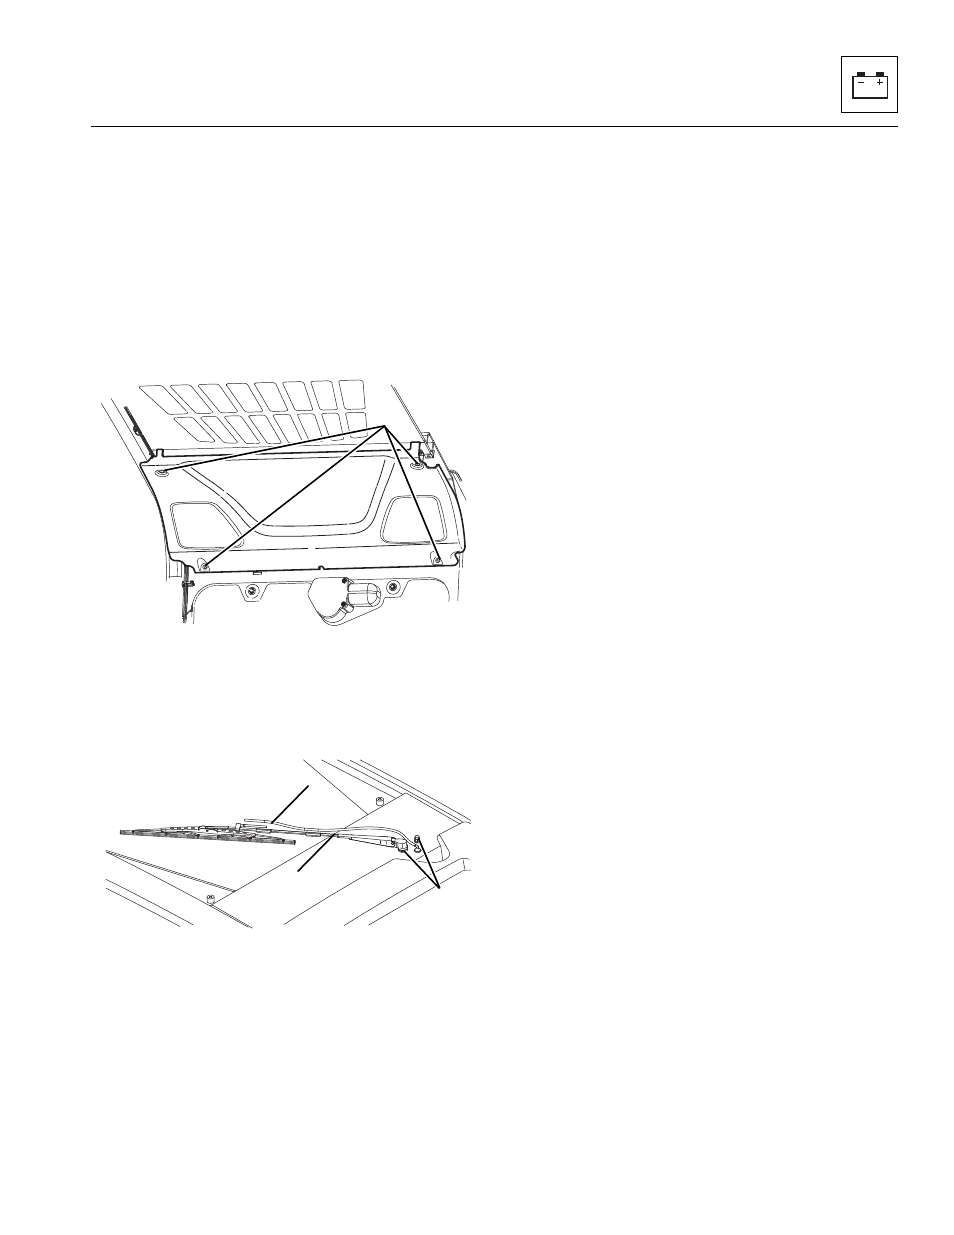
a.
Removal
1. Park machine on a firm, level surface, level machine, fully
retract boom, lower boom, place transmission in (N)
NEUTRAL, engage parking brake, and shut engine OFF.
2. Place a Do Not Operate Tag on both ignition key switch
and steering wheel.
3. Open engine cover. Allow system fluids to cool.
4. Properly disconnect battery.
5. Remove hardware securing access cover (1).
6. Disconnect electrical harness connectors from the
wiper motor.
7. Disconnect reservoir hose from wiper linkage (2).
8. Remove wiper linkage (3).
9. Loosen and remove hardware (4) holding wiper motor
assembly to machine.
Note: Retain all hardware removed from wiper assembly for
possible reuse on replacement motor housing.
10. Remove wiper assembly from window.
b. Disassembly
DO NOT disassemble the motor. The motor is not
serviceable. Replace motor if found to be defective.
c.
Inspection and Replacement
Inspect motor terminals for continuity. Replace motor if
continuity is not found.
d. Installation and Testing
1. Align wiper assembly with mounting holes and secure
assembly to machine.
2. Connect wiper linkage to wiper motor shaft.
Note: Align wiper linkage arm with flat on motor shaft to
ensure wiper stroke covers window area, and it does not swipe
past glass area.
3. Connect reservoir hose to wiper linkage.
4. Connect electrical harness to wiper motor.
5. Properly connect battery.
6. Turn ignition key switch to RUN position, and operate
windshield wiper in both LOW and HIGH speeds to
ensure proper operation and that correct wiper travel is
achieved.
7. Secure access cover with hardware removed earlier.
8. Close and secure engine cover.
9. Remove Do Not Operate Tag from ignition key switch
and steering wheel.
MZ8150
1
MZ8140
4
2
3