JLG G5-18A Service Manual User Manual
Page 83
7-5
G5-18A, 2505H, 25.5
Engine
17. Place a funnel at the base of the radiator to channel
the drained coolant into the container. Open the
radiator petcock and drain the coolant into the
funnel. Transfer the fluid into a properly labeled
container. Dispose of properly if coolant needs to be
replaced. Close the radiator petcock.
18. Remove air dam (6) to gain access to the cooling
package lifting eye mounts.
19. Loosen the mounting bolts and move the surge tank
(4) to access the cooling package lifting eye mounts.
20. Remove the top radiator hose (7) and hose from the
surge tank attached to the radiator. Cap all fittings
and openings to keep dirt & debris from entering the
cooling system.
21. Place a suitable container beneath the hydraulic oil
cooler fittings. Transfer any hydraulic oil into a
properly labeled container. Dispose of properly.
22. Disconnect and cap the hydraulic hose (8) attached
to the radiator/oil cooler assembly. Allow hydraulic oil
to drain from the hydraulic oil cooler. Cap all fittings
and openings to keep dirt & debris from entering the
hydraulic system.
23. Disconnect the hydraulic cooler temperature sensor
(9).
24. Loosen and remove the four mounting nuts and
rebound washers (9) from the radiator assembly.
25. Connect a lifting strap to the radiator/oil cooler
assembly lifting eyes.
26. Slowly lift the radiator assembly to gain access to the
fan side, hydraulic oil cooler out hose connections
and the bottom radiator hose.
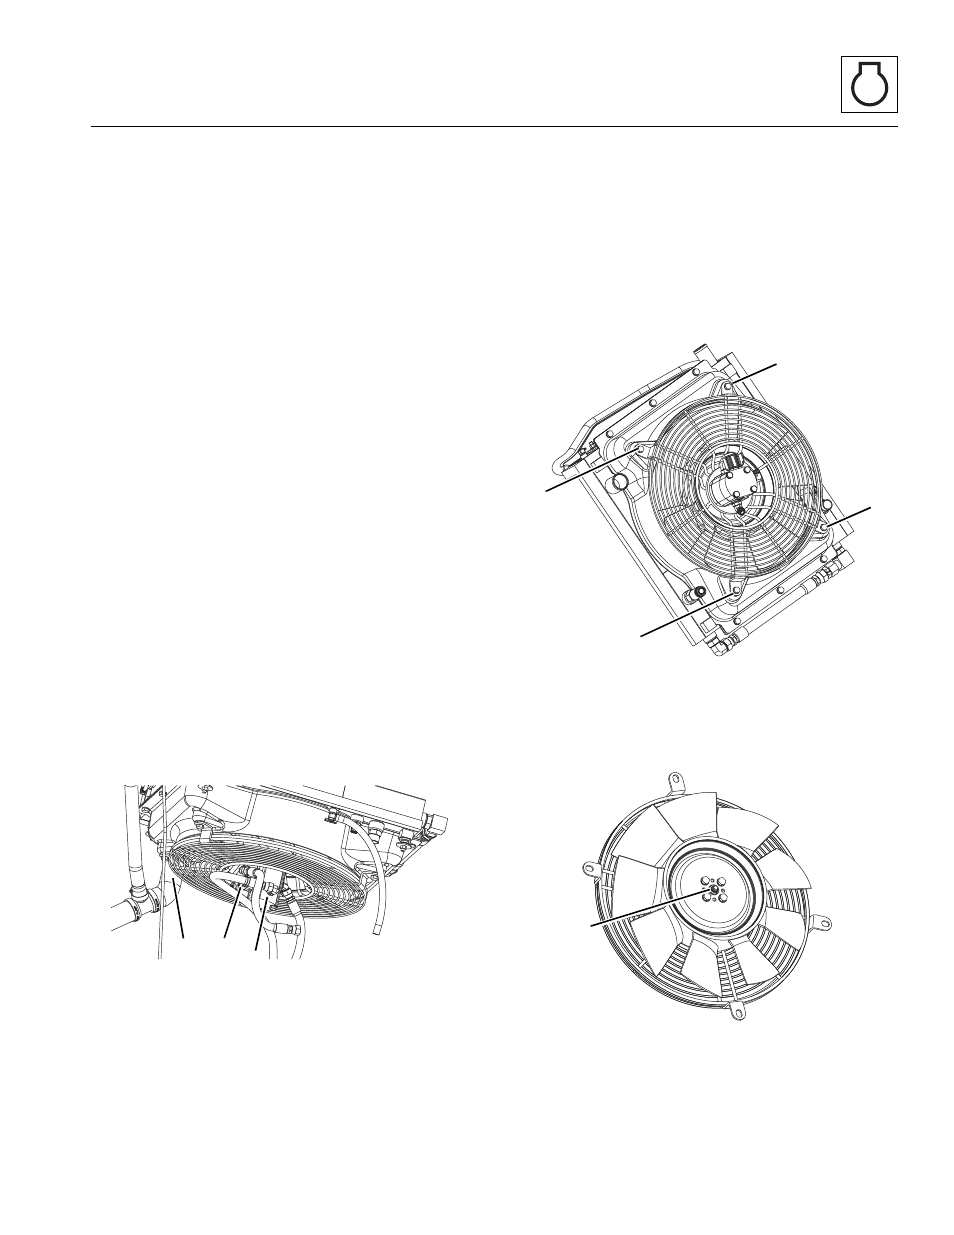
27. Disconnect the connector on the fan solenoid(s).
Loosen and remove the fan solenoid(s) (11).
28. Label, disconnect and cap the three hydraulic hoses
attached to the fan motor (12). Cap all fittings and
openings to keep dirt and debris from entering the
hydraulic system.
29. Loosen and remove the lower hydraulic oil cooler
hose. Cap all fittings and openings to keep dirt &
debris from entering the hydraulic system.
30. Remove the bottom radiator hose (13). Cap all
fittings and openings to keep dirt & debris from
entering the cooling system.
31. Slowly remove the radiator/oil cooler from the
machine.
b. Cooler/Fan Motor Removal
1. Turn the radiator/cooler assembly over and place on
a secure location.
2. Remove the four bolts (14) securing the fan motor/
guard to the radiator/cooler shroud.
3. Turn the fan motor/guard over to access the fan
assembly.
4. Loosen and remove the center bolt and washer (15)
securing the fan to the motor shaft.
MY9000
11
12
13
MY8940
14
14
14
14
MY8950
15