2 engine cooling system, 1 surge tank cap, 2 radiator/oil cooler replacement – JLG G5-18A Service Manual User Manual
Page 82: Engine cooling system, Surge tank cap, Radiator/oil cooler replacement
Engine
7-4
G5-18A, 2505H, 25.5
7.2
ENGINE COOLING SYSTEM
7.2.1
Surge Tank Cap
A 14.5 psi (1,0 Bar) cap is used on the surge tank. An
incorrect or malfunctioning cap can result in the loss of
coolant and a hot-running engine.
7.2.2
Radiator/Oil Cooler Replacement
Before considering radiator or oil cooler replacement for
other than obvious damage, conduct a cooling system
pressure test check the coolant specific gravity, coolant
level, fan belt tension and dash panel temperature
indicator.
• If the engine runs hot, check the temperature of
the upper radiator hose.
• If the hose is not hot, the thermostat may be
stuck in the closed position.
• If the engine has overheated, performance may
suffer, indicating other damage including a leaking
cylinder head gasket, cracked cylinder head or
block, and/or other internal engine damage.
a. Radiator/Oil Cooler Removal
1. Park the machine on a firm, level surface, fully
retract the boom, raise and support the boom, place
the transmission control lever in (N) NEUTRAL,
engage the park brake and shut the engine OFF.
2. Place a Do Not Operate Tag on both the ignition key
switch and the steering wheel, stating that the
machine should not be operated.
3. Open the engine cover. Allow the system fluids to
cool.
4. Thoroughly clean the engine and surrounding area,
including all hoses and fittings before proceeding.
5. Open the battery cover.
6. Properly disconnect the battery.
7. Support or secure the hood assembly.
8. Remove the mounting nuts from the rod end of each
hood gas strut.
9. Remove the two bolts and washers securing each
hinge from the hood side of the hood. Mark each bolt
location before removing to aid in aligning the hood
during reassembly.
10. Remove the hood assembly.
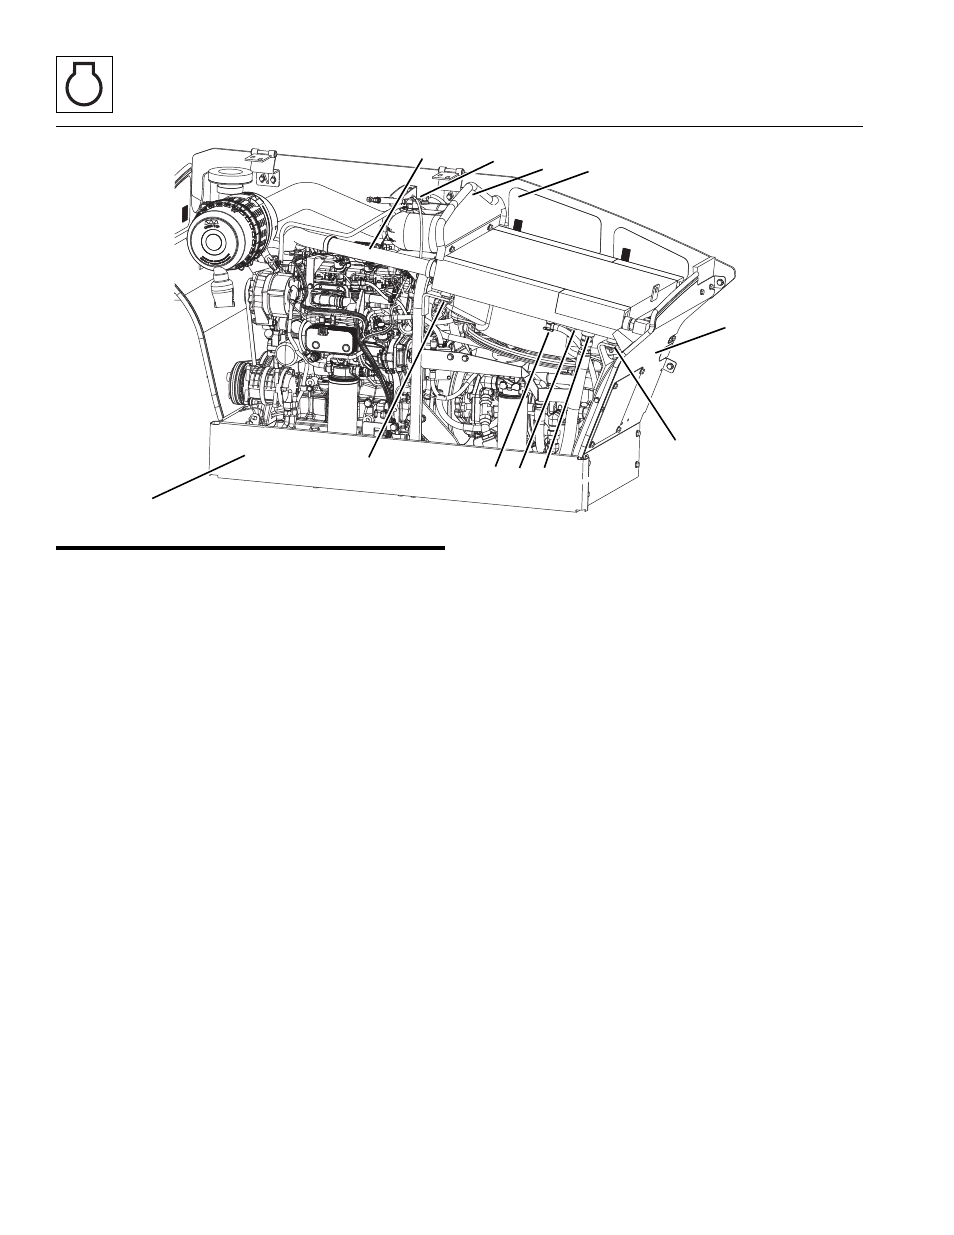
11. Remove the inside firewall plate (1) to access the
back side of the cooling package.
12. Remove the engine pod side skirt (2) and belly pan.
13. Disconnect the ECM connectors and remove any
nylon ties that may be securing the wire harness
mounted to the right front fender.
14. Remove the right front fender (3).
Note: It may be required to remove the right front tire to
access hydraulic hose fittings.
15. Slowly turn the coolant surge tank cap and allow any
pressure to escape (4).
16. Place a suitable container beneath the radiator
petcock (5).
MY8970
2
4
3
1
3
6
7
10
10
9
8