Galaxy® co2 sensor setup — instructions – Eppendorf Galaxy Gas Analyzer User Manual
Page 5
5
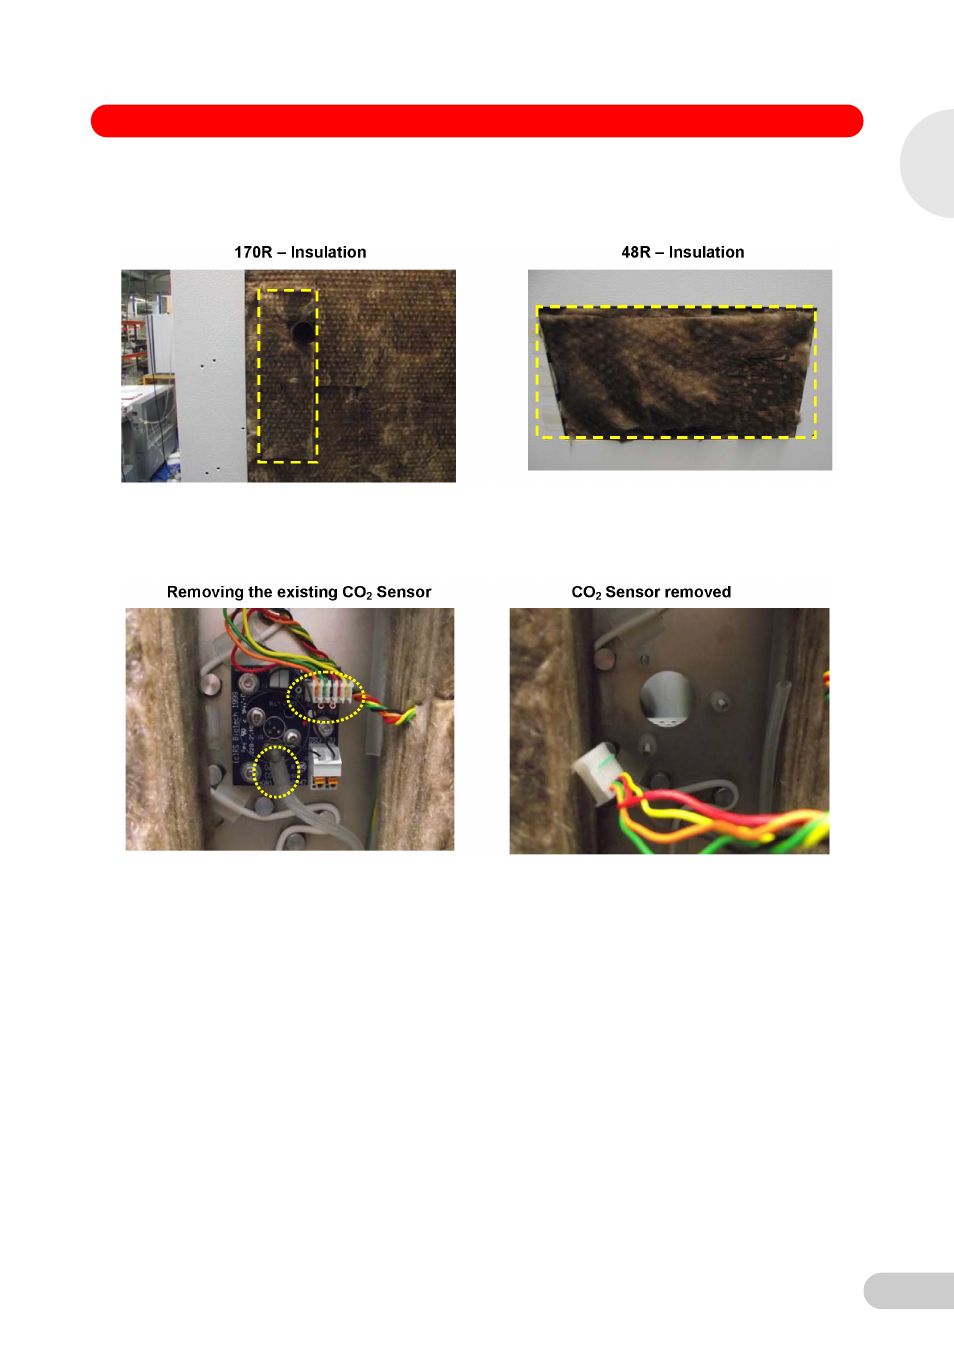
Galaxy® CO2 Sensor Setup — Instructions
3. With the access panel removed, locate the insulation block covering the CO
2
Sensor and
carefully remove the block (shown in yellow dashed boxes in images below) and place to one
side for refitting later. The rear of the CO
2
Sensor will now be visible.
4. Remove the existing CO
2
Sensor by disconnecting the 5 way Molex connector and then
unplug the Auto-Zero port tubing leading from the pump (see dashed yellow circles on image
to the left below). Unscrew the 3 x M3 securing nuts and washers, and place to the side for
refitting (only one nylon washer will be reused).
5. Equipment Tray and 48 R Top Cover:
170 R – Open the rear equipment tray by unscrewing the 2 x large Pozidriv head screws as
shown, reference top left-hand image on page 6 and then remove the cover plate shown
arrowed on top right-hand image page 6 by unscrewing the 4 x Pozidriv head screws. Discard
the old plate after removal. Save screws for further use.
1
Galaxy 170 R / 48 R 120 V / 230 V CO
2
Incubators