2 removing existing parts, Galaxy® co2 sensor setup — instructions, Inc ubators – Eppendorf Galaxy Gas Analyzer User Manual
Page 4
Galaxy® CO2 Sensor Setup — Instructions
4
1.2
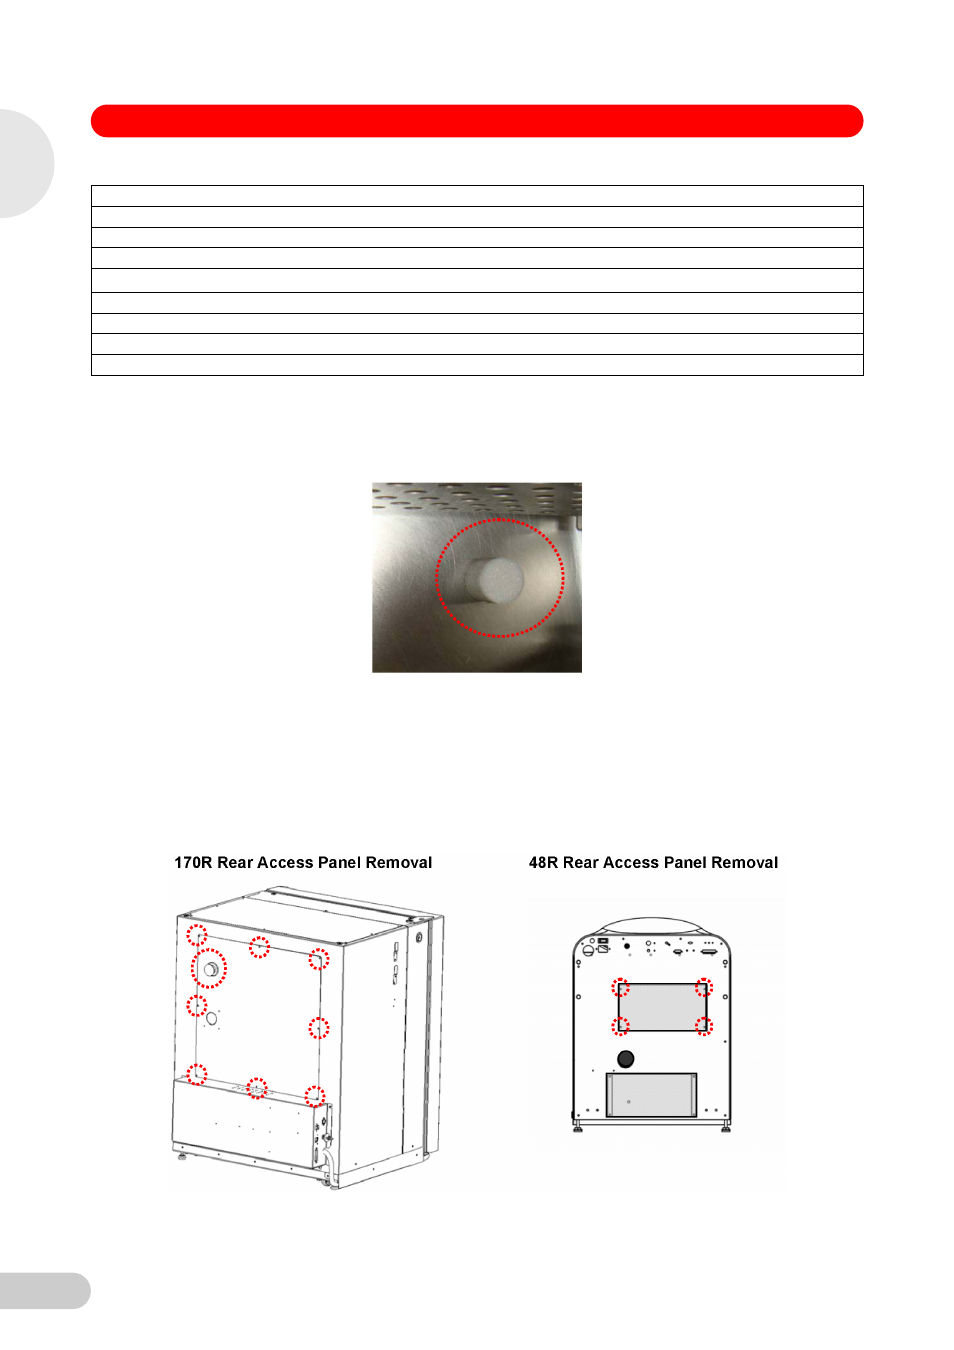
Removing existing parts
1. Power down the Incubator and completely disconnect from the Mains/Power Supply. Open
the outer and Inner Door (option on 48 R) then remove the white porous cover on the CO
2
Sensor from inside the chamber of the incubator (dashed red circle in image below).
2. Rear cover removal:
170 R – Remove the rear access panel by unplugging the access port plug and then
unscrewing the 8 x Pozidriv head screws with washers (see all screws and plug in dashed red
circles in image below).
NOTE: Protect top face of equipment tray with tape.
48 R – Remove the CO
2
Sensor access panel by unscrewing the 4 x Pozidriv head screws
with washers (see all screws in dashed red circles in image below).
48 R – Cover slots along the top face of the power supply box with tape. Remove after retro fit
is complete.
Tools required/recommended
Large sized Pozidriv screwdriver – for Equipment Tray and cover screws
Small sized Pozidriv screwdriver – for 170 R Expansion PCB screws
Side-Cutters – for cutting cable zip ties
5.5 mm nutspinner – for CO
2
Sensor M3 fixing nuts
5 mm nutspinner – for Expansion Board RS232 9 Way ‘D’ Connector fixing posts
T-bar torque limiter screw driver with attachment to fit M3 Hex
EPROM extractor tool or Small flat bladed screwdriver – to remove EPROM
ESD Wrist strap
1
Galaxy 170 R / 48 R 120 V / 230 V CO
2
Inc
ubators