Apple Motion 2 Getting Started User Manual
Page 42
42
Chapter 1
Orientation
3
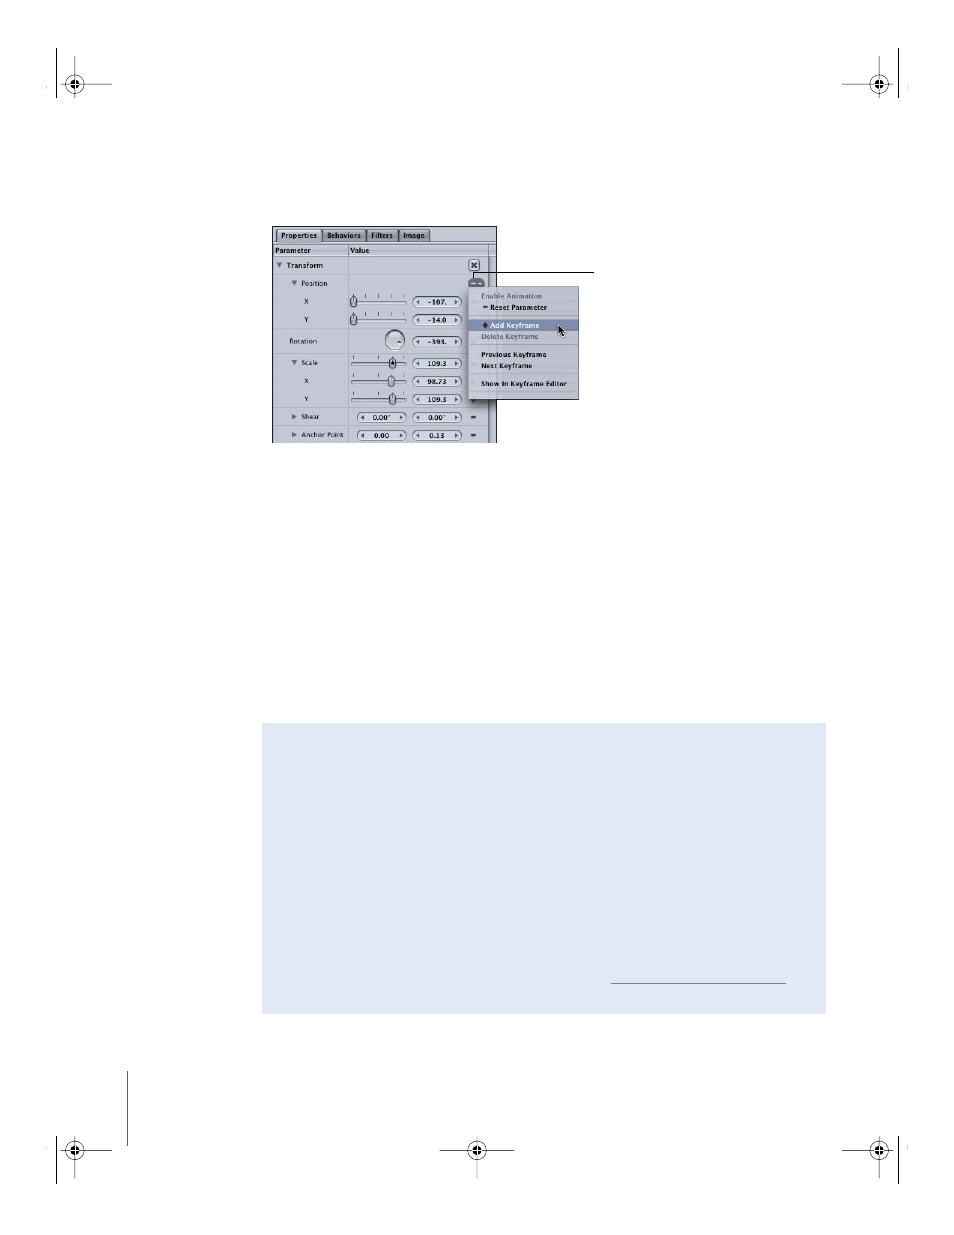
In the Properties tab, click the Animation menu in the Position parameters, then choose
Add Keyframe.
A filled gray diamond appears in the Animation menu, indicating that a keyframe exists
at that frame. The keyframe is set to the current position.
4
Position the object.
The keyframe updates to the new position values.
5
Go to the next frame where you want to create a keyframe.
6
Choose Add Keyframe from the Animation menu.
Important:
Notice that a keyframe must be added first, before you change the position
of the object. If you adjust the object’s position at this point, before adding a second
keyframe, you shift the entire curve because Record is disabled.
7
Move the object to the new position.
Animation
menu
Using the Animation Menu vs. Using the Record Button
When Record is disabled, setting a keyframe using the Animation menu is not the
same as when Record is enabled. When Record is enabled, any changes to a
parameter’s value result in the creation of a keyframe. When Record is disabled, the
Animation menu allows you to explicitly set keyframes. This method can be useful for
changing the value of an entire curve, without having to go in and delete or edit your
initial keyframe. Also, explicit keyframing can be handy for playing with your design
and only setting a few pivotal keyframes, rather than keyframing every move you
make in your project.
When explicitly setting keyframes, keep in mind that you must add a keyframe prior
to modifying a value, or you are merely changing the overall value for that parameter
(shifting the entire curve). For more information, see “
2505.book Page 42 Wednesday, June 30, 2004 5:58 PM