The mini-timeline – Apple Motion 2 Getting Started User Manual
Page 23
Chapter 1
Orientation
23
Note: You can also drag the Play Range arrows to define a playback range. As you drag
the In or Out point, the new In or Out point frame number is displayed.
The Mini-Timeline
You can use the mini-Timeline to import files, as well as to quickly slip objects in time
or trim the duration of an object (without having to open the Timing pane and display
the full Timeline). The bar that appears in the mini-Timeline represents the currently
selected object or layer.
Note: Keyframes can appear in the full Timeline, but do not appear in the mini-Timeline.
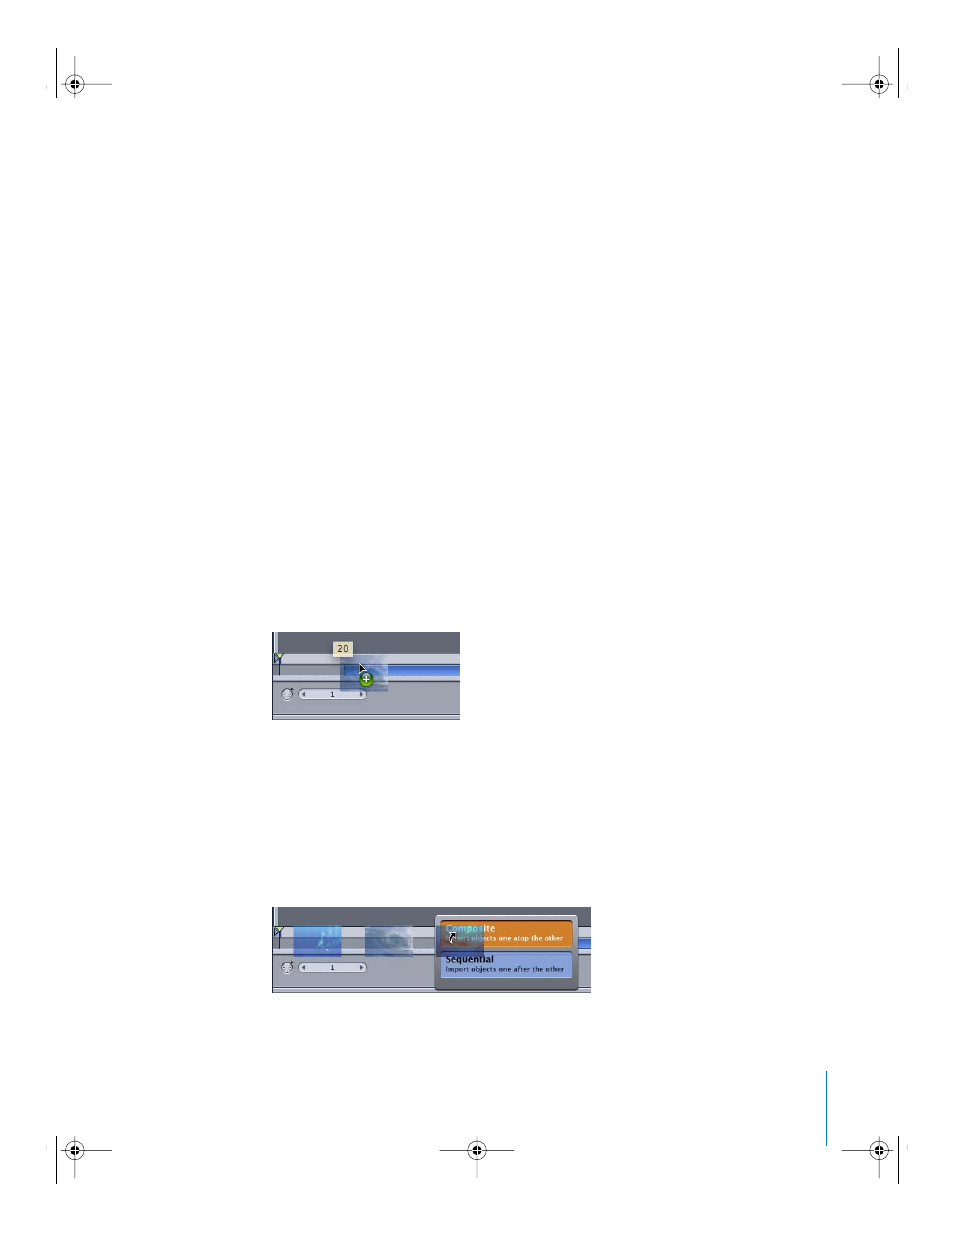
When you import multiple files from the File Browser to the mini-Timeline, you have
the option to composite the objects (place the objects on top of each other), or to
sequence the objects (place the objects one after the other). This option is also
available in the full Timeline.
To add a file to the mini-Timeline:
1
In the File Browser, select the file you want to import.
2
Drag the file to the mini-Timeline and position the pointer over the gray bar in
between the light-gray bar (that contains the playhead) and the transport controls.
While dragging the pointer in the mini-Timeline, the current frame is displayed and the
“+” sign appears next to the pointer, indicating you can drop the object at any time. A
transparent thumbnail of the object also appears next to the pointer.
3
At the correct frame, release the mouse button.
The object is added to your project at the specified frame.
To add multiple files to the mini-Timeline:
1
In the File Browser, select the files you want to import.
2
Drag the files to the mini-Timeline, and keep the mouse button pressed until the drop
menu appears.
2505.book Page 23 Wednesday, June 30, 2004 5:58 PM