Installation instruc tio ns – Poison Spyder CJ FULL WIDTH CONVERSION KIT User Manual
Page 3
INSTALLATION INSTRUC
TIO
NS
©2009 POISON SPYDER CUSTOMS, INC. • 951-849-5911 • WWW.POISONSPYDER.COM
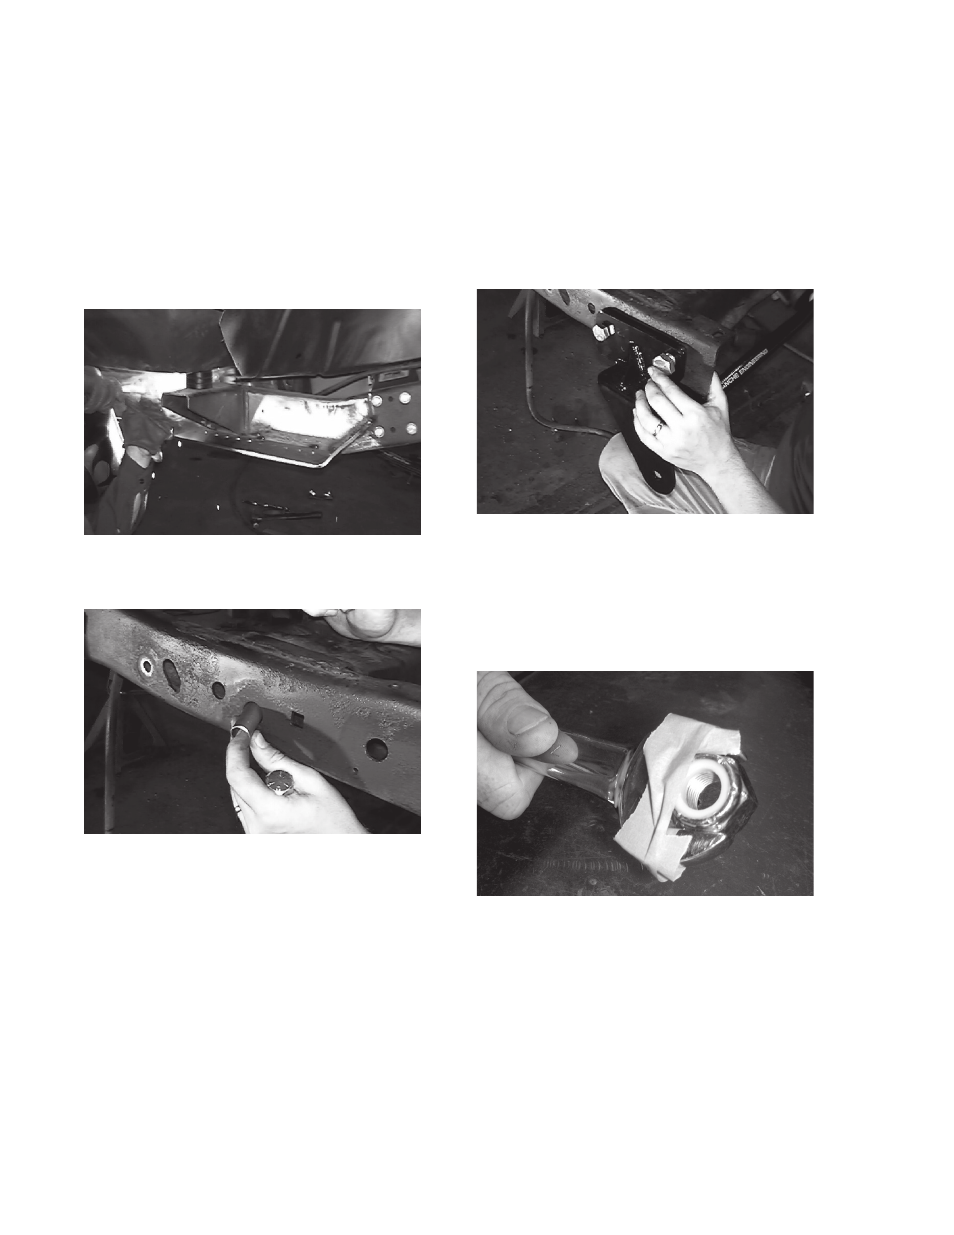
specially designed to index correctly on the
indicated side of the Jeep. The tab with the
“D” or “P” cut into it will slide up between the
vertical gussets of the front body mount to
correctly locate the bracket. Align the bottom
of the bracket with the bottom of the frame
and tack-weld into place. Re-check after
tack-welding for proper fit and alignment,
then finish weld into place, using 1” beads
alternating with 1” gaps.
FIGURE 6
6. Insert the frame sleeves into the second
hole back from the forward end of the frame..
FIGURE 7
7. Install the front outboard bracket. Insert
spacer plates between the frame and the
mounting flange of the bracket, on either
side, as you place the bracket onto the frame.
If you have either a winch plate or frame
plates, you will not use the spacer plates. If
you have both frame plates and a winch plate
you will need to either re-position the winch
plate or notch the frame plates. Be careful
to insert the spacers correctly, which results
in the top edge of the spacer being flush
with the edge of the flange on the bracket
(if improperly installed, the two edges will be
misaligned). Once the outboard bracket is
in place, insert a 5/8-18 X 3-1/2” Gr. 8 hex
head cap screw with 5/8 flat washer through
the rearward hole in the mounting flange,
spacer, and frame rail, on either side. Then
insert a 3/4-16 X 2” Gr. 8 hex head cap screw
with 3/4 flat washer through the forward hole
in the mounting flange, spacer and frame
rail. In both of these cases the flat washer
should be directly under the head of the bolt.
FIGURE 8
8. Thread a 5/8-18 lock nut on to each of
5/8 cap screws inserted in step 7. On the
driver’s side it may be difficult to access this
area. One method to solve this problem is to
tape the lock nut to your wrench as shown in
Figure 9.
FIGURE 9
Then slide the wrench (with the lock nut taped
into it) between the frame and the steering
gear, carefully feel for alignment with the cap
screw threads, then turn the head of the cap
screw to engage it with the lock nut.
Poison Spyder Customs • CJ FULL WIDTH FRONT AXLE CONVERSION Page 3