Installation instruc tio ns – Poison Spyder CJ FULL WIDTH CONVERSION KIT User Manual
Page 2
INSTALLATION INSTRUC
TIO
NS
©2009 POISON SPYDER CUSTOMS, INC. • 951-849-5911 • WWW.POISONSPYDER.COM
Poison Spyder Customs • CJ FULL WIDTH FRONT AXLE CONVERSION Page 2
sockets and ratchet, pry bars, hammers, etc.
(specific wrench sizes are not given)
• Welder and all associated welding and safety
equipment
It is strongly recommended that all welding
be performed by a certified welder. If you are
a beginning welder or not confident in your
welding abilities, DO NOT ATTEMPT the welding
portion of this procedure yourself! Suspension
components are too important to trust to less
than professional welds.
INSTALLATION PROCEDURE
1. Position the Jeep on a level surface. Lift
Jeep with a floor jack and position jack
stands under the frame. Remove front tires.
FIGURE 1
2. Remove the front axle, springs and steering
linkage from the front of the Jeep. Be sure to
cap the brake lines.
FIGURE 2
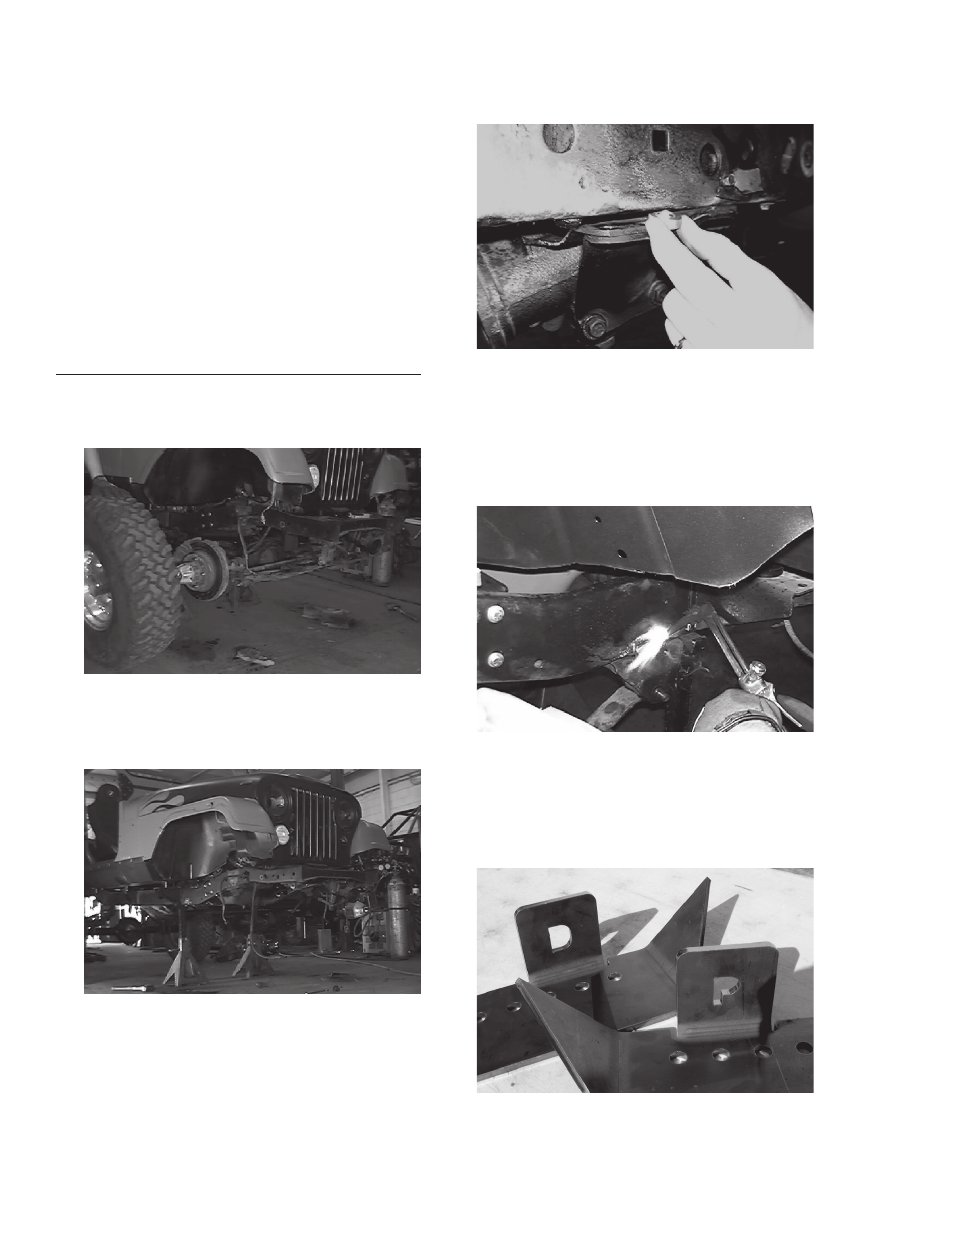
3. Remove the front shackle hangers. On the
driver side, insert the 1/4” X 5/8” spacer into
the gap between the frame and the steering
box bracket as shown in Figure 3. This is the
space that the shackle hanger used to take
up. Then reinstall the bolts for the steering
box bracket and torque to 75 ft./lbs.
FIGURE 3
4. Remove the rearward spring hangers from
the frame. This step will require either a
torch or a grinder. Remove the welds from
the sides of the frame. Remove the rivets
on the inside of the spring hanger. Clean the
frame of all excess weld material and slag.
FIGURE 4
5. Install the rear outboard brackets. Each
bracket has a “D” or “P” laser-cut into it, as
shown in Figure 5, it to identify it as being
for either the driver or passenger side of the
Jeep.
FIGURE 5
Be sure to use the correct one, as it is