Making adjustments to your saw – SawStop 3.0HP User Manual
Page 80
78 SawStop 10” Professional Cabinet Saw
Fig. 124
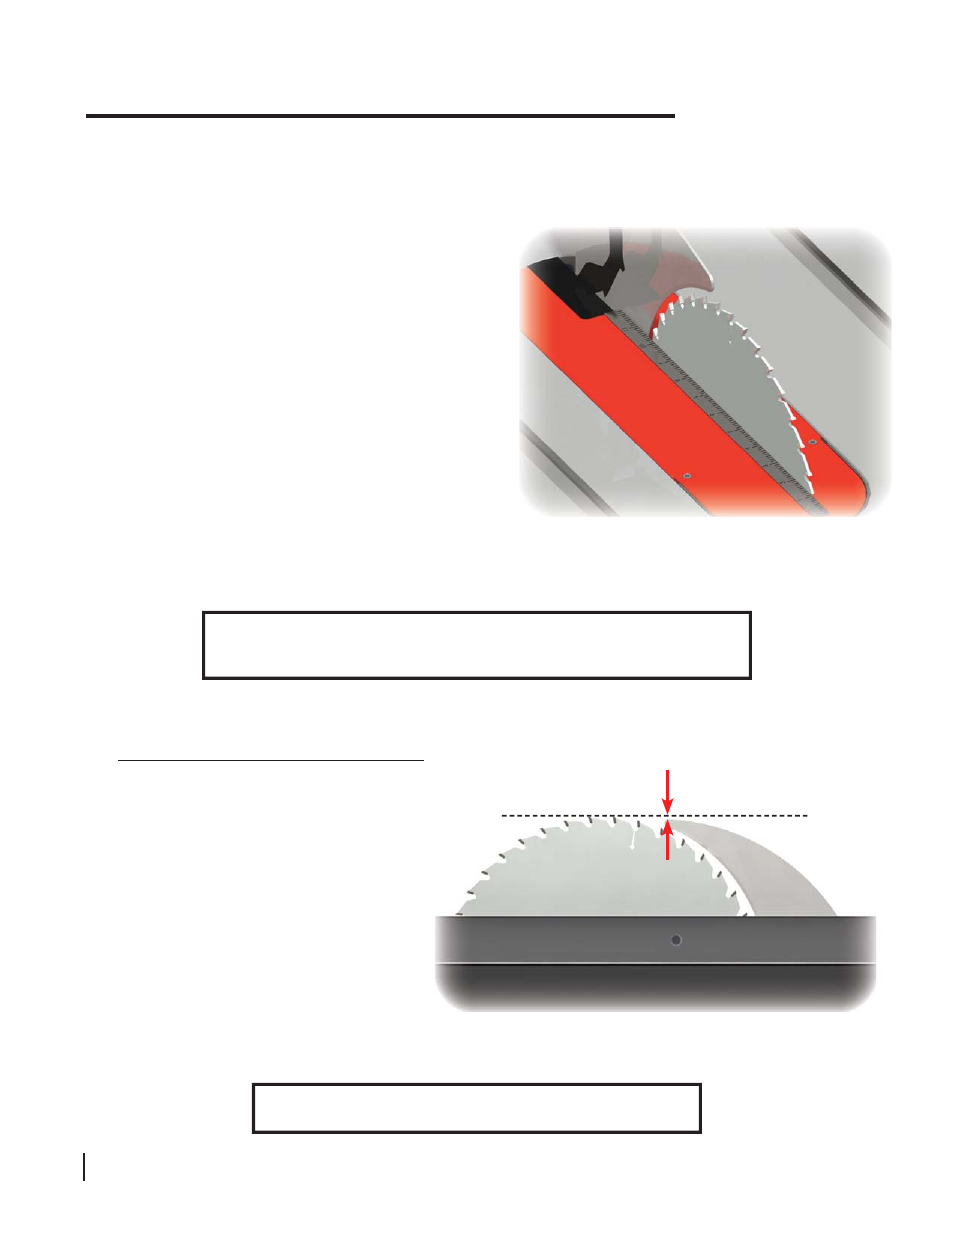
approximately
1 mm
Fig. 123
To align the spreader or riving knife so it is within the kerf of the blade, place a straight edge along the left
side of the blade, making sure the straight edge runs between the teeth (see Fig. 123). Slide the clamp left
or right until the left side of the spreader is fl ush and fl at against the straight edge. If necessary, pivot the left
anti-kickback pawl up out of the way while performing
this step. If you are using a thin-kerf blade (i.e., kerf is
3
⁄
32
inch), you may need to place one or more shims
between the straight edge and the side of the blade to
ensure the spreader is centered with the blade.
To adjust the gap between the front edge of the spreader
or riving knife and the teeth of the blade, slide the clamp
forward or backward until the spacing is approximately
correct.
When the spreader or riving knife is both aligned and
spaced properly, tighten the two mounting bolts to hold
the quick-release clamp in position. You may need to
remove the blade to fully tighten the mounting bolts.
Making Adjustments to Your Saw
WARNING! Make sure there is at least 4 mm spacing between the riving knife
and blade at all points. Contact between the blade and either the riving knife
or spreader during operation may cause the brake system to be activated.
Setting the Height of the Riving Knife
When using the riving knife, the top of the
riving knife should be approximately 1 mm
below the top of the blade (see Fig. 124). This
allows the riving knife to be used on rabbet
cuts and other non-through cuts.
WARNING! Always turn off the main power switch and unplug
the power cord before making any adjustments to your saw.