Preparing your saw for use – SawStop 3.0HP User Manual
Page 32
30 SawStop 10” Professional Cabinet Saw
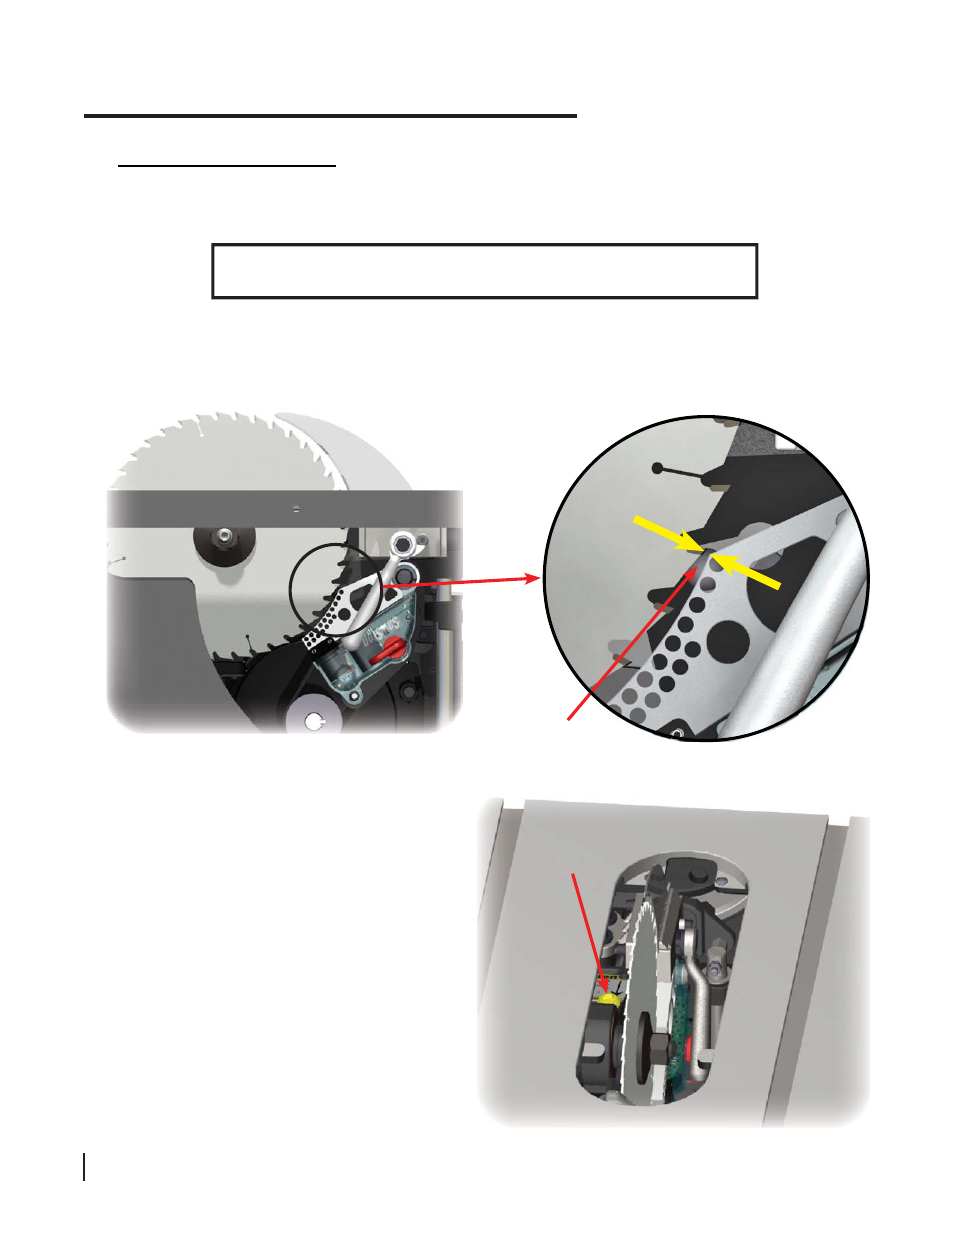
Fig. 44
Fig. 45
Fig. 46
brake
positioning
bolt
Brake Position Adjustment
It is important to accurately adjust the spacing between the brake cartridge and the blade (see Fig. 44). If the brake
is too far from the blade, the safety system will take longer than necessary to stop the blade. On the other hand,
if the brake is too close to the blade, a portion of the blade might contact the brake and cause it to activate.
The exact diameters of 10 inch blades will vary. In addition, blades that have been resharpened one or more
times will usually be under 10 inches. Therefore, always check the spacing between the blade and the
brake when installing a different blade or brake cartridge.
Preparing Your Saw for Use
The spacing between the brake cartridge
and the blade is adjusted by the yellow brake
positioning bolt mounted in the top of the
arbor block (see Fig. 46). To access the brake
positioning bolt, set the tilt angle to 0° and adjust
the blade elevation to approximately 1
1
⁄
2
inches
above the table top. The bolt will be accessible
through the opening in the table top.
Using the 8 mm hex key included with the
saw, turn the brake positioning bolt clockwise
to decrease the spacing between the brake
cartridge and the edge of the blade, or counter-
clockwise to increase the spacing. Adjust the
brake position as needed to set the spacing
between the teeth of the blade and the closest
point on the brake cartridge to between
1
⁄
16
and
1
⁄
8
inch (see Fig. 45).
spacing
WARNING! Always turn off the main power switch and unplug the power cord
before removing, installing, or adjusting the brake cartridge on your saw.