Using your saw – SawStop 3.0HP User Manual
Page 57
SawStop 10” Professional Cabinet Saw 55
Using Y
our
Saw
Continue pushing the workpiece toward the
back of the saw until it clears the anti-kickback
pawls on the spreader. Turn off the motor. Do
not attempt to remove the cut-off portion until the
blade has come to a complete stop.
When ripping pieces longer than approximately
4 feet, use rollers, an out-feed table or a similar
support to prevent the workpiece from dropping
off the back of the table.
When making non-through cuts, the blade guard
and spreader must be removed. For these cuts,
install the riving knife (except when making dado
cuts) and use one or more featherboards to hold
down the workpiece and help prevent kickback.
(See page 97 for instructions on making a
featherboard.) The featherboard should be
clamped to the rip fence.
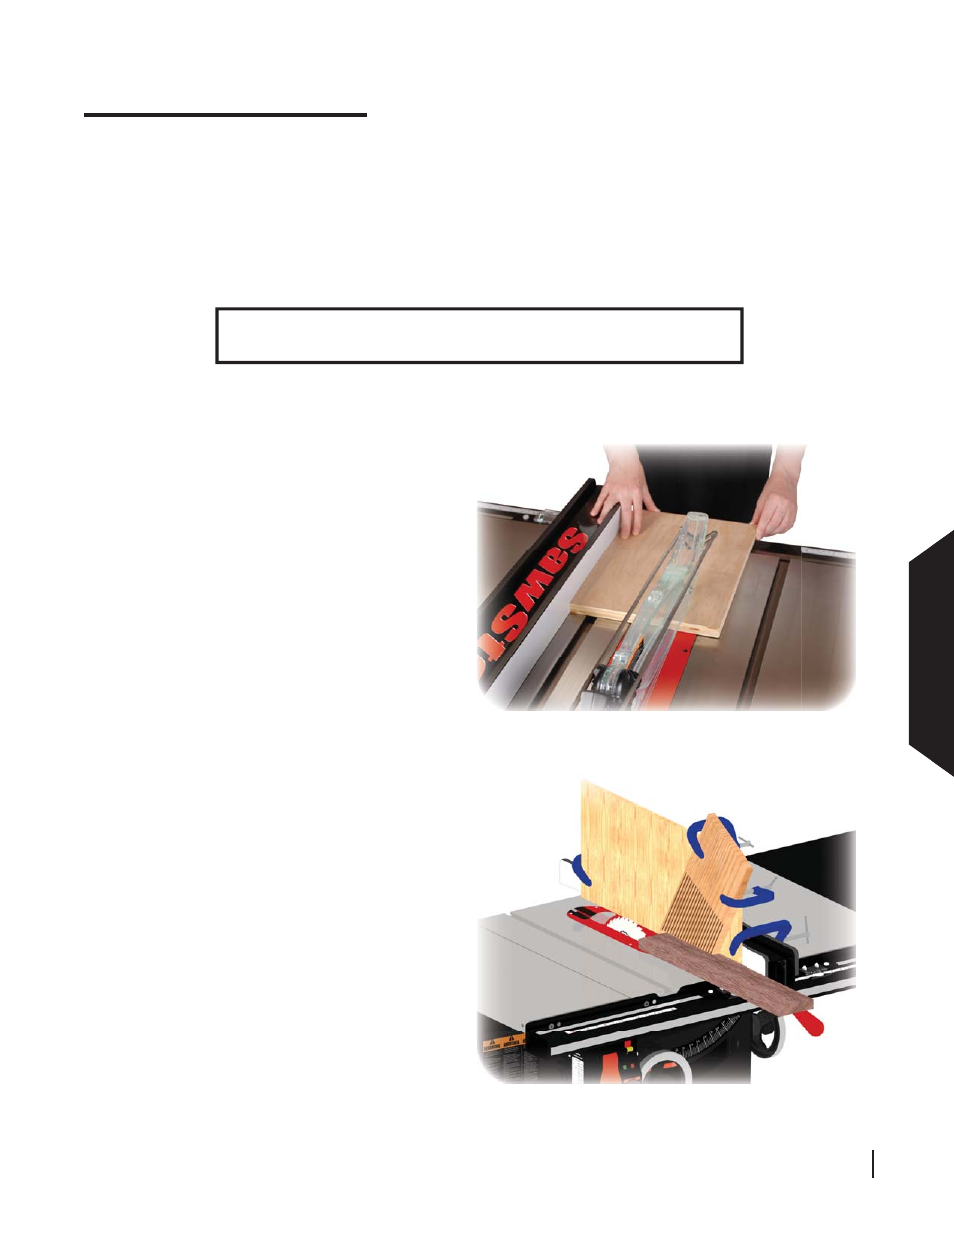
Alternatively, the featherboard can be clamped
to an extender board that is clamped to the
rip fence (Fig. 86). A second featherboard can
be clamped to the top of the table as discussed
above, to hold the workpiece against the fence.
If your cut requires the fence to be positioned too close to the blade to use a push stick, use an auxiliary fence
and a push block to make the cut. (See pages 95 and 96 for instructions on making an auxiliary fence and a
push block.) In this case, clamp the auxiliary fence to the rip fence and slide the workpiece along the auxiliary
fence. When your hand comes within 6 inches of the blade, remove your hand from the workpiece and fi nish
the cut using the push block. Use a featherboard as described above to hold the workpiece fl ush against the
side of the rip fence.
WARNING! To reduce the chance of a serious injury, always use a push
stick or push block when your hand comes within 6 inches of the blade.
Fig. 86
Fig. 85
Using Your Saw