Making adjustments to your saw, Adjusting y our saw – SawStop 3.0HP User Manual
Page 79
SawStop 10” Professional Cabinet Saw 77
Adjusting Y
our
Saw
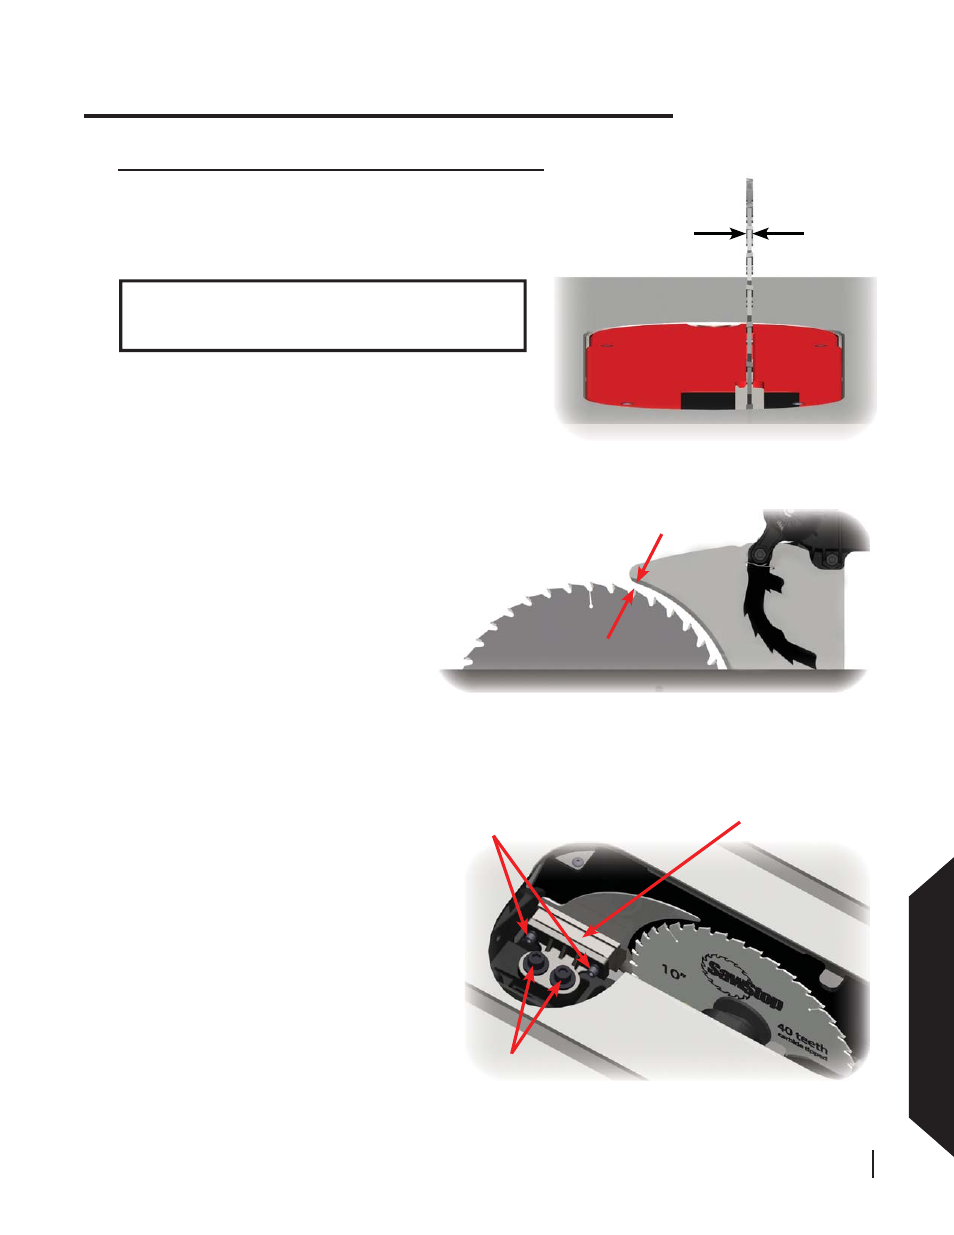
kerf of the
blade
mounting
bolts
vertical
positioning bolts
quick-release
clamp
Fig. 120
Fig. 121
Fig. 122
gap should be
approximately 4-7 mm
Making Adjustments to Your Saw
To adjust the position of the clamp, set the
tilt angle to 0° and remove the table insert.
Remove the blade and set it aside. Make
sure the spreader or riving knife is installed
and lower the blade elevation to zero to
provide access to the clamp.
Two mounting bolts hold the quick-release
clamp in the saw (see Fig. 122). Loosen
both mounting bolts (using an 8 mm hex
key) just enough so that you can slide the
clamp along its mounting surface with some
friction. Reinstall the blade and raise the
blade to the fully elevated position.
Aligning the Riving Knife and Spreader to the Blade
For safe operation, the spreader and riving knife should be
aligned parallel to the blade and positioned inside the kerf of the
blade (see Fig. 120).
There should also be a gap of approximately
4-7 mm between the front edge of the
spreader or riving knife and the teeth of the
blade (see Fig. 121). The spreader or riving
knife is held in position by a quick-release
clamp mounted under the table and behind
the blade (see Fig. 122). If the spreader or
riving knife is not aligned with the blade or
is too close to the blade, then the position
of the clamp must be adjusted. Once the
clamp is properly adjusted, the spreader
and riving knife will automatically align to
the blade when installed in the clamp.
WARNING! Always turn off the main power switch and
unplug the power cord before making any adjustments
to your saw.