Installing a power supply module – Allied Telesis AT-RPS3000 User Manual
Page 61
AT-RPS3000 Redundant Power Supply Installation Guide
61
Installing a Power Supply Module
To install a power supply unit module in the chassis, perform this
procedure:
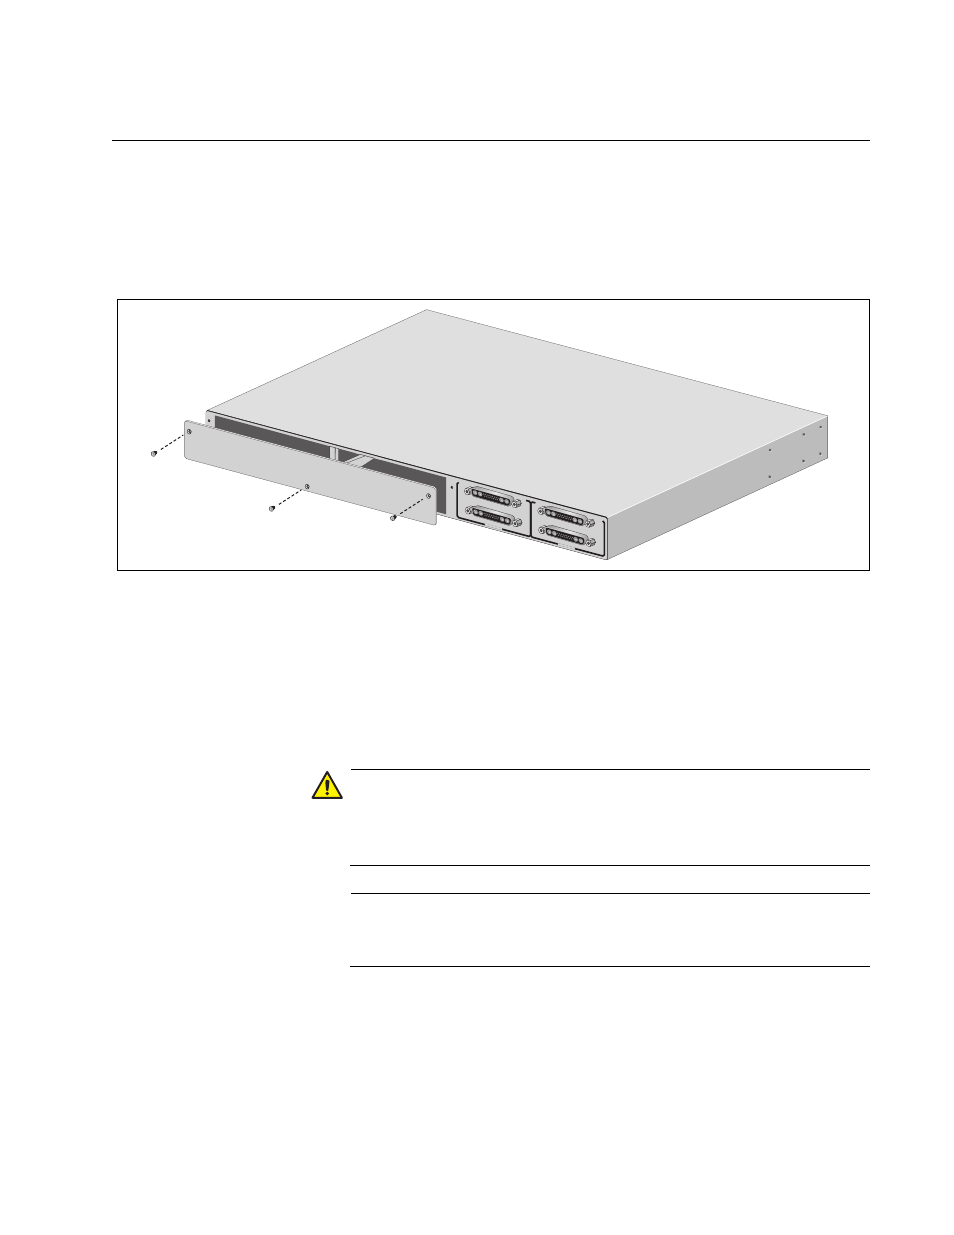
1. Using a cross-head screwdriver, remove the three screws that secure
the blank shipping panel, from the back panel of the chassis.
Figure 39. Removing the Blank Shipping Panel from the Back Panel
2. Orient the new power supply module as shown in Figure 40 on page
62 and slide it into the slot until the tabs with the captive screws are
flush with the back panel of the chassis. (If you are installing only one
power supply module, you may install it in either slot.) Light pressure
may be required to properly seat the module on the power connector
inside the chassis.
Caution
Do not use excessive force when seating the module, because this
may damage the system or the module. If the module resists
seating, remove it from the system, realign it, and try again.
E47
Note
When installed, the AT-PWR1200 Module extends 5.6 cm (2.2 in.)
from the back panel of the chassis.
B
B
1
2
3
4
SYSTEM
PoE+ /
SYSTEM
PoE+ /
SYSTEM
SYSTEM
MODU
LE B
MODU
LE A
A
A
2167