DAVIS Weather Monitor II (7440, 7440CS) User Manual
Page 11
Assembling the Anemometer
Weather Monitor II
Page 7
Avoid lubricating the wind cup shaft and bearings or the wind vane shaft. Nat-
ural or synthetic lubricant reduces the anemometer’s efficiency.
Note:
Do NOT attach the wind vane now. Install the anemometer before attaching wind vane. (See page
11)
To Attach the Anemometer Arm to the Anemometer Base
1. Insert the anemometer arm into the anemometer base, sliding cable through the slot
in the base as shown.
Line up the small hole in the arm with the holes in the base.
2. Insert the 4-40 screw into one of the holes in the base and through the arm.
The screw should slide easily through the holes.
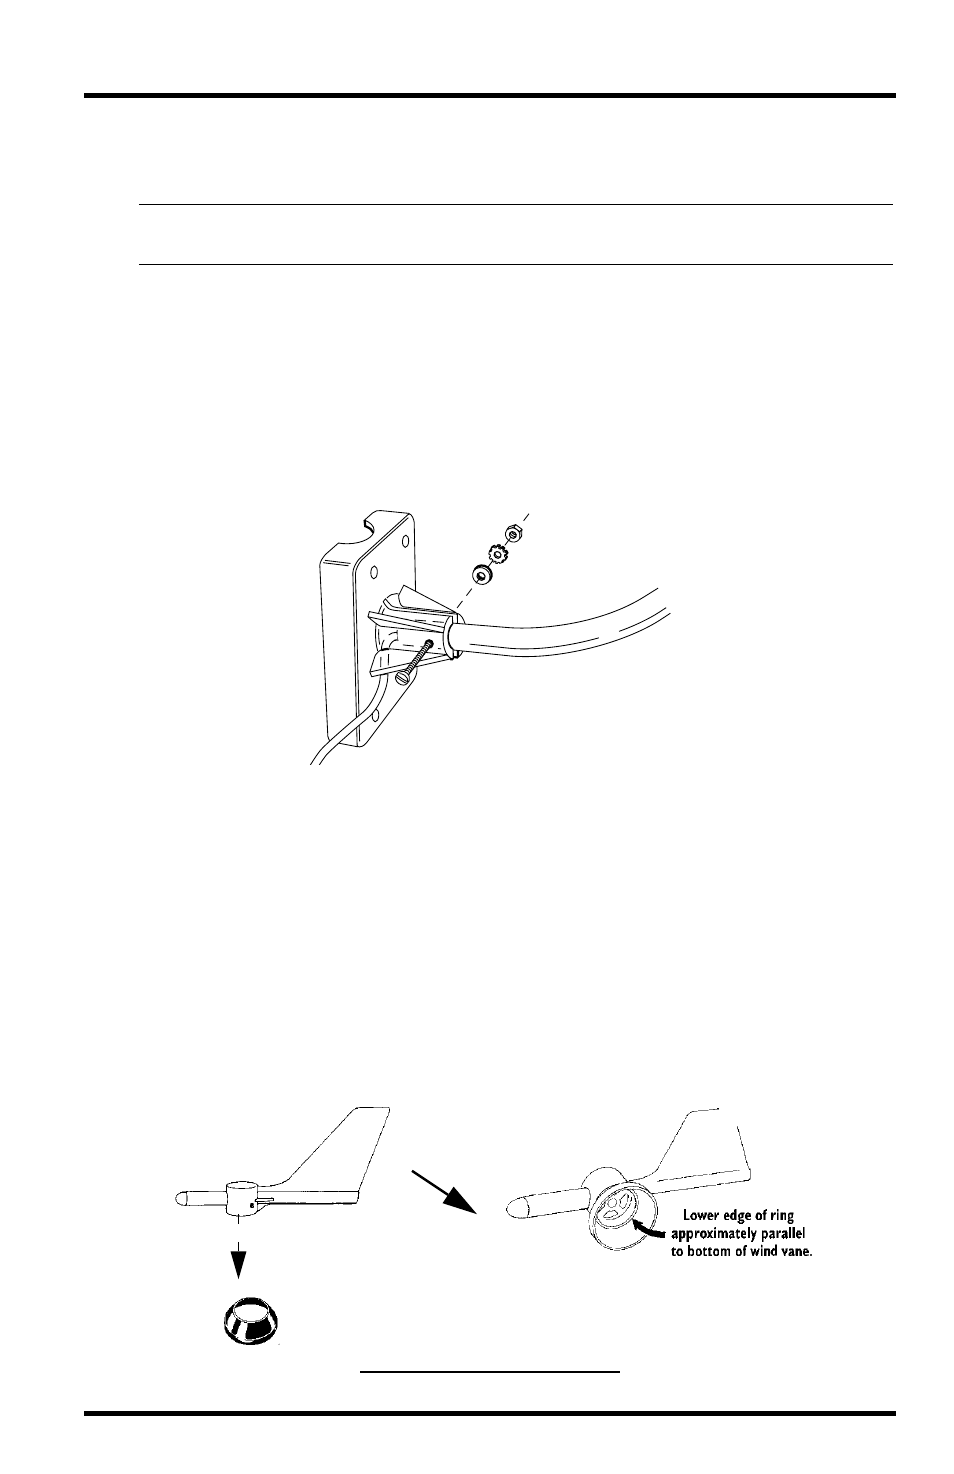
3. Secure as shown below.
To Attach the Drip Rings to the Wind Vane and Anemometer Arm
The drip rings protect against icing of the wind vane and wind cups. If you do
not install them, the anemometer will function normally in non-icy conditions.
1. Remove the wind cups and wind vane from the anemometer using the allen wrench.
For details, consult your station or anemometer manual. You may want to
make a note of the anemometer’s mounted position for later realignment.
2. Place a drip ring on a flat surface with the small hole facing up. Securely press the
wind vane on top of the drip ring.
Tilt the vane slightly. Ensure the ring fits securely between the two ridges on
the vane
S
ECURING
D
RIP
R
ING
ON
W
IND
V
ANE
4-40 Hex Nut
#4 Lock Washer
#4 Flat Washer
4-40 x 1" Pan Head Screw