Obd2 live data mode – Equus 3140 - Scan Tool CanOBD2&1 Kit User Manual
Page 44
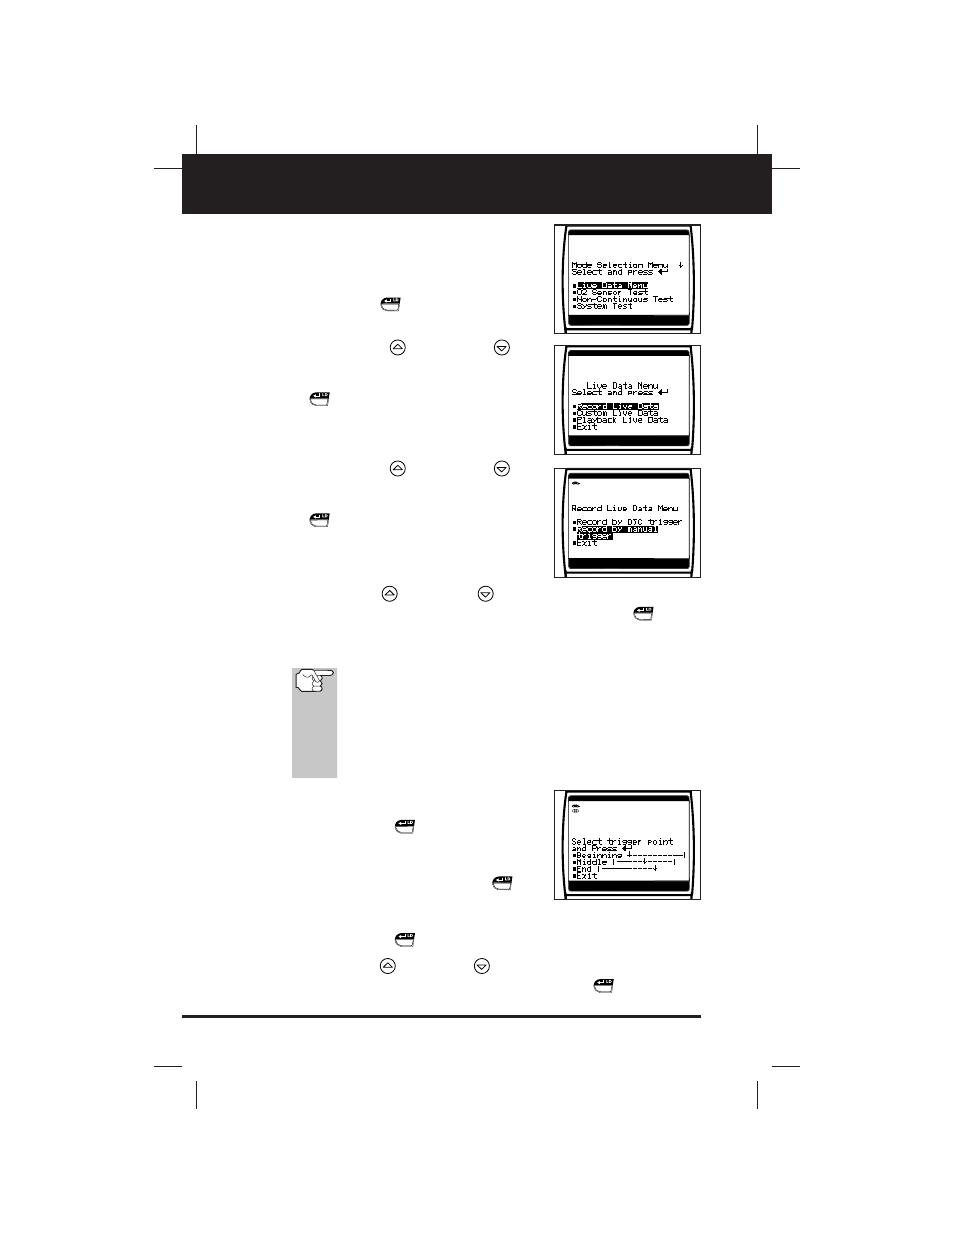
OBD2 Live Data Mode
RECORDING (CAPTURING) LIVE DATA
42
CanOBD2&1
E
1. With the CanOBD2&1 Scan Tool in "Live
Data" mode (see Viewing Live Data on
page 37 for details), press and hold the
ENTER/LD
button until the "Mode
Selection Menu" appears.
2. Use the UP
and DOWN
but-
tons, as necessary, to highlight Live
Data Menu, then press the ENTER/LD
button.
■
The "Live Data Menu" displays.
3. Use the UP
and DOWN
but-
tons, as necessary, to highlight Record
Live Data, then press the ENTER/LD
button.
■
The "Record Live Data Menu" dis-
plays.
4. Use the UP
and DOWN
buttons, as necessary, to highlight
Record by manual trigger, then press the ENTER/LD
button.
5. When the "Record by Manual Trigger" screen displays, select the
desired trigger point as follows:
The CanOBD2&1 Scan Tool is capable of recording approxi-
mately 20 frames of Live Data. Record by DTC trigger lets
you select the point in time at which you wish the
CanOBD2&1 Scan Tool to begin recording Live Data. You can
set the trigger point to record the 20 frames of data before an
event (when the DTC was set), after the event, or in the mid-
dle (10 frames before and 10 frames after the event.
■
Beginning - records approximately
20 frames of Live Data after the
ENTER/LD
button was pressed.
■
Middle - records approximately 10
frames of Live Data before and 10
frames after the ENTER/LD
but-
ton was pressed.
■
End - records approximately 20 frames of Live Data before the
ENTER/LD
button was pressed.
6. Use the UP
and DOWN
buttons, as necessary, to select the
desired trigger point, then press the ENTER/LD
button.