4 hygrogen2 touchscreen interface, 1 controller home screen, In figure 8) – ROTRONIC Hygrogen2 User Manual
Page 22: E-m-hg2-s-v2.1
E-M-HG2-S-V2.1
Rotronic AG
Bassersdorf, Switzerland
Document code
Unit
HygroGen2: Humidity and Temperature Generator
with AutoCal/AutoCal+, Remote Control and
Range Extensions options.
Instruction Manual
Instruction Manual for Software
Version 2.1
Document Type
Page 18 of 75
Document title
3.4 HygroGen2 Touchscreen Interface
The HygroGen2 controller consists of four top level screens that are accessed using the forward or back
buttons in a loop:
Please note: the Programmer Screen is replaced by the AutoCal Screen when AutoCal is activated. The
standard Programmer functionality is still available, however. Please see
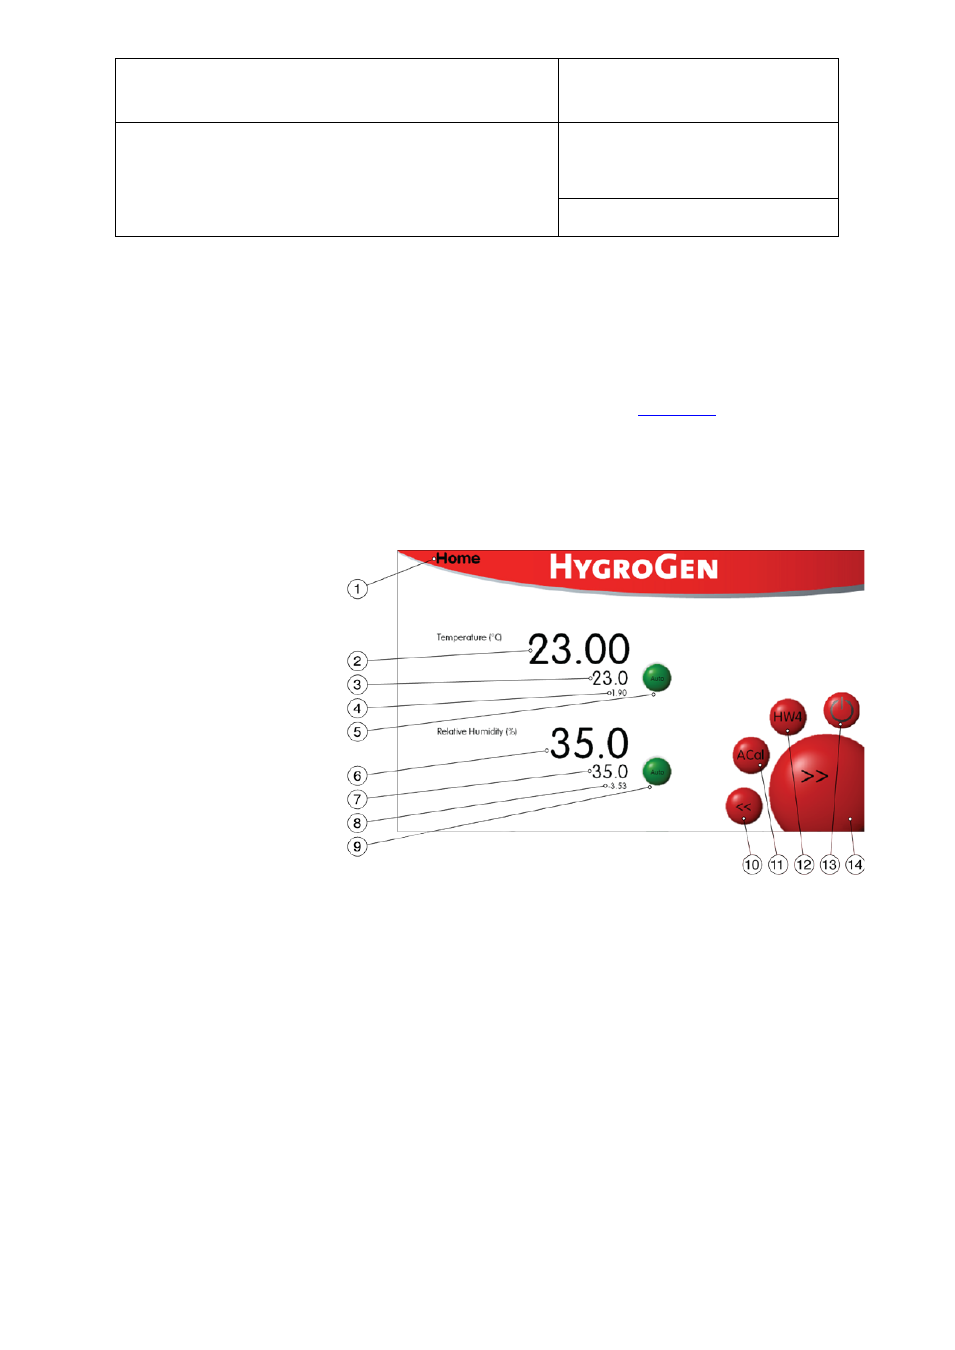
3.4.1 Controller Home Screen
1) Menu (drop down)
2) Chamber temperature
3) Temperature set-point
4) Heating power
5) Temperature control
6) Chamber humidity
7) Humidity set-point
8) Humidification power
9) Humidity control
10) Previous screen
11) Prog/ACal function
12) HW4 software
13) Power off
14) Next screen
Navigating to Other Screens (items 1, 10 & 14)
The user can navigate to different screens using the drop-down menu (item 1) or can scroll through the
four main screens using items 10 & 11.
Setting Temperature and Humidity Set-Points (items 3 & 7)
At any time, the user can change humidity or temperature set-points by simply touching the set-point
on screen. A pop-up will appear and either the touch screen or, when connected, the keyboard/mouse
may be used to input desired values.
Note: To aid a smooth and efficient transition between temperature set-points, the controller is
programmed to suspend humidification during changes in temperature. Once the chamber temperature
is within 0.7°C of the temperature set-point, the humidity control is activated.
Figure 8: HygroGen2 Home Screen
© 2014; Rotronic AG
E-M-HG2-S-V2.1