Thermo Fisher Scientific CyberScan CON 11/CON 110 User Manual
Page 21
Instruction Manual
CON 11/110
17
4.6
Manual Calibration (For Conductivity & TDS Calibration)
In Manual Calibration mode, you can use customised Conductivity / TDS calibration
standards (specific to your own application) and calibrate the meter. The following
example shows the calibration sequence to 12.00 mS conductivity calibration
standard. Set up the manual calibration mode in the SETUP menu Program P9.1 by
setting to “NO”. See page 51.
The following procedure describes the method for a single point calibration. Set the
single point calibration mode to on in the SETUP menu Program 9.2 by setting to
‘YES”. See page 52 for the single point calibration set up procedure.
1. If necessary, press the MODE key to select
conductivity mode.
2. Rinse
the
electrode
thoroughly with de-ionised
water or a rinse solution, and then rinse with a
small amount of calibration standard.
3. Dip the electrode into the calibration standard.
Immerse the electrode tip beyond the upper steel
band (see Figure 6 in page 6). Stir the electrode
gently to create a homogeneous sample. Allow
time for the reading to stabilise.
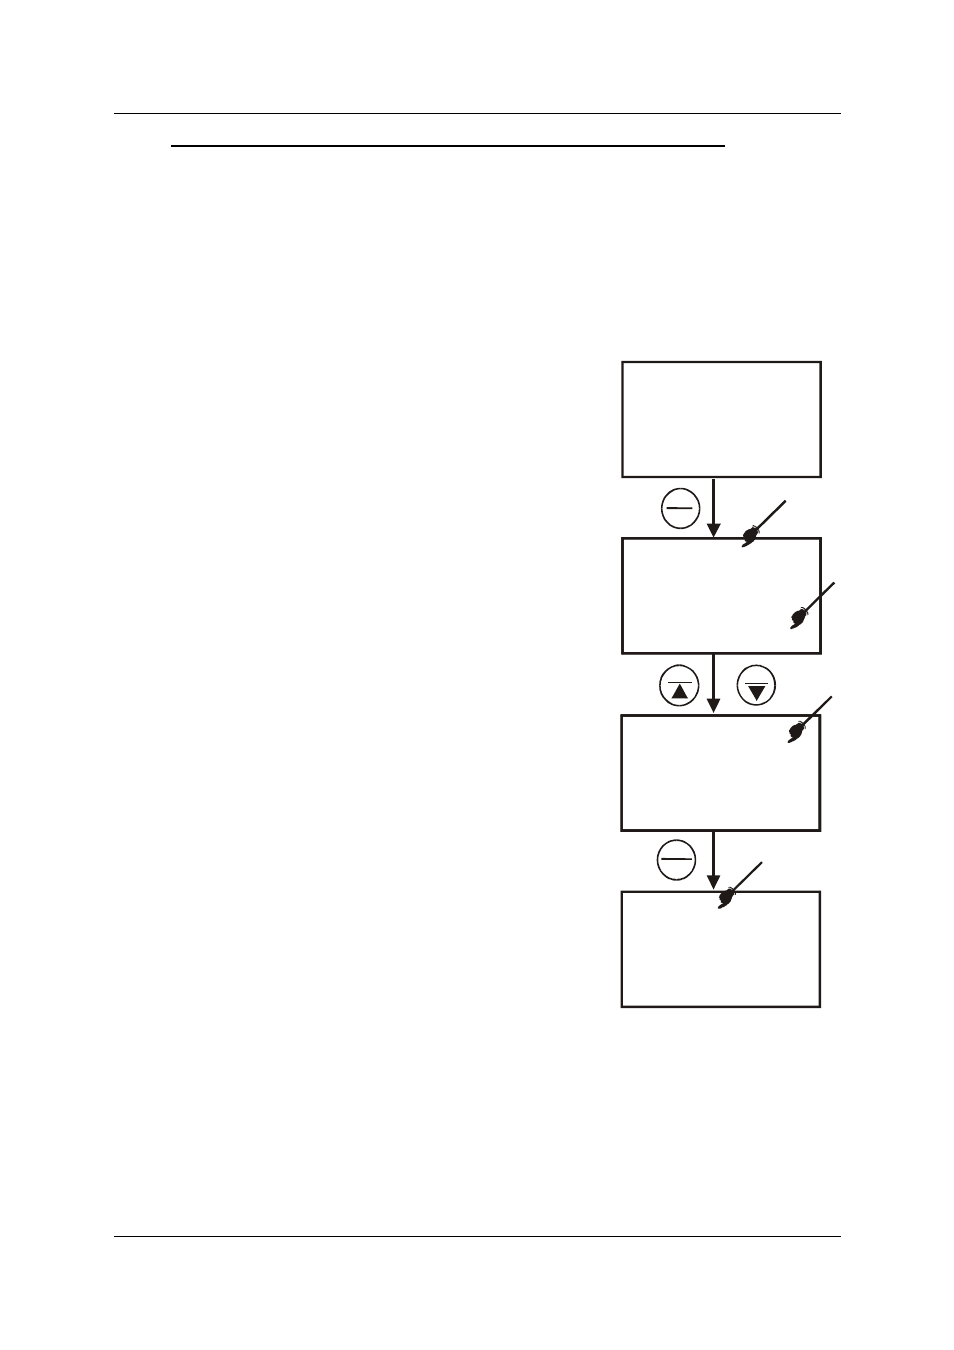
4. Press CAL/MEAS key to enter conductivity
calibration mode. The CAL indicator will appear
in the upper corner of the display. The upper
(primary) display shows the measured value
which is with respect to the last calibration while
the lower (secondary) display shows the
measured value with respect to the default
calibration.
NOTE: To exit calibration without confirmation, press
CAL/MEAS key again to go back to measurement
mode.
5. Wait for the value to stabilise and press MI/▲ or
MR/▼ key and adjust the value in the upper
display to the calibration standard used.
6. Press the HOLD/ENTER key to confirm. The
meter returns to measurement mode with the
new calibrated value.
This single point calibration will apply to all the five ranges.
As for multi point calibration, set up the multi point
calibration mode in the SETUP menu Program P9.2 by setting to ‘NO”.
Repeat step 1 to 6 for every calibration point (one in each measuring range) using
the desired calibration solutions until all points have been calibrated.
Figure13: Manual
Calibration
MEAS
11.87
ATC
°C
22.3
12.00
ATC
°C
22.3
MEAS
READY
CAL
MEAS
HOLD
ENTER
11.87
11.87
CAL
12.00
11.87
CAL
MI
MR
mS
mS
mS
mS