Setting shank pressure – Seed Hawk 30 SERIES 2014 User Manual
Page 61
SEED HAWK
®
2014 30 SERIES OPERATOR’S MANUAL – DOMESTIC 55
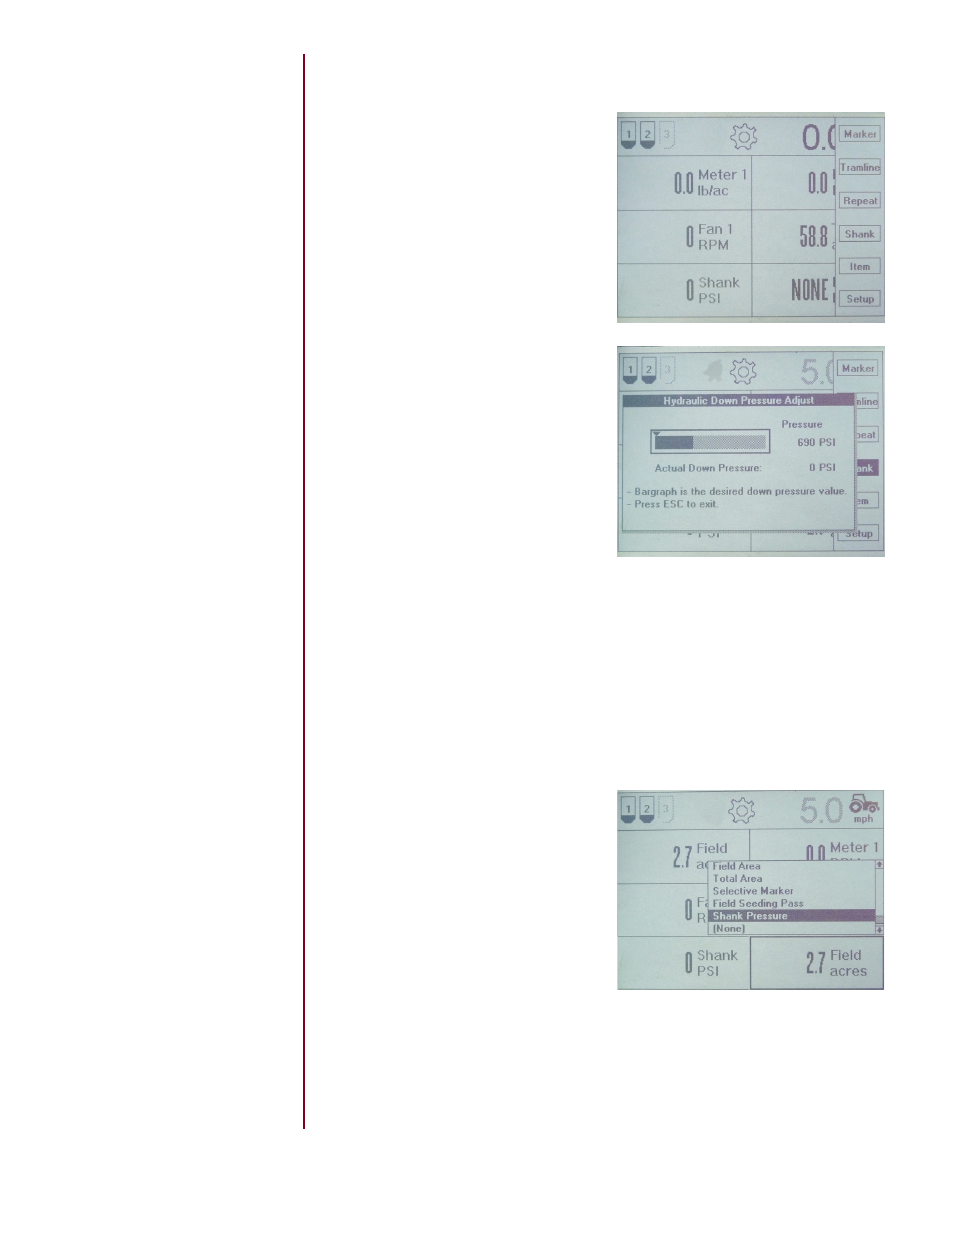
Setting Shank Pressure
2. A horizontal bar graph display will
come up on the screen. Press
Enter
to activate the adjustment and then
rotate the
Toggle Knob to increase
or decrease the system pressure
setting.
3. Press Enter again to save the setting. When seeding. this screen will show
the system pressure setting and a triangular shaped icon will move up and down
the bar graph to show the measured system pressure as compared to the set
pressure.
The Operator can also view the actual system pressure while seeding by select-
ing it as a display item. The monitor will display the applied down pressure on
the run screen. Refer to Section 5.3.4 for more information.
To add this to the display press any
of the
Soft Keys to bring up the
soft key menu, then press “Item”. A
highlight box will appear over the up-
per LH window. Using the
Selector
Knob, navigate the highlight box to
the display window desired to display
the shank down pressure information
and press
Enter. A menu will appear
with a list of all the items you can
display in the window. Navigate to
“Shank” and press
Enter.
1. Press any soft key to bring up the
soft key menu and press “Shank”.
NOTE: The window item se-
lection is time limited. If no
action is taken after selecting
“Item” from the soft key
menu the monitor will cancel
the function.
NOTE: The correct item type
for this function is “Shank”.
There is also a selection
choice called “Pressure”. This
is reserved for an option-
al pressure measurement
sensor for use with the
MUXBUS sensor system.