9 rotor replacement, Rotor changing procedure – Seed Hawk 30 SERIES 2014 User Manual
Page 35
SEED HAWK
®
2014 30 SERIES OPERATOR’S MANUAL – DOMESTIC 29
4.9 Rotor Replacement
The 30 Series comes equipped with an electric feed which controls the feed
quantity. Feed rates are switched by a rotor and the gear setting. Refer to Sec-
tion 11.0 for the Seeding Table.
The rotor for the required seed output attachment must be installed and set
prior to drilling. There are three different rotors to choose from: a rapeseed
rotor, a grass rotor and a grain rotor.
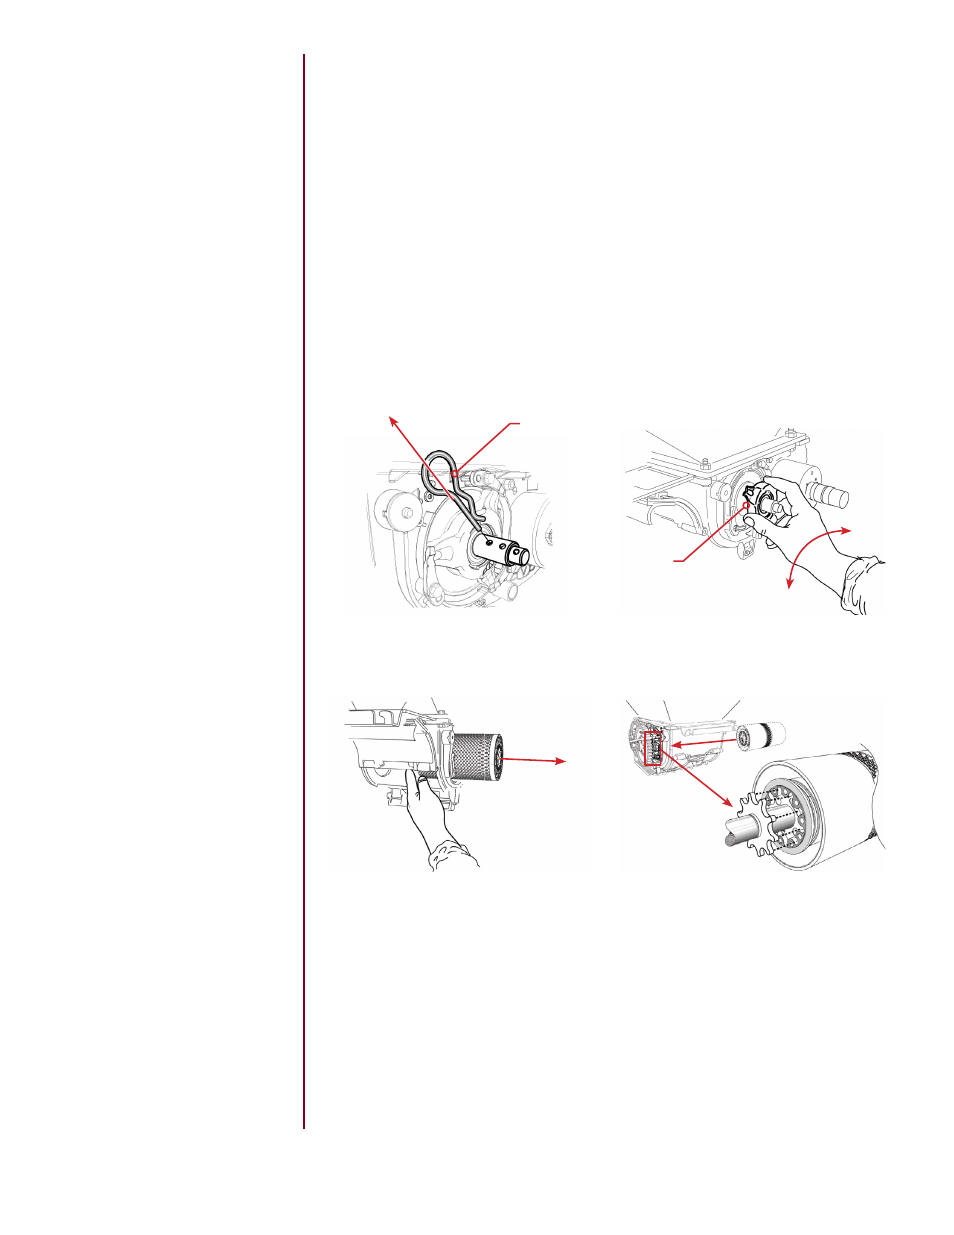
Rotor Changing Procedure
1. Switch off the supply of seed to the seed box with the shut-off hatch and
open the emptying hatch. Refer to Section 5.10 on emptying the hoppers.
A
B
4. Switch to the required rotor. Make sure that the rotor engages correctly in
the driveshaft, as shown above.
2. Pull out the gearbox locking pin (A). 3. Remove the bearing (B) by twisting
it out of its snap mountings