Yokogawa DAQWORX User Manual
Page 36
2-24
IM WX201-01E
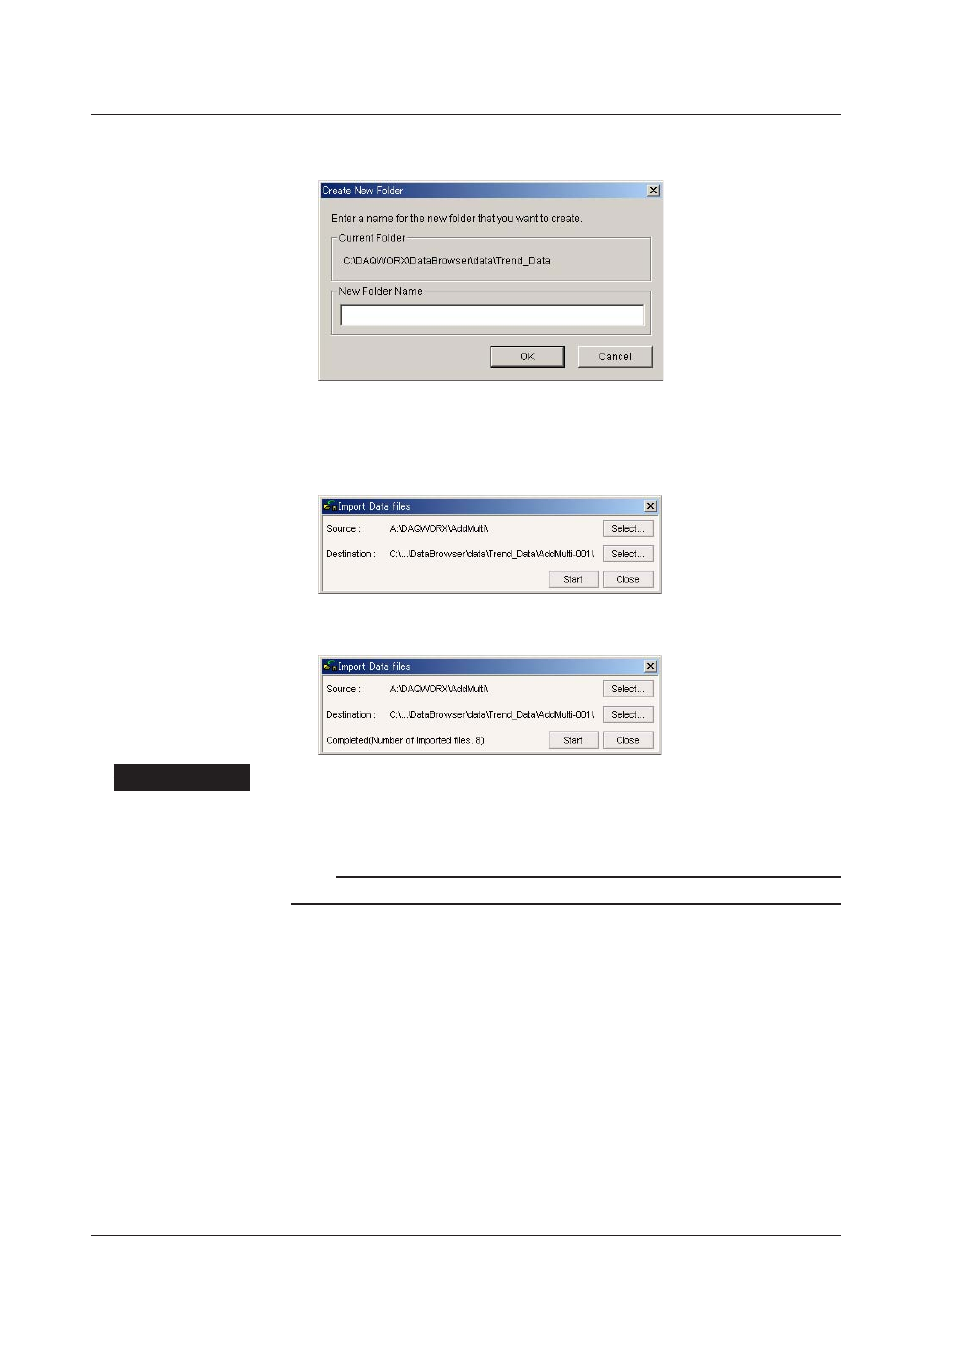
5.
Select a location in which to create a new folder, and click the New Folder button.
The Create New Folder dialog box is displayed.
6.
Enter the name of the folder to be created, and click the OK button. The Browse
Folders dialog box is displayed (the screen in step 4).
7.
Select the destination folder and click the OK button. The Import Data files dialog
box reappears.
8.
Click the Start button. When copying is complete, “Completed”is displayed in the
bottom of the Import Data files dialog box along with the number of copied files.
Explanaton
The Import Data files function allows you to copy data files saved on the floppy disk or
CF card of a recorder to a specified folder. By specifying a copy source and destination
the first time you import files, subsequent imports can be done quickly and easily.
Note
Only folders on the local host can be specified as the source and destination folders.
Select Buttons (Import Data fles Dalog Box)
A folder for specifying folders is displayed.
New Folder (Browse Folders Dalog Box)
Lets you create a new folder in a specified location. The Create New Folder dialog box
is displayed.
Start Button (Import Data fles Dalog Box)
Executes the import of data files. This button is not active unless a source and
destination folder are selected.
Stop Button (Import Data fles Dalog Box)
Becomes available once importing has started. Stops the importing of data files.
Close Button (Import Data fles Dalog Box)
Closes the Import Data files dialog box.
OK Button (Create New Folder Dalog Box)
Creates the new folder.
Cancel Button (Create New Folder Dalog Box)
Cancels creation of the new folder and closes the Browse Folders dialog box.
2.8 Copyng Data Fles