3 how to install, 1 installation of the main body, Installation 19 – IAI America CT4 User Manual
Page 25
2. Installation
19
2.3 How to Install
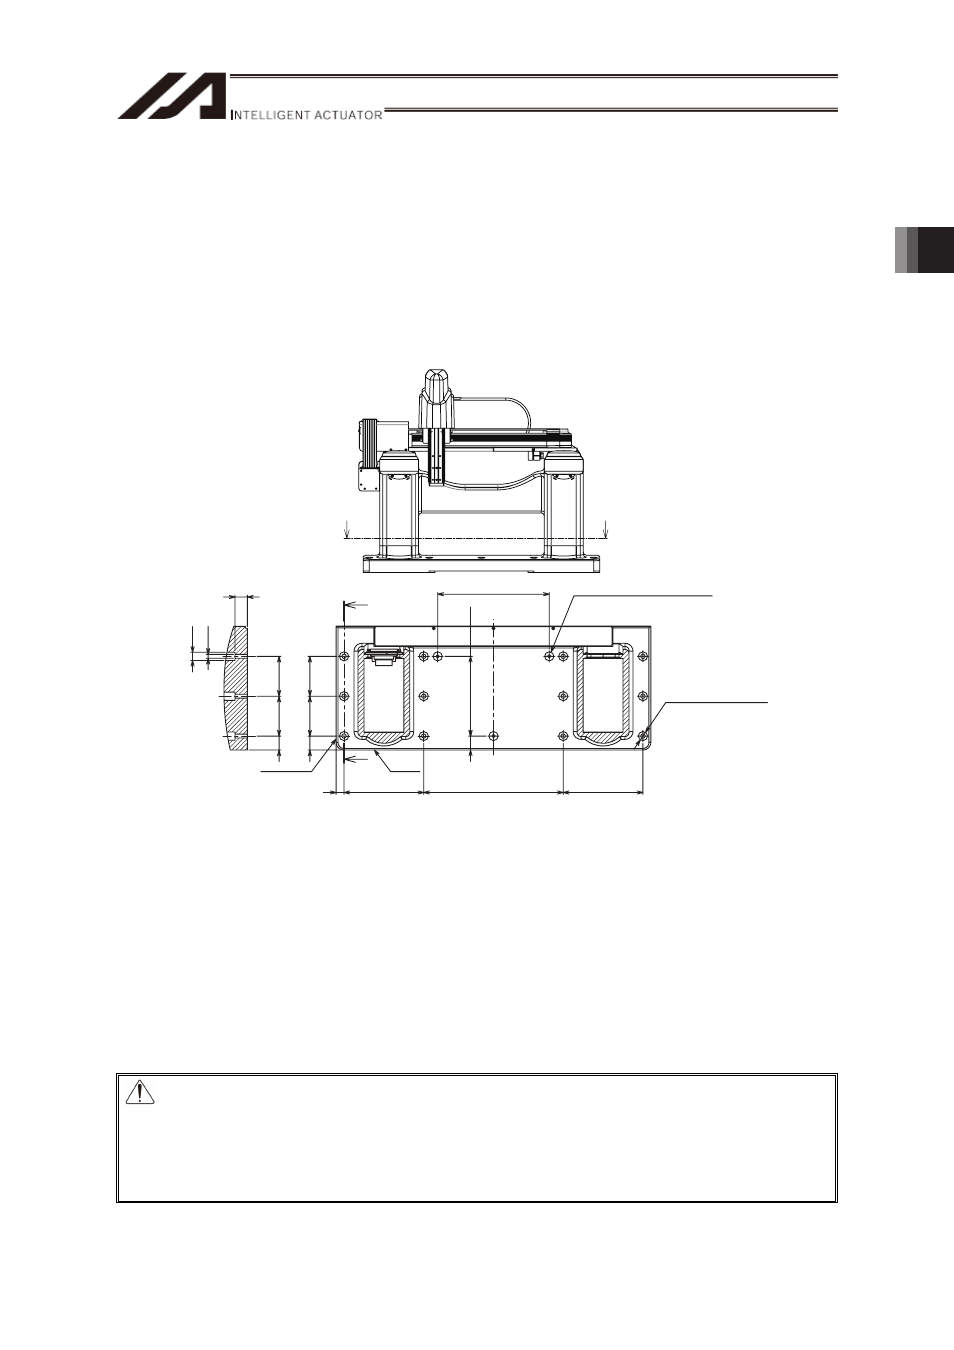
Shown below is how to install High-Speed Orthogonal Robot CT4.
2.3.1
Installation of the Main Body
Ɣ There are datum surfaces for attachment on the frame.
Ɣ There are through holes equipped on the base so the unit can be attached from the top of
the base on the frame.
Ɣ Also, consider enough space necessary for maintenance work such as replacement and
inspection.
Apply the socket head cap screw indicated in the table below suitable for the platform material.
Apply a high-tensile bolt with the performance of ISO-10.9 or more.
Bolts to be used : M10×40 (Effective length of thread engagement 10 or more),
Washers to be used : M10 (10.5Ч18Ч2)
Tightening Torque : 60N • m
Bolts to be used : M10×50 (Effective length of thread engagement 20 or more),
Washers to be used : M10 (10.5Ч18Ч2)
Tightening Torque : 60N • m
Danger: Use the specified bolts. Pay special attention when selecting the screw length.
Using an unspecified bolt or a bolt with inappropriate length may cause damage
to the tapped holes or inefficiency in the attachment strength, which may result
not only in abnormal noise, vibration, malfunction or drop in product life, but also
in such critical accidents as to destroy the peripherals including the CT4 main
body and work piece or in death because of the CT4 main body being unstable.
A
A
200
(100)
(100)
350
200
280
200
Through holes for installation
12-φ11 through
φ23 Counterbore, Depth 22
(35)
30
20
Datum Surface
Datum
Surface
35
100
100
35
φ
11
φ
23
3-M10
(for eyebolt attachment at transportation)
B
B