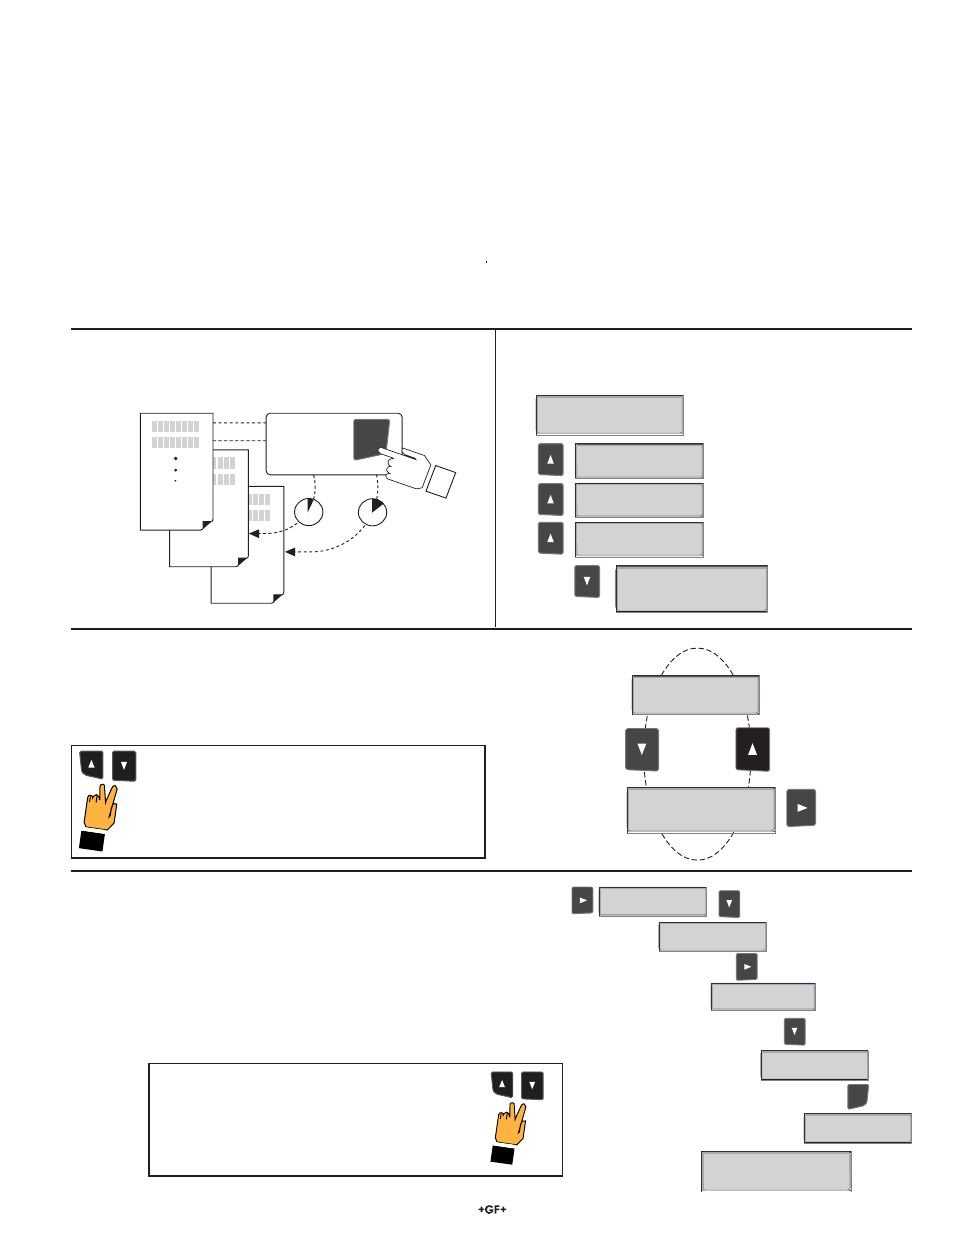
Processpro editing procedure, Step 1, Step 2 – GF Signet 8350 Temperature Transmitter User Manual
Page 5: Step 3, Step 4, Step 5, Step 6, Step 3: finished editing, Step 5: made an error
5
8350-3 Temperature Transmitter
Output1 Setpnt:
2
0.00
°C
Output1 Setpnt:
1
0.00
°C
ENTER
Output1 Setpnt:
1
0
.00
°C
Output1 Setpnt:
1
9
.00
°C
Output1 Setpnt:
Saving
Output1 Setpnt:
19.00
°C >
20.00
°C >
Output1 Setpnt:
>
Switch ID:
Notes on Steps 5 and 6:
• All output functions remain active during editing.
• Only the fl ashing element can be edited.
• ► key advances the fl ashing element in a continuous loop.
• Edited value is effective immediately after pressing ENTER key.
• If no key is pressed for 10 minutes unit will restore the last saved value and return to step 3.
• Step 6 (pressing ENTER key) always returns you to Step 3.
• Repeat steps 3-6 until all editing is completed.
Notes on Step 2:
If no key is pressed for 5 minutes while display is showing "Enter
Key Code", the display will return to the VIEW menu.
Notes on Steps 3 and 4:
• Refer to pages 6 and 7 for complete listing of menu items and their use.
• From the Step 3 display, pressing the ▲ and ▼ keys simultaneously will return
the display to the VIEW menu.
• If no key is pressed for 10 minutes, display will also return to the VIEW menu.
ProcessPro Editing Procedure:
Step 1.
Press and hold ENTER key:
• 2 seconds to select the CALIBRATE menu
• 5 seconds to select the OPTIONS menu.
Step 2.
The Key Code is ▲-▲-▲-▼ keys in sequence.
• After entering the Key Code, the display will show the fi rst item in the selected menu.
Step 3.
Scroll menu with ▲ or ▼ arrow keys.
Step 4.
Press ► key to select menu item to be edited.
•
The
fi rst display element will begin fl ashing.
Step 5.
Press ▲ or ▼ keys to edit the fl ashing element.
• ► key advances the fl ashing element.
Step 6.
Press ENTER key to save the new setting and return to Step 3.
2s
5s
ENTER
OPTIONS
CALIBRATE
VIEW
Press &
hold for
access:
Step 5
Step 6
Notes on Step 1:
• The View Menu is normally displayed.
• The CALIBRATE and OPTIONS menus require a KEY CODE.
Step 4
First item in CALI-
BRATE menu
Step 3
Step 3: Finished Editing?
Press the ▲ and ▼ keys simultaneously after saving
the last setting to return to normal operation.
Press the ▲ and ▼ keys simultaneously while
any element is fl ashing. This will recall the last
saved value of the item being edited and return
you to Step 3.
Step 5: Made an Error?
CALIBRATE: ----
Enter Key Code
CALIBRATE: *---
Enter Key Code
CALIBRATE: **--
Enter Key Code
CALIBRATE: ***-
Enter Key Code
>
Switch ID: