1 add nvr server, 2 nvr recording mode configuration, 3 nvr recording schedule configuration – eLine Technology iVMS-4000 V2.03 User Manual
Page 49
User Manual of iVMS-4000(V2.03)
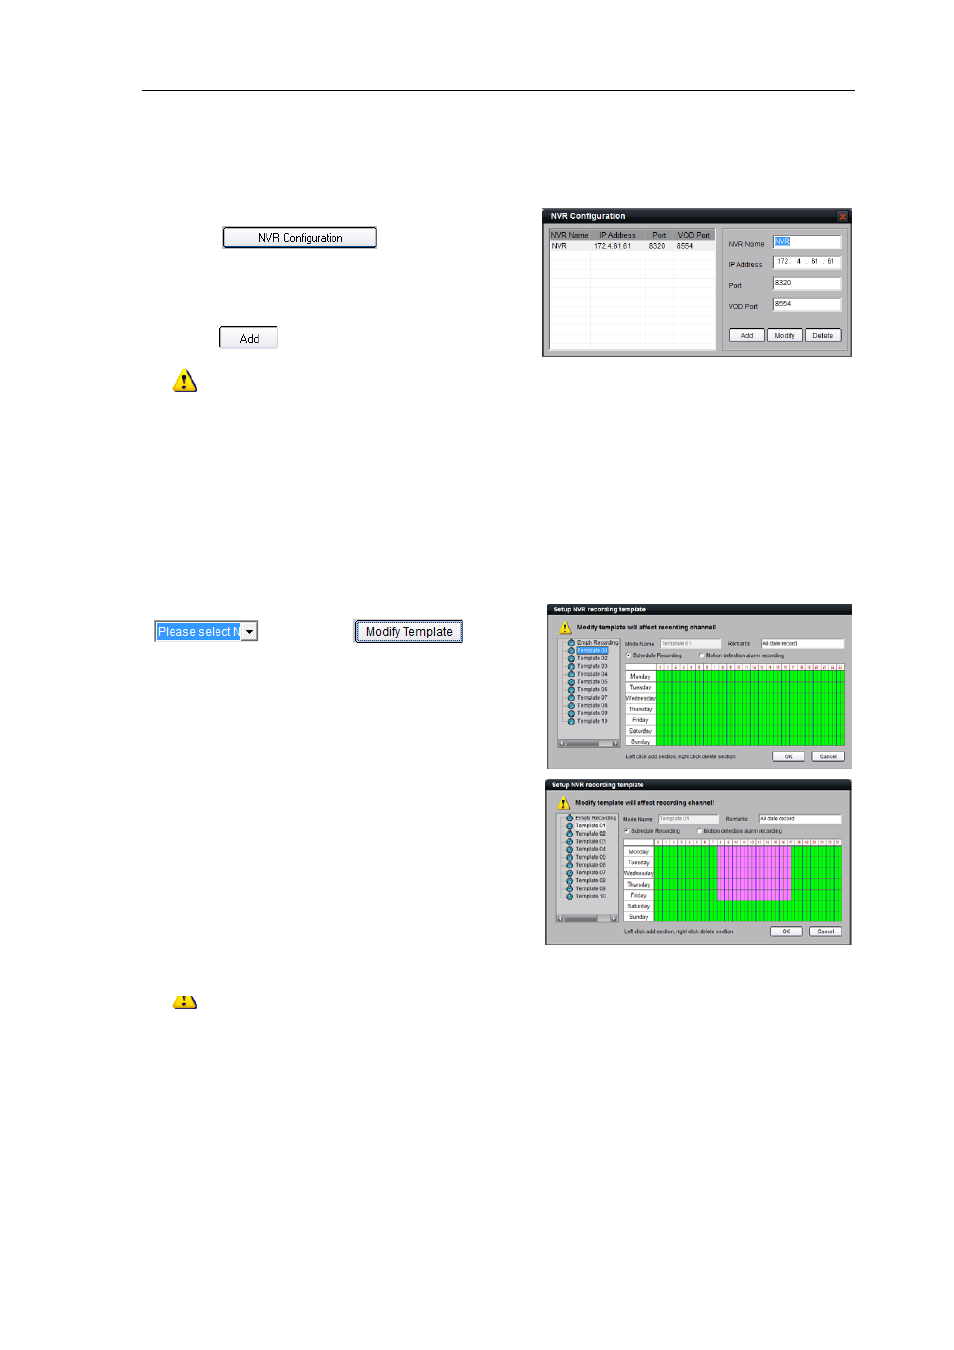
7.2.1 Add NVR Server
Click
key to enter NVR
configuration interface.
Input the NVR server name, IP address and port,
and click
key to finish.
Note: Up to 16 NVR servers can be added to the iVMS software. The default server port and VOD port
are 8320 and 8554.
7.2.2 NVR Recording Mode Configuration
After having finished the adding of NVR server, user can define the recording template for the schedule
recording settings.
1
st
step: Select the added NVR servers from
list, and click
to enter modifying recording schedule.
Click the mouse to add recording schedule;
right click to cancel recording schedule.
2
nd
step: Select the record template, and set
the recording period for the mode.
3
rd
step: click “OK” to finish modifying the template.
Note: The unit of recording mode is half an hour, green means schedule recording, pink means motion
detection recording, and white means no recording.
Recording type includes “Schedule Recording”
& “Motion Detection Recording”. Then use left click
to add section, right click to delete section in the
date area.
7.2.3 NVR Recording Schedule Configuration
User should configure the schedule recording through client software so as to enable the NVR to realize the
integral storage of record files over network. Operate the following steps:
48