Preliminar y – Extron Electronics Matrix 12800 Series User Guide User Manual
Page 102
6-5
Matrix 12800 Switchers • Upgrades and Maintenance
PRELIMINAR
Y
PRIM
ARY
A
RED
UND
ANT
A
ON
= G
OOD
OFF
= FA
ILED
2 LE
D's:
ON
= G
OOD
OFF
= FA
ILED
2 LE
D's:
PRIM
ARY
B
RED
UND
ANT
B
ON
= G
OOD
OFF
= FA
ILED
2 LE
D's:
ON
= G
OOD
OFF
= FA
ILED
2 LE
D's:
CON
T
PO
WE
R S
UPP
LY B
PO
WE
R S
UPP
LY A
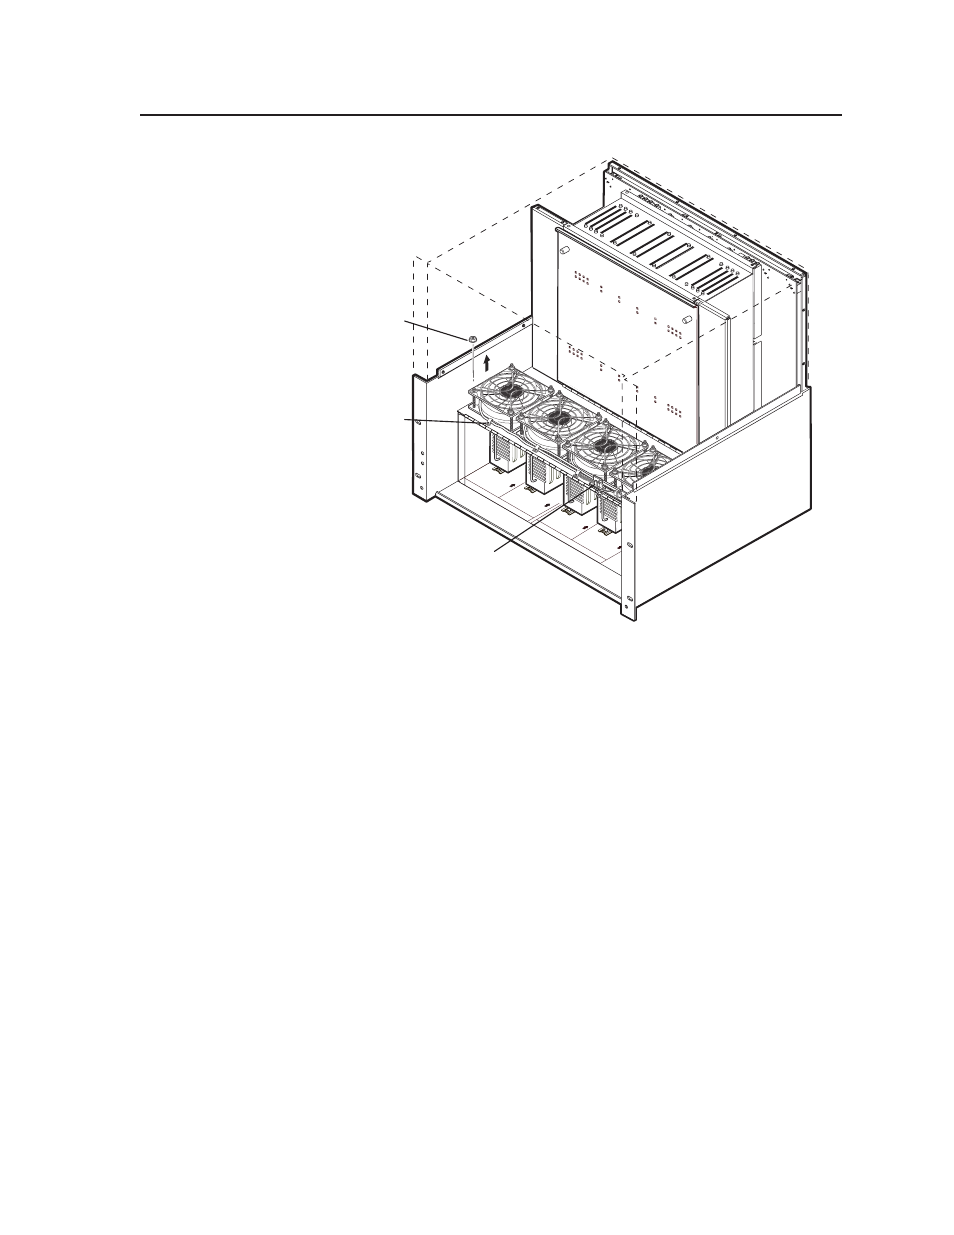
Remove four nuts w/
captive washers
(each fan).
Remove screws from
cable hold down
brackets.
Disconnect fans
at connectors.
Figure 6-4 — Fan pair replacement
6
.
Using a 5/16-inch nut driver, remove and retain the four nuts securing each
fan to the fan assembly door.
7
.
Lift the two finger grates out of the way.
8
.
Lift the two fans off of the fan assembly door retaining posts.
9
.
Place the replacement fan assembly on the fan assembly door retaining posts.
10
. Place the finger grates over the two fans on the retaining posts.
11
. Secure each fan and finger grate to the restraining posts with the four 5/16"
nuts removed in step 6.
12
. Secure the power cables out of the way, behind the fan connector bracket and
through the three cable restraints retained in step 5. Tighten down the three
cable restraints.
13
. Align the fan assembly power connector with the slot on the outside of the fan
connector bracket and snap the connector into the bracket.
14
. Connect the power distribution plane fan power cable to the fan assembly
power connector in the fan connector bracket.
C
Ensure that you close and secure the fan assembly door when you have
finished this maintenance procedure. The Matrix 12800 may overheat
otherwise.
15
. Close the fan assembly door and turn the left and right knurled knobs ¼-turn
clockwise.
16
. Close the front door.