2 installing a serial ata hard disk drive – Asus AP140R-E1 User Manual
Page 26
Chapter 2: Hardware setup
2-12
2.4.2 Installing a Serial ATA hard disk drive
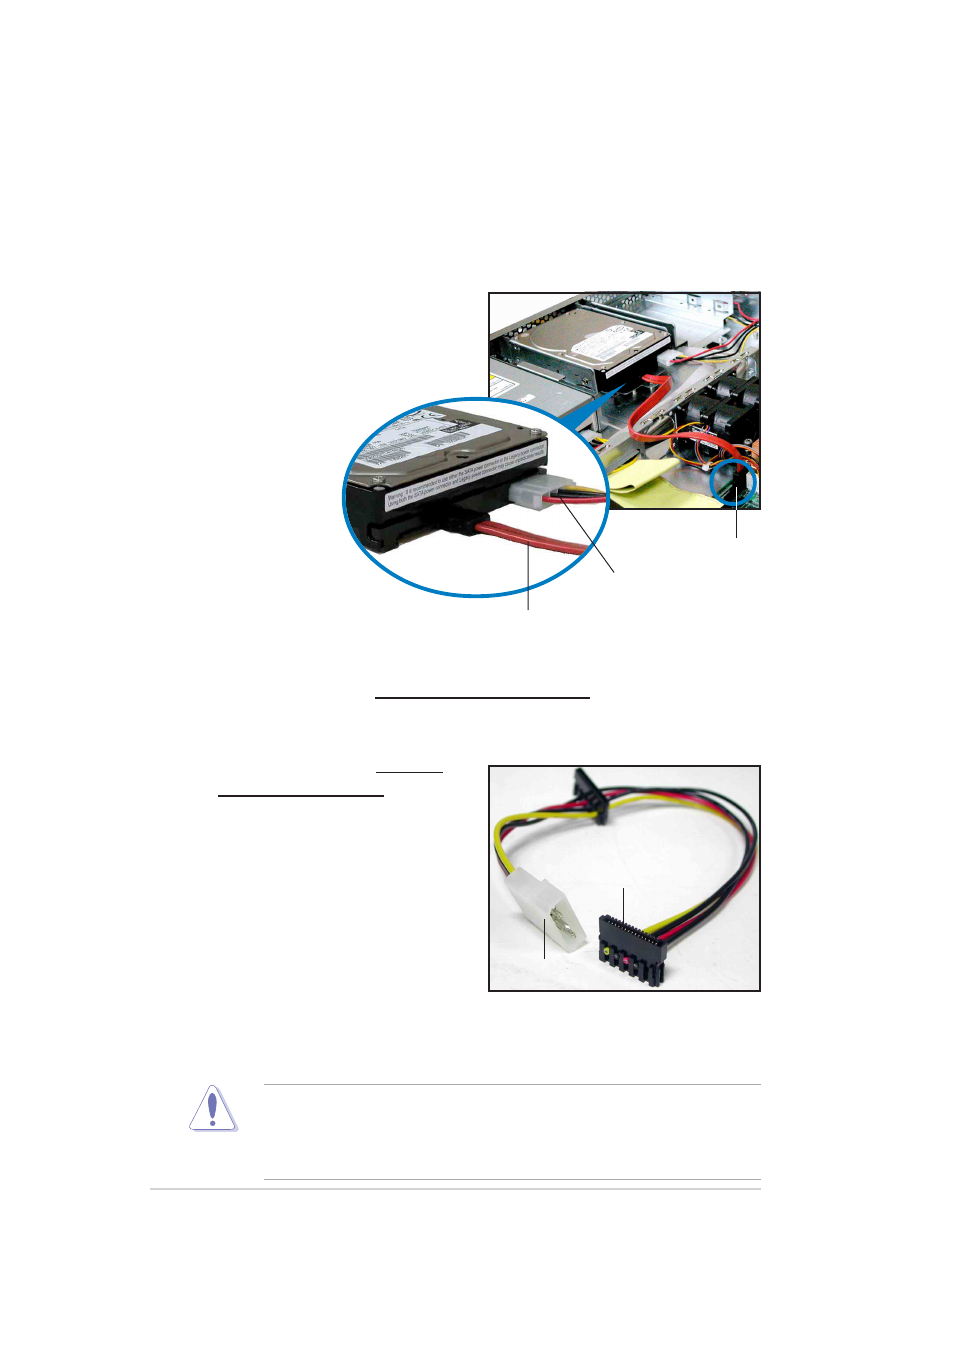
To install an SATA HDD:
1. Follow steps 1 to 4 in section “2.4.1 Installing an IDE hard disk drive.”
2. Connect the 7-pin SATA cable to
the SATA connector on the back
of the drive. Connect the other
end to an SATA connector on the
motherboard.
3. Connect the HDD power cable.
•
For Serial ATA HDDs
with a 4-pin power connector
, connect a 4-pin
(female) device plug from the power supply to the 4-pin (male) power
connector on the back of the drive as shown above.
•
For Serial ATA HDDs
without a
4-pin power connector
, use an
SATA power cable with a 4-pin/15-
pin plugs. Connect a 4-pin
(female) device plug from the
power supply to the 4-pin (male)
plug of the SATA power cable.
Connect the 15-pin SATA power
plug to the power connector on
the back of the drive.
7-pin SATA cable
4-pin device power cable
SATA connector
4-pin (male)
15-pin
SATA power cable
4. Repeat steps 1 to 3 to install a second SATA drive.
Ensure that all cables are held together with the cable clamp, specially
those near the system fans. Loose cables may get caught with the fan
blades causing fan failure! See step 7 of section “2.4.1 Installing an
IDE hard disk drive.”