3 selecting a track and recording – Zoom HD16 User Manual
Page 28
Quick Tour
ZOOM HD8/HD16
28
Now we will record the guitar sound (with the insert effect
applied) on track 1.
1.
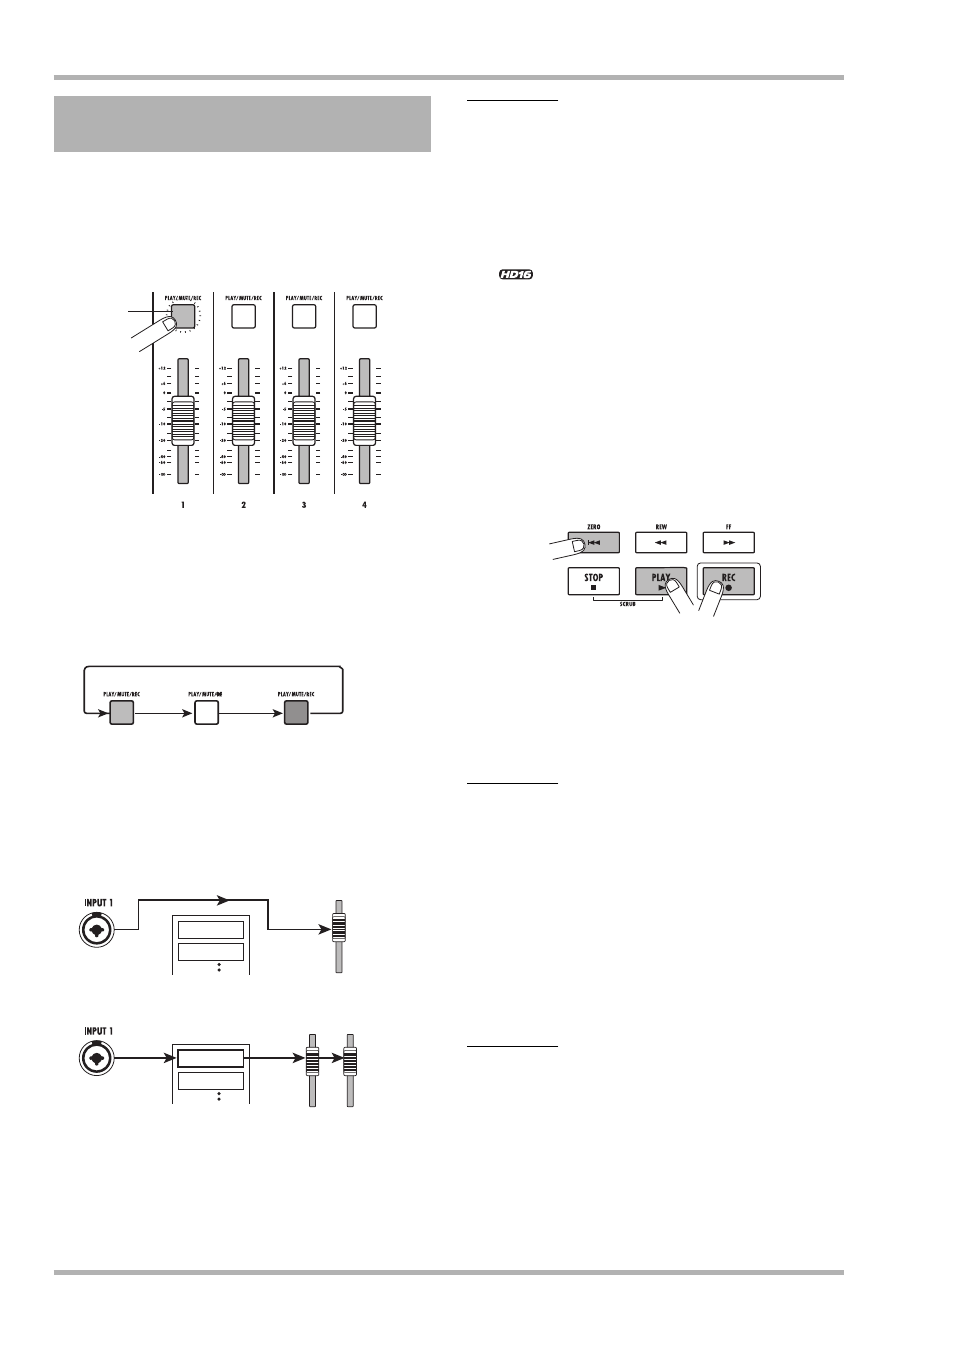
From the main screen, repeatedly press the
status key 1 until the key is lit in red.
The status keys are used to select the recording/playback track
and to switch muting for each track on and off. Each time you
press a status key, the key will cycle through the following
states.
When status key 1 is red, track 1 is in the recording standby
condition, and the input signal is assigned to track 1. The signal
routing will change as follows.
For stereo tracks, the parameters for left and right are set to the
same values, except for the recording target V-take and phase
selection. This is useful for recording from stereo sources such
as synthesizers or CD players.
HINT
• Normally, you can select up to two tracks simultaneously. To
select two mono tracks, press the first status key of an odd/
even-numbered pair so that it is lit in red, and then hold down
that key and press the other key so that it also is lit in red.
• Also if the input signal is mono, selecting a pair of stereo tracks
as target will ensure that the left/right spread added by certain
insert effect settings is preserved in recording.
• <<
only>> You can also record 8 tracks simultaneously
(
→ p. 46).
2.
Set fader 1 and the [MASTER] fader to 0 dB.
Then adjust the volume of the monitoring
system while playing your instrument.
3.
To begin recording, press the ZERO [
U
] key
to return to the beginning of the song. Then
hold down the REC [
O
] key and press the
PLAY [
R
] key.
4.
The REC [
O
] key and PLAY [
R
] key light up,
and a pre-count of 4 beats is heard. Then
recording will begin. Record your instrument
play while listening to the guide rhythm from
the rhythm section.
HINT
• The number and the sound of the pre-count clicks can be
changed (
→ p. 49).
• If the input signal is distorted, refer to step 2-1 to adjust the input
sensitivity and recording level.
5.
When you have finished recording, press the
STOP [
P
] key.
The REC [
O] key and PLAY [R] key will go out, and
recording will stop. The “wait” bar indication is shown on the
display while the unit is processing the recorded data.
NOTE
The duration of the “wait” bar indication may differ. Never turn
power to the unit off while this indication is being shown on the
display. Otherwise recorded data may be lost and damage to
the unit may occur.
6.
To listen to the recorded content, press the
ZERO [
U
] key to return to the beginning of
the song, and then press the PLAY [
R
] key.
2.3 Selecting a track and
recording
Red
Status key
Lit green
Mute off
Out
Mute on
Lit red
Selected as recording track
MASTER
MASTER
1
Track 1
Track 2
Track 1
Track 2
When a recording track has not been selected
When a recording track (track 1) has been selected