Custom accompaniment – Yamaha PSR-4000 User Manual
Page 75
71
Custom Accompaniment
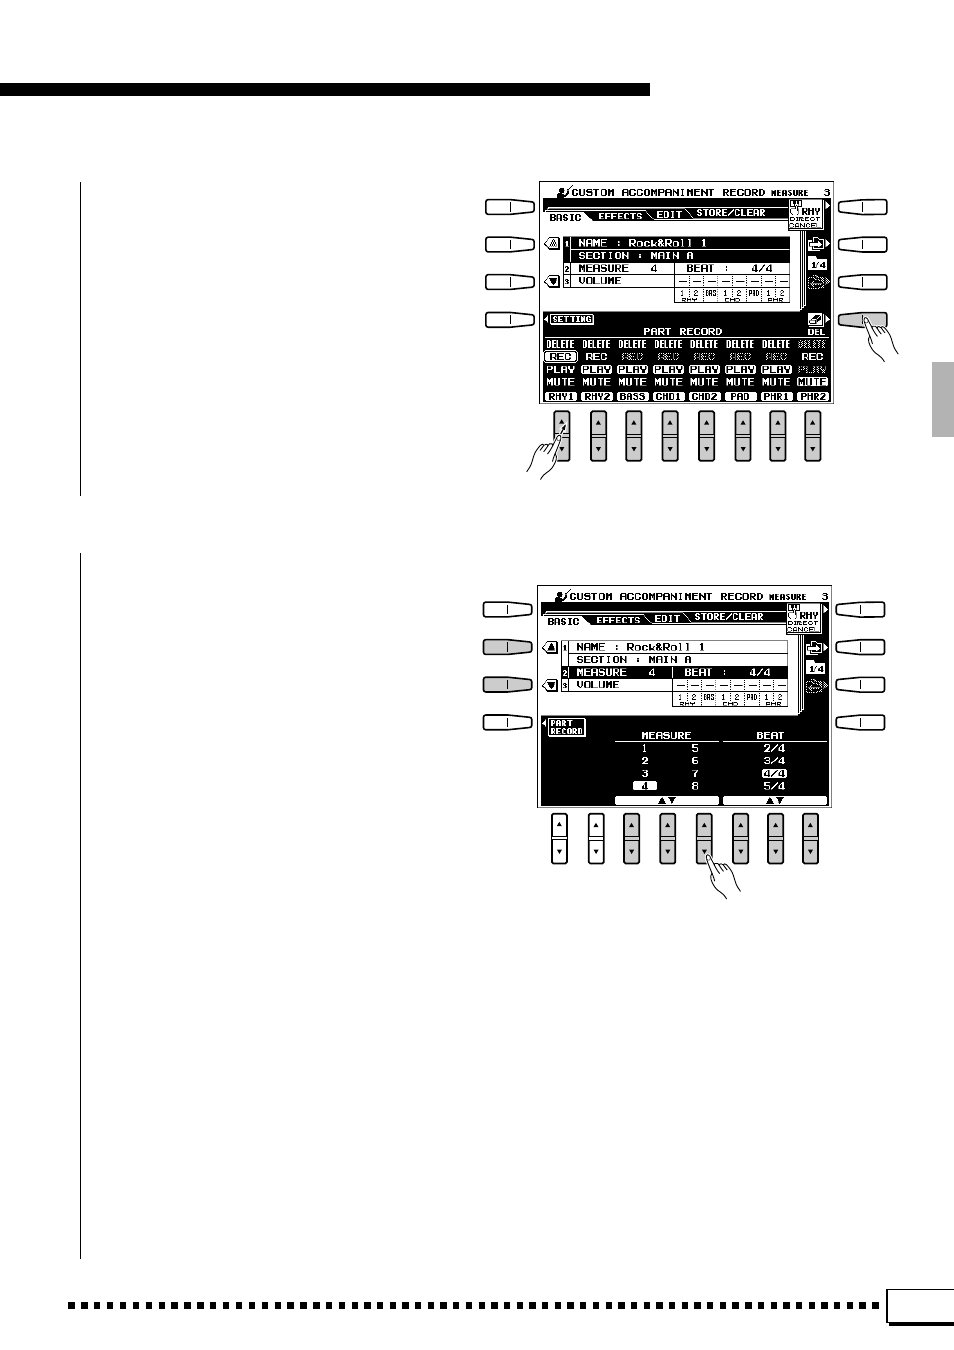
Parts can be cleared completely before recording
if you want to record “from scratch”, or change the
number of measures in the section, as described
below. When the
DEL LCD button is pressed DE-
LETE will appear for tracks which contain data.
Select
DELETE via the track LCD [▲/▼] controls
while holding the
DEL button to delete all data in the
corresponding tracks. The data is actually deleted
when the
DEL button is released.
The entire custom accompaniment style can be
cleared (in order to change the time signature, for
example) by using the CLEAR CUSTOM STYLE
function described on page 77.
M
Change the Time Signature & Number Of Measures, If Required
..........................................
If you want to create a style in a different time
signature than the current style, or change the number
of measures in the selected section, use the ▼ LCD
button to the left of the display to select the
MEAS-
URE and BEAT parameters.
Use the
BEAT LCD [▲/▼] controls to select a
different time signature: 2/4, 3/4, 4/4, or 5/4. Please
note that the time signature can only be changed if
all sections of the current custom style have been
cleared. If any data remains in any section “All
sections must be clear to set beat” will appear in the
BEAT parameter position (use the CLEAR CUS-
TOM STYLE function described on page 77 to clear
all sections of the current custom style).
Use the
MEASURE LCD [▲/▼] controls to
select a different number of measures for the se-
lected section. Please note that the number of meas-
ures can only be changed if all parts of the current
section have been cleared. If any data remains in any
part “All parts must be clear to set measures” will
appear in the
MEASURE parameter position (the
parts can be cleared as described in the previous
step) Once the parts have been cleared you can
select a new number of measures as required: 1
through 8.
Once the
BEAT and/or MEASURE parameters
have been set as required, press the
PART RECORD
button to the left of the display to go back to the
PART RECORD display.