Receive, F8: midi – Yamaha PSR-4000 User Manual
Page 124
120
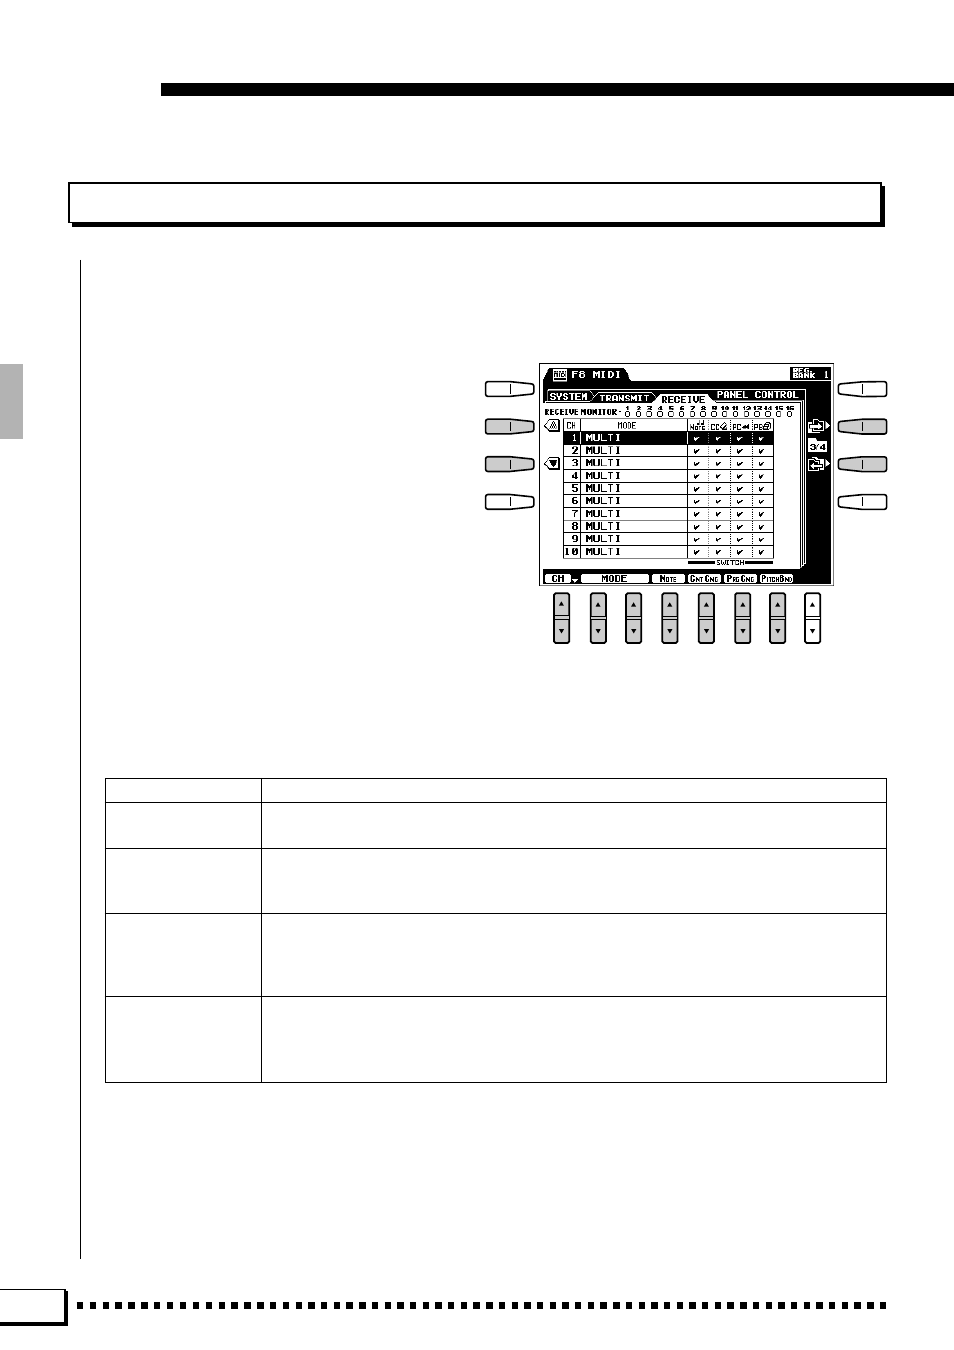
F8: MIDI
RECEIVE
This display page allows you to specify the MIDI receive mode for each PSR-4000 MIDI channels, and to
specify which types of data will be received via each channel.
●
RECEIVE MONITOR
The
RECEIVE MONITOR at the top of the
display indicates when data is being received on any
of the 16 MIDI channels: The dots corresponding to
each channel (1 … 16) flash briefly whenever any
data is received on the channel(s).
●
CHANNEL
Use either the ▲ and ▼ LCD buttons to the left
of the display, or the
CH LCD [▲/▼] control to
select the channel to which you want to assign a
mode or change a data switch setting. The channel
numbers are show in the leftmost column in the
display.
●
MODE
The
MODE LCD [▲/▼] controls select the re-
ceive mode for the currently selected channel. Any
of the following modes can be selected:
OFF
No data will be received on the selected channel.
MULTI
This is the “Multi-Timbre” mode in which the corresponding channel of the internal tone gen-
erator is directly controlled by the received MIDI data.
MIDI BASS
When the AUTO MIDI BASS or MANUAL MIDI BASS ABC accompaniment mode is selected
this receive mode can be selected to allow reception of bass note data from an external MIDI
bass pedal unit or other device.
PANEL CONTROL
When this mode is selected the received MIDI data controls the PSR-4000 panel operations
rather than playing the internal tone generator. Which panel operations are controlled by
which types of MIDI data are specified in the PANEL CONTROL display page, described
below.
KEYBOARD
This is the “normal” receive mode in which MIDI note data received by the PSR-4000 (A-1 …
C7) plays the corresponding notes in the same way as if they were played on the keyboard.
Pitch bend, modulation, expression, and sustain control data is also accepted. Program
change and main volume data affects the RIGHT 1 voice only.
●
NOTE, CONTROL CHANGE, PROGRAM CHANGE, & PITCH
BEND SWITCH
These “switches” turn reception of the specified data type on or off. Use
the
N
OTE
,
C
NT
CNG, P
RG
C
NG
, and
P
ITCH
B
ND
LCD [▲/▼] controls to turn
reception of the corresponding data on or off. A check mark appears in the
appropriate box when the corresponding switch is turned on.