Printer menus, Using the service menu (continued) – Pitney Bowes ADDRESSRIGHT DA400 User Manual
Page 90
A-29
Printer Menus
1. Adjust Print (continued)
Scroll through the Adjust Print menu options until the
HEAD 3 UP DOWN option is displayed on the LCD panel.
Enter the menu option to move the setting down. Enter
the new value into the printer’s memory. A value between
280 and 300 can be entered. The higher the value, the
higher the relevant cartridge will print. An Asterisk (*) will
appear in front of the new selection.
Press the Test button to print another Test Pattern. The
Test Pattern is printed using the entered selection.
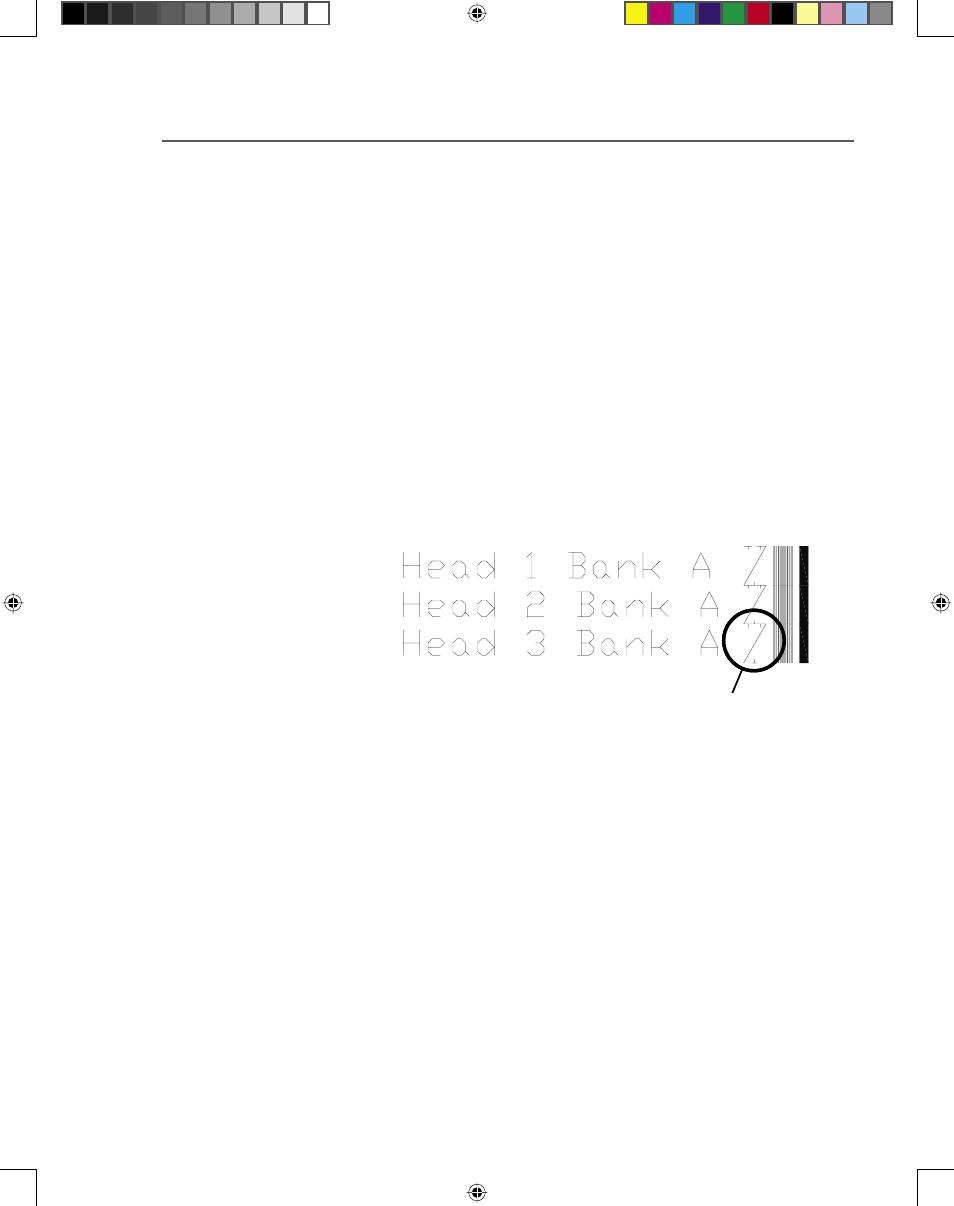
When the correct numeral is selected the center Test Pat-
tern will be one long ‘zig-zag’ line with hatch marks like
the example below.
Head 3 is now correctly
aligned
C. Head 2 side to side
D. Head 3 side to side
Use the options C and/or D to horizontally synchronize
the individual Print Cartridges.
When a line of print is split apart, or the left edge of a
block of lines don’t line up with the left edge of the other
lines, the Print Cartridges have to be synchronized hori-
zontally. Perform a horizontal adjustment whenever the
wide solid line and the set of 18 thin vertical lines do not
form long vertical lines for the whole bank of Print Car-
tridges.
Using the
Service Menu
(continued)
SV61186ABook.indb A-29
3/29/2004, 1:45:18 PM